How to Create an Opt-in Page with WordPress For Free in 2 Easy Steps

Are you looking to design an opt-in page for your website and connect it to your email marketing platform?
Look no further!
In this article, I will guide you through the process of creating an attractive opt-in page using free tools within WordPress. By following these simple steps, you’ll be able to capture the email addresses of your website visitors and engage them in your marketing campaigns.
So let’s get started!
Building the Opt-In Page with Kadence Blocks
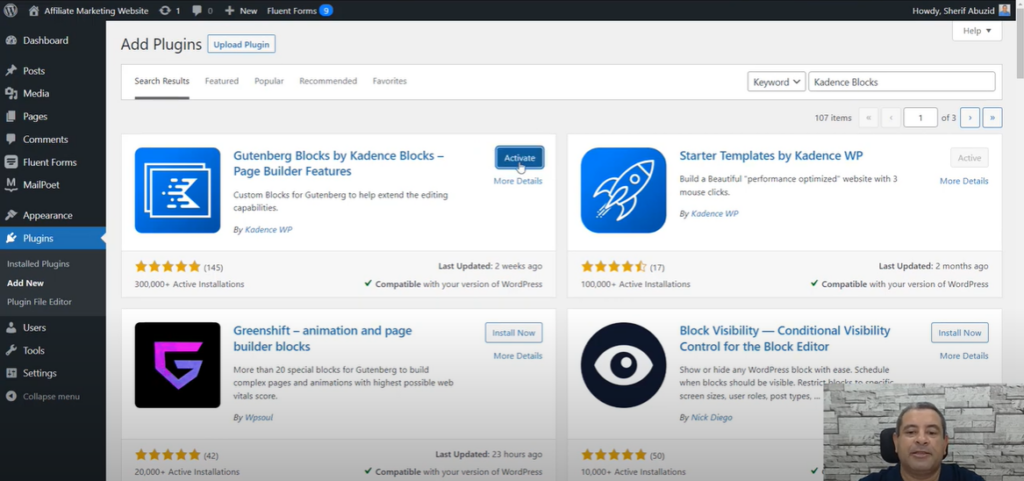
- Install the Kadence Blocks plugin and activate it on your WordPress website.
- Create a new page and name it accordingly (e.g., “Opt-In Now”).
- Use the “+” button to access the Kadence Blocks features.
1] Designing the Opt-In Page Layout
- Choose a one-column rollout for your page layout.
- Drag the rollout element onto the page.
- Select the rollout and choose a background image from your media library.
- To ensure the image stretches across all screens, navigate to the advanced tab and set the minimum height to 100% under Structure settings.
2] Adding Sections and Text
- Drag a section element inside the rollout. This will hold your text and other content.
- Use the Advanced Text block to add your title and subtitle. You can style these elements using the options on the right sidebar.
3] Incorporating Images and Icons
- Drag another rollout element inside the first one to create a two-column layout.
- In the first column, use the Image block to add a relevant image.
- In the second column, use the Icon List block to showcase the benefits of subscribing.
- You can customize the icons and text within the Icon List block settings.
4] Creating the Opt-In Form
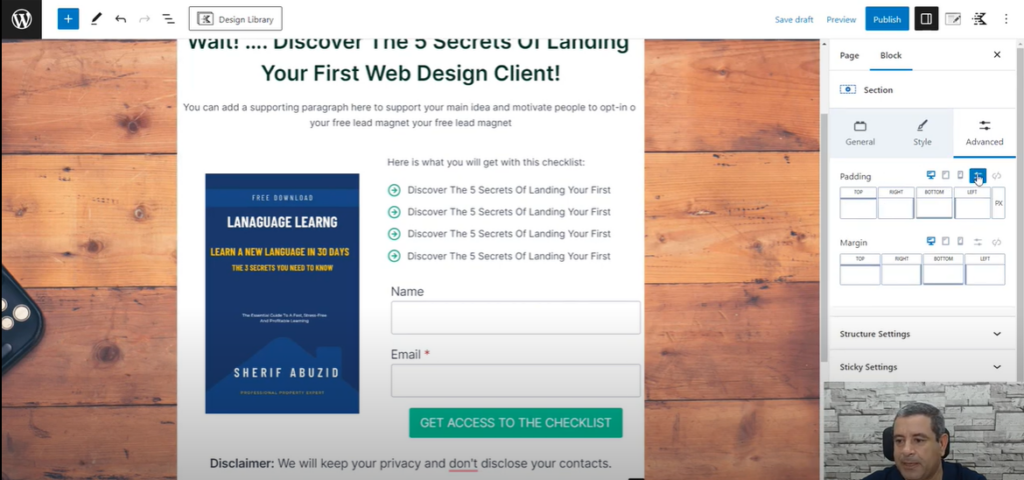
- Drag a Form block into the desired location on your page.
- By default, the form includes name and email fields. You can remove unnecessary fields if needed.
- Add a clear call to action button using the form settings.
5] Including a Privacy Disclaimer
- Drag another section element beneath the form to house the disclaimer text.
- Add your privacy policy disclaimer using the Advanced Text block.
Finalizing the Opt-In Page
- Add padding to the main section for better visual spacing.
- Preview your page to ensure everything looks as intended.
- Publish your opt-in page.
Removing Header, Footer, and Page Title (Optional)
The method for removing these elements depends on your theme. Refer to your theme’s documentation for specific instructions. In the Kadence theme example used here, you can disable these options under Page Settings.
Connecting the Opt-In Form to Your Email Marketing Platform
The free version of Kadence Blocks offers limited integration options. Here, we’ll explore using the redirect feature:
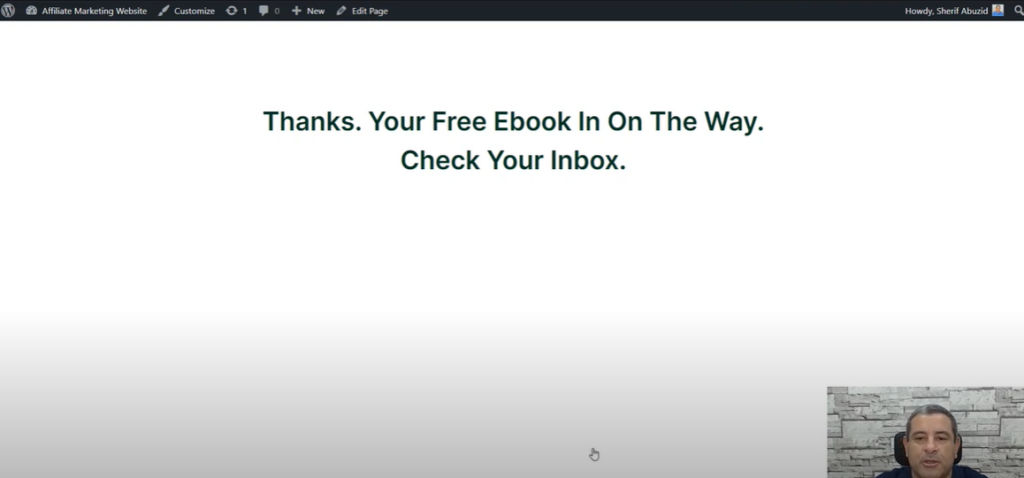
- In the form settings, under Actions after Submit, choose “Redirect to Another Page.”
- Select your pre-made “Thank You” page where you can express gratitude and potentially offer an incentive to new subscribers.
Conclusion
Congratulations! You have successfully created an opt-in page using free tools within WordPress. By following the simple steps outlined in this article, you can now collect email addresses from your website visitors and connect them to your email marketing platform.
Remember to customize your opt-in page to align with your brand’s identity and offer valuable incentives to encourage visitors to subscribe. With WordPress and the Kadence Blocks plugin, you have the power to create engaging opt-in pages that drive conversions and grow your email list effortlessly. Start implementing these techniques today and watch your subscriber base expand!