Building an online course website with WordPress has never been easier, thanks to LearnDash. This blog will provide an in-depth review of LearnDash, covering its features, how to set up a course, and tips for enhancing student engagement.
Getting Started with Course Creation
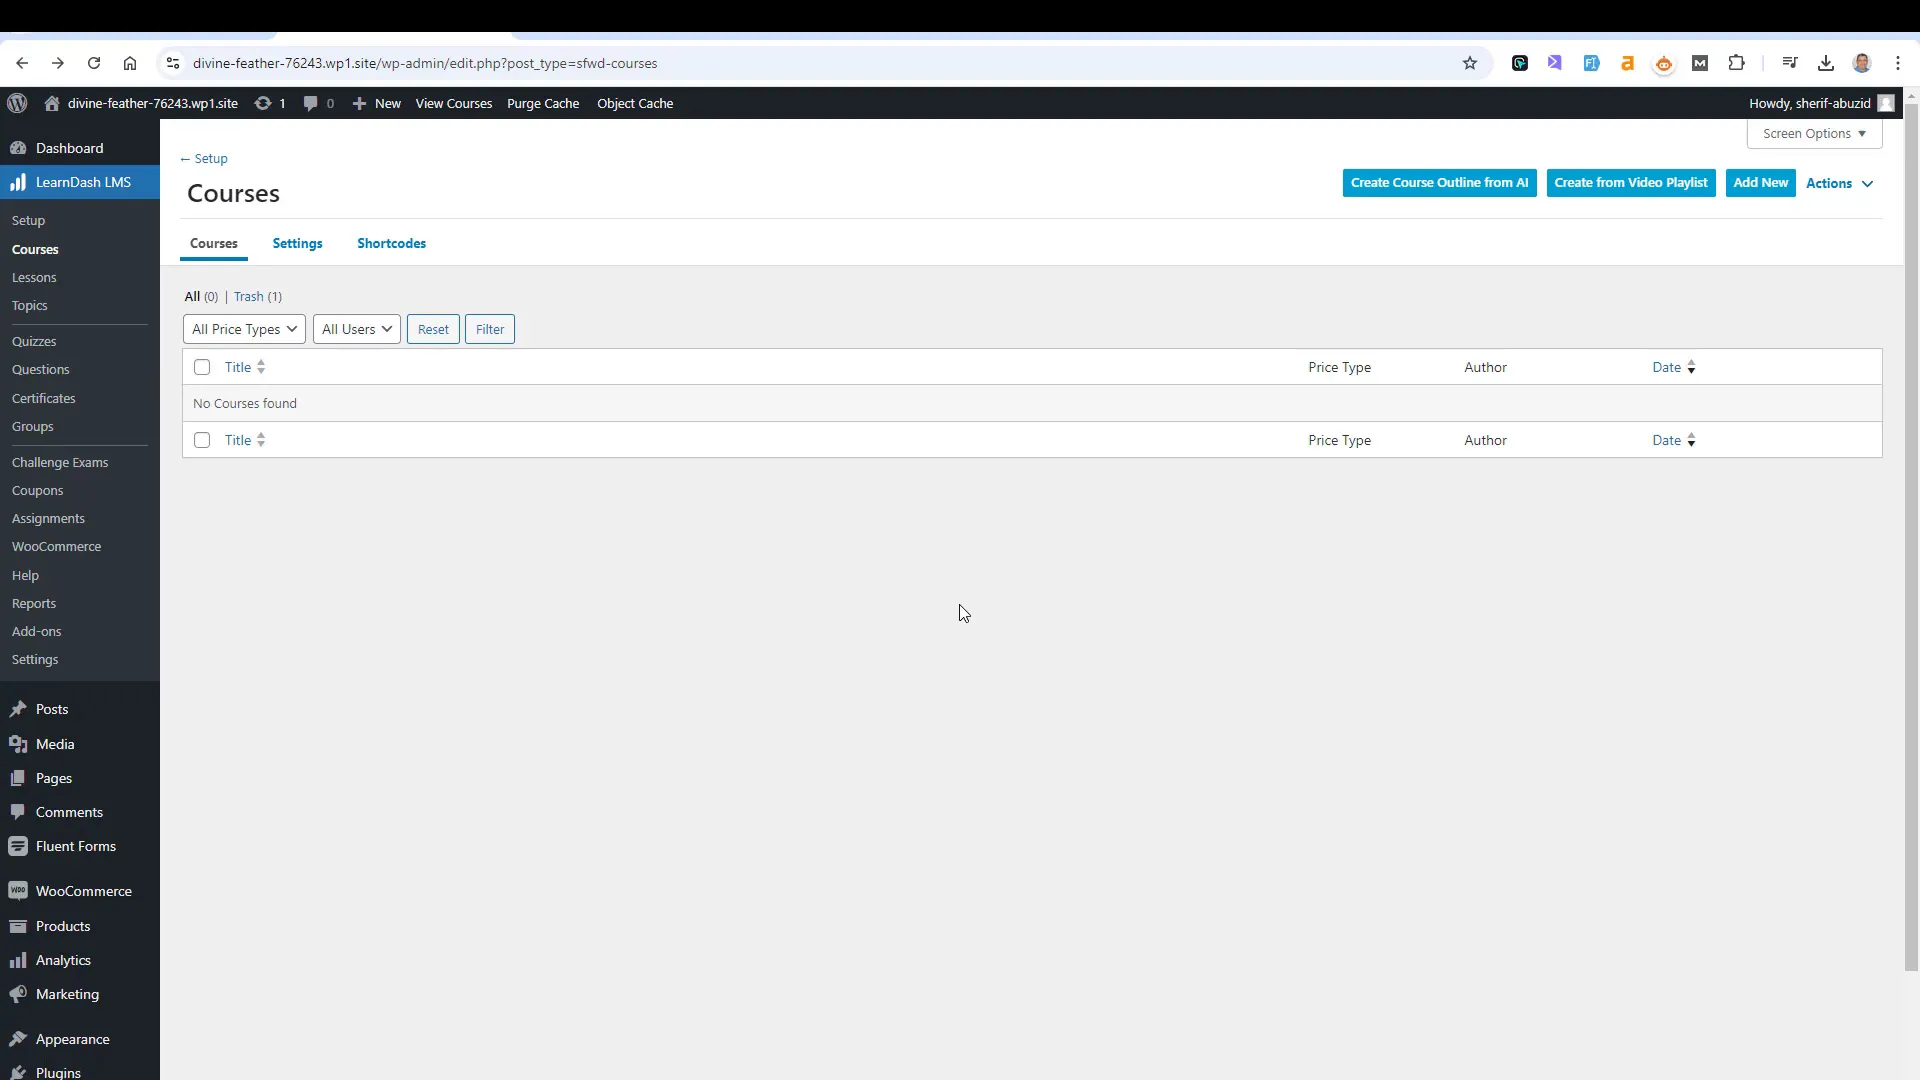
Creating a course with LearnDash is a straightforward process. To begin, navigate to the courses tab in your WordPress dashboard and select “Add New.” This action opens up the course creation interface where you can set the foundational elements of your course.
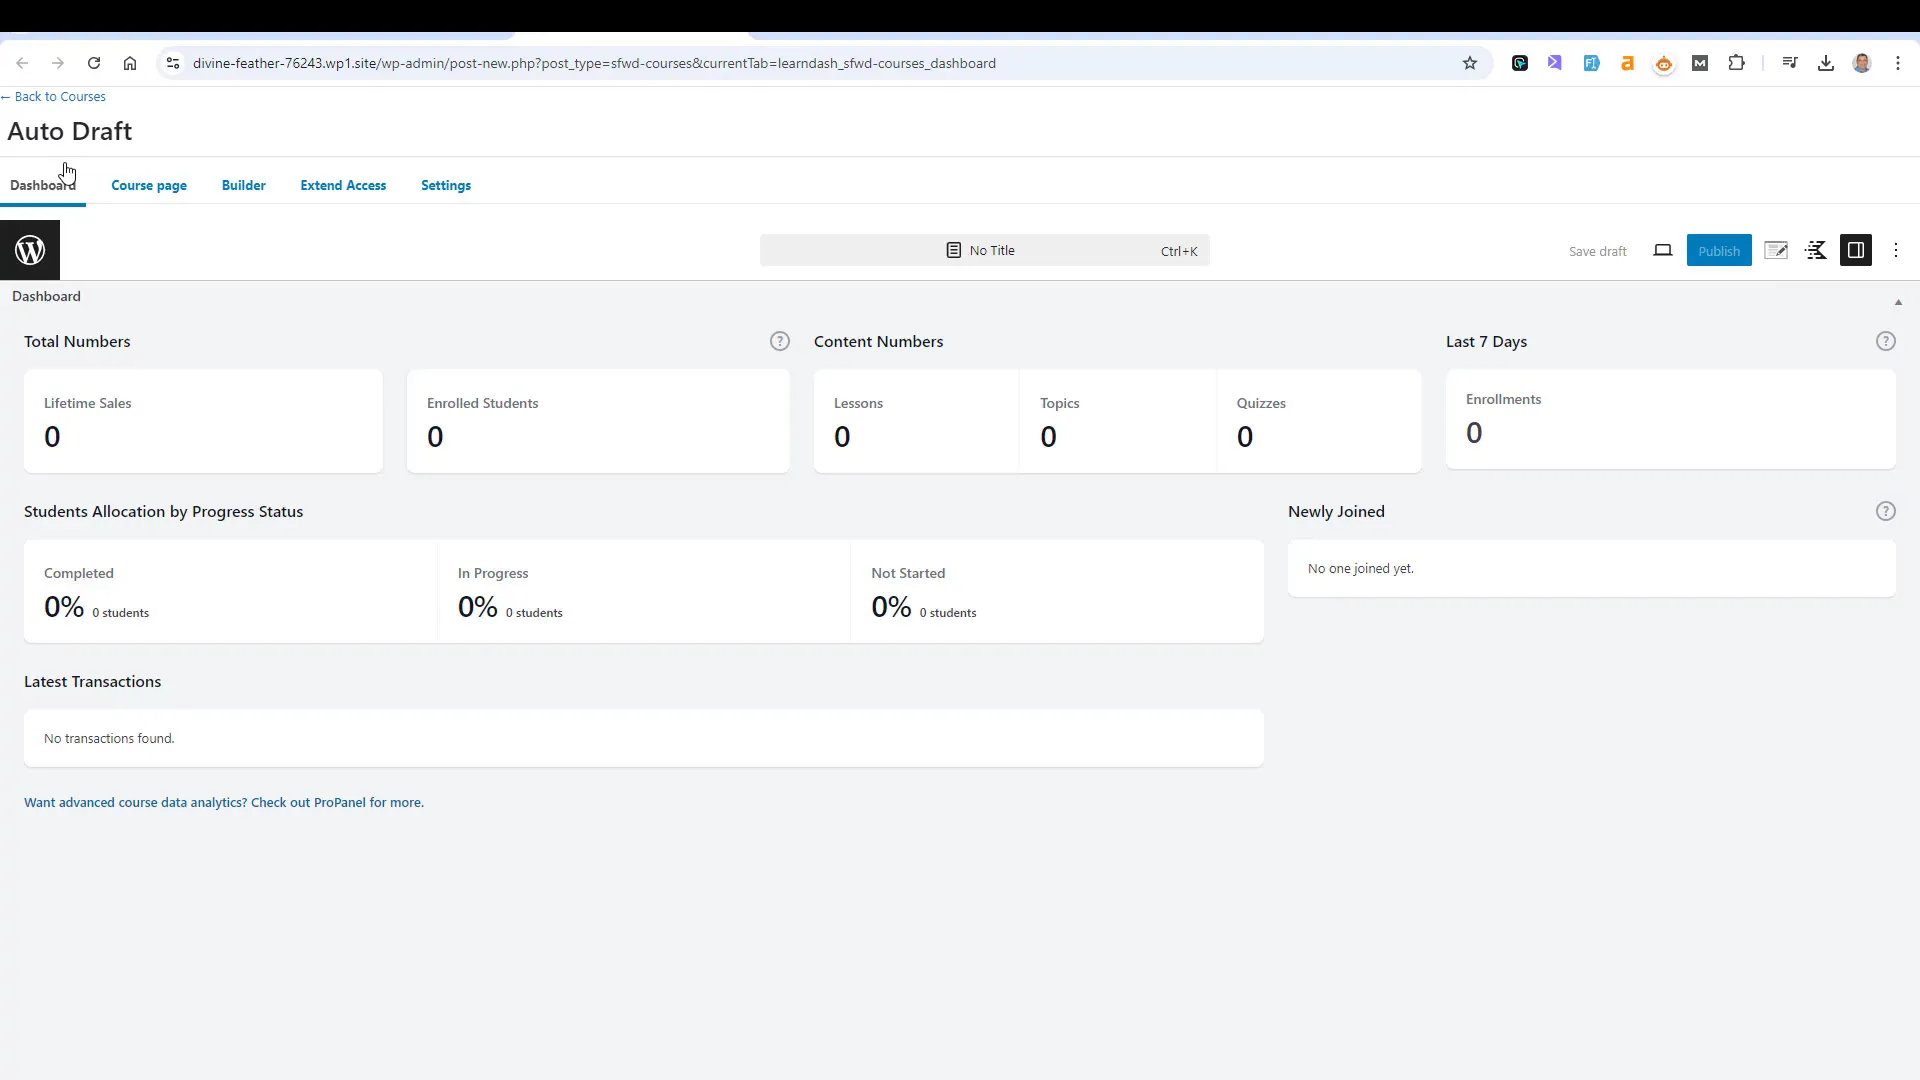
Understanding the Dashboard
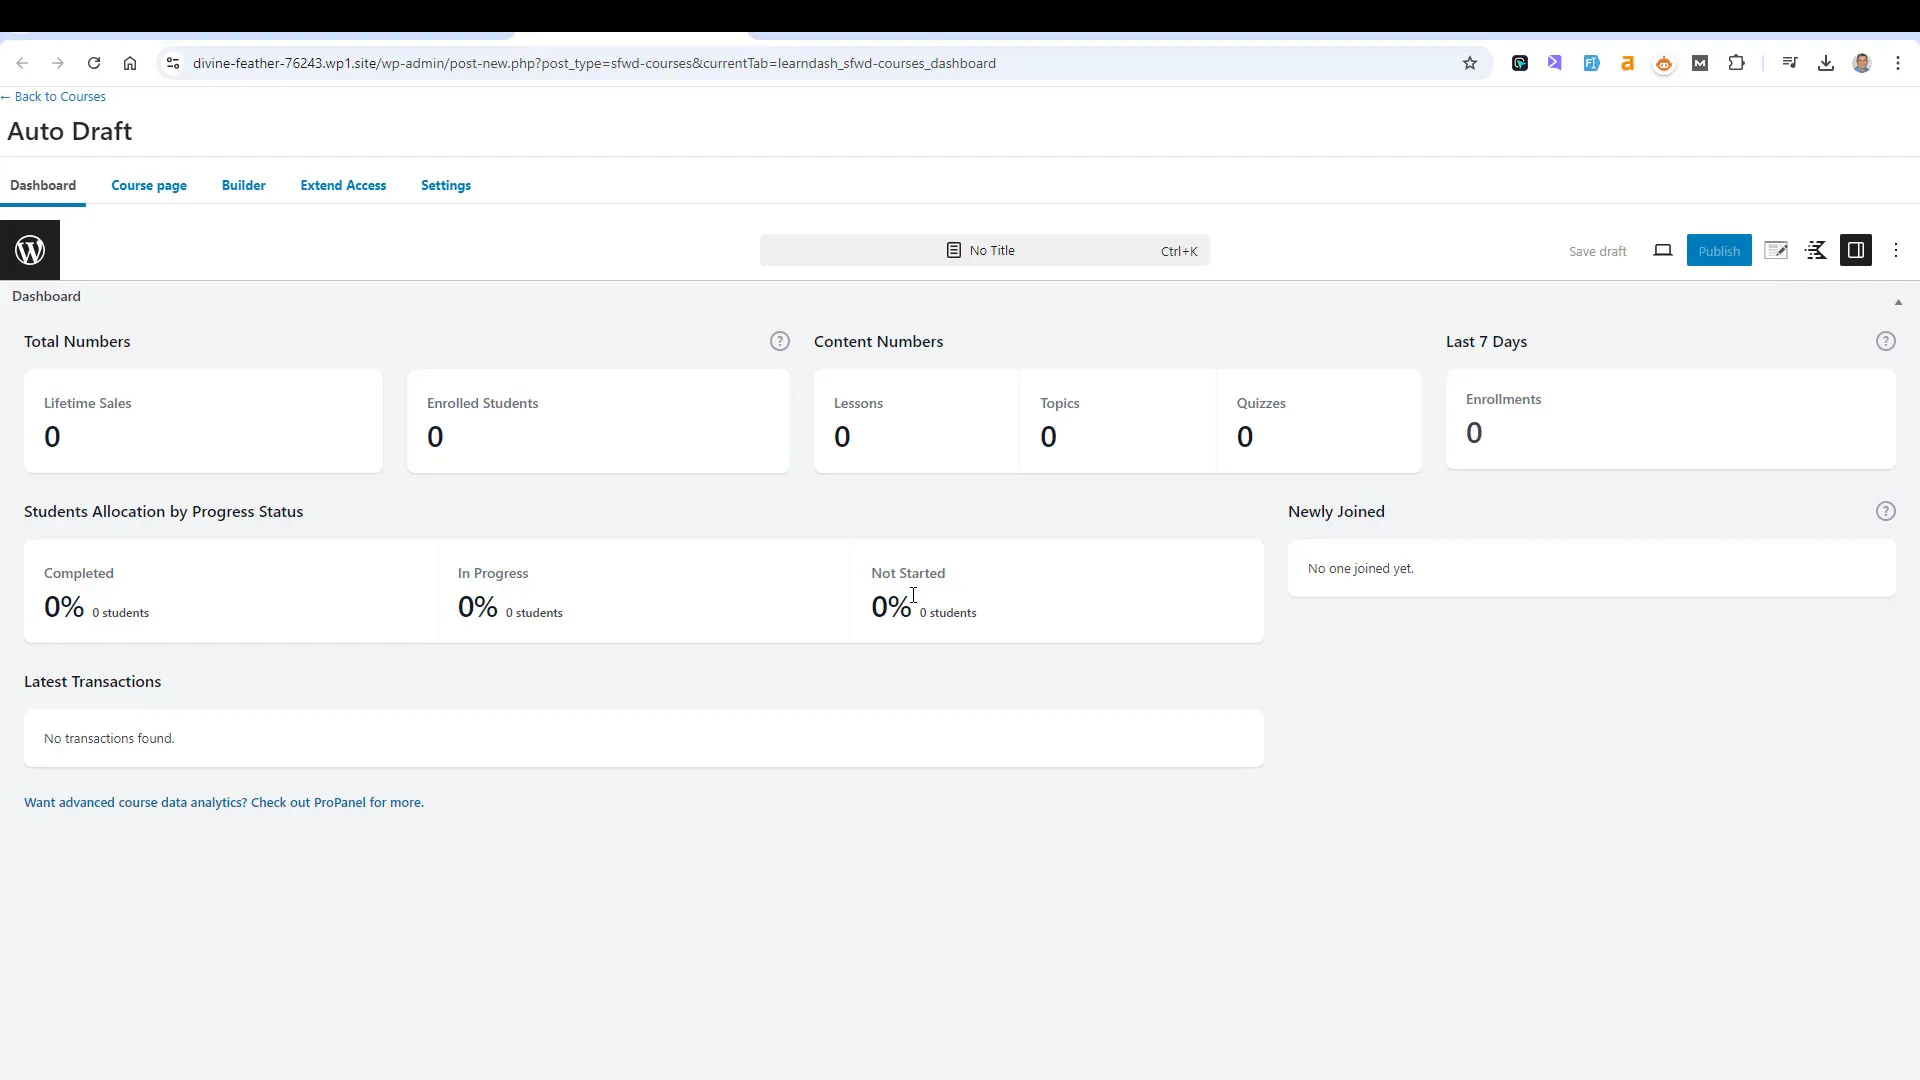
The dashboard provides a comprehensive overview of your course’s performance. Here, you can track metrics such as total students enrolled, lesson completion rates, and the number of quizzes. A quick glance at this data helps you gauge the effectiveness of your course and identify areas for improvement.
Course Page Setup
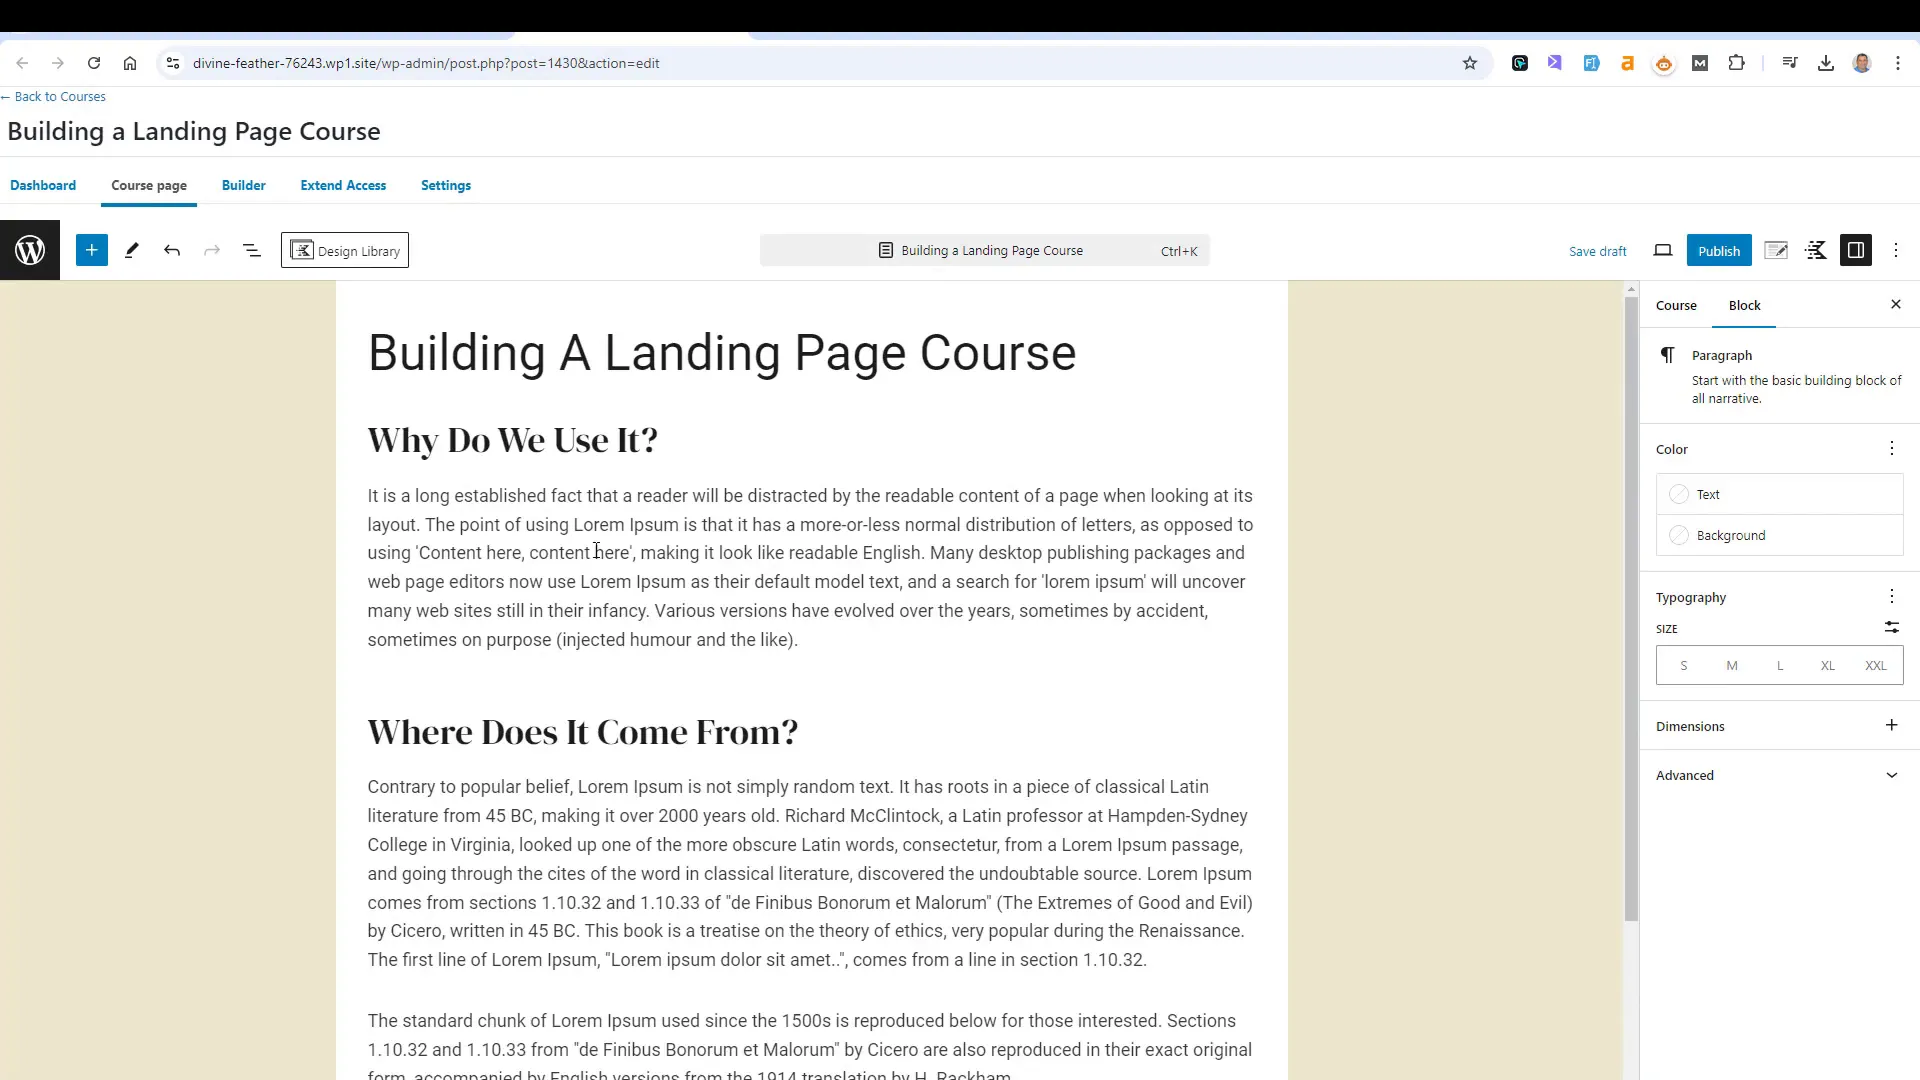
Once you’ve clicked “Add New,” you’ll be prompted to fill in essential details such as the course title and description. This is where you outline what learners can expect. Be clear and engaging in your introduction to attract potential students.
After setting the title, you’ll enter the course builder. This is the heart of your course creation process, where you’ll spend most of your time adding lessons, modules, and quizzes. Organizing your content into cohesive sections is crucial for a seamless learning experience.
Access Modes Explained
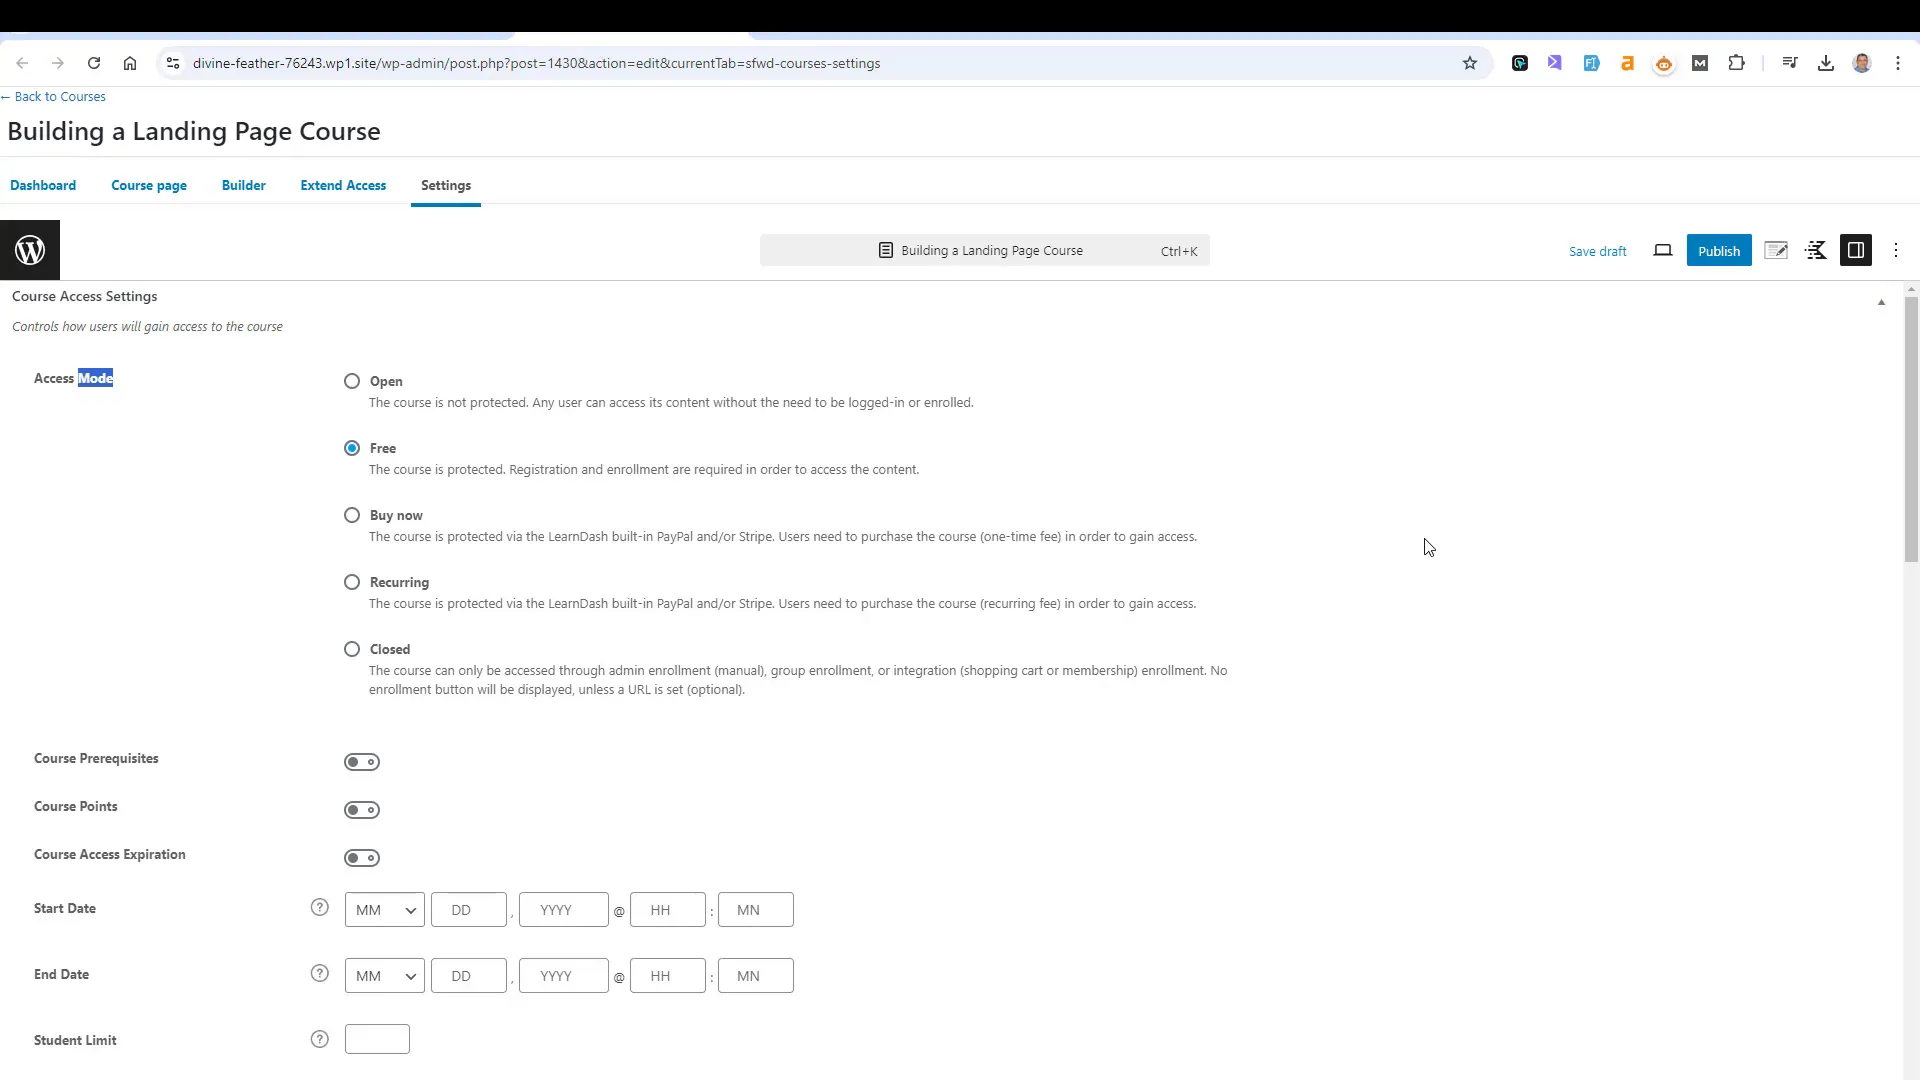
LearnDash offers various access modes for your courses. Understanding these modes helps you control how users interact with your content:
- Open: No registration is needed; anyone can view the course.
- Free: Users must register but do not pay.
- Pay Now: Users pay upfront to access the course.
- Recurring: Users are charged periodically for continued access.
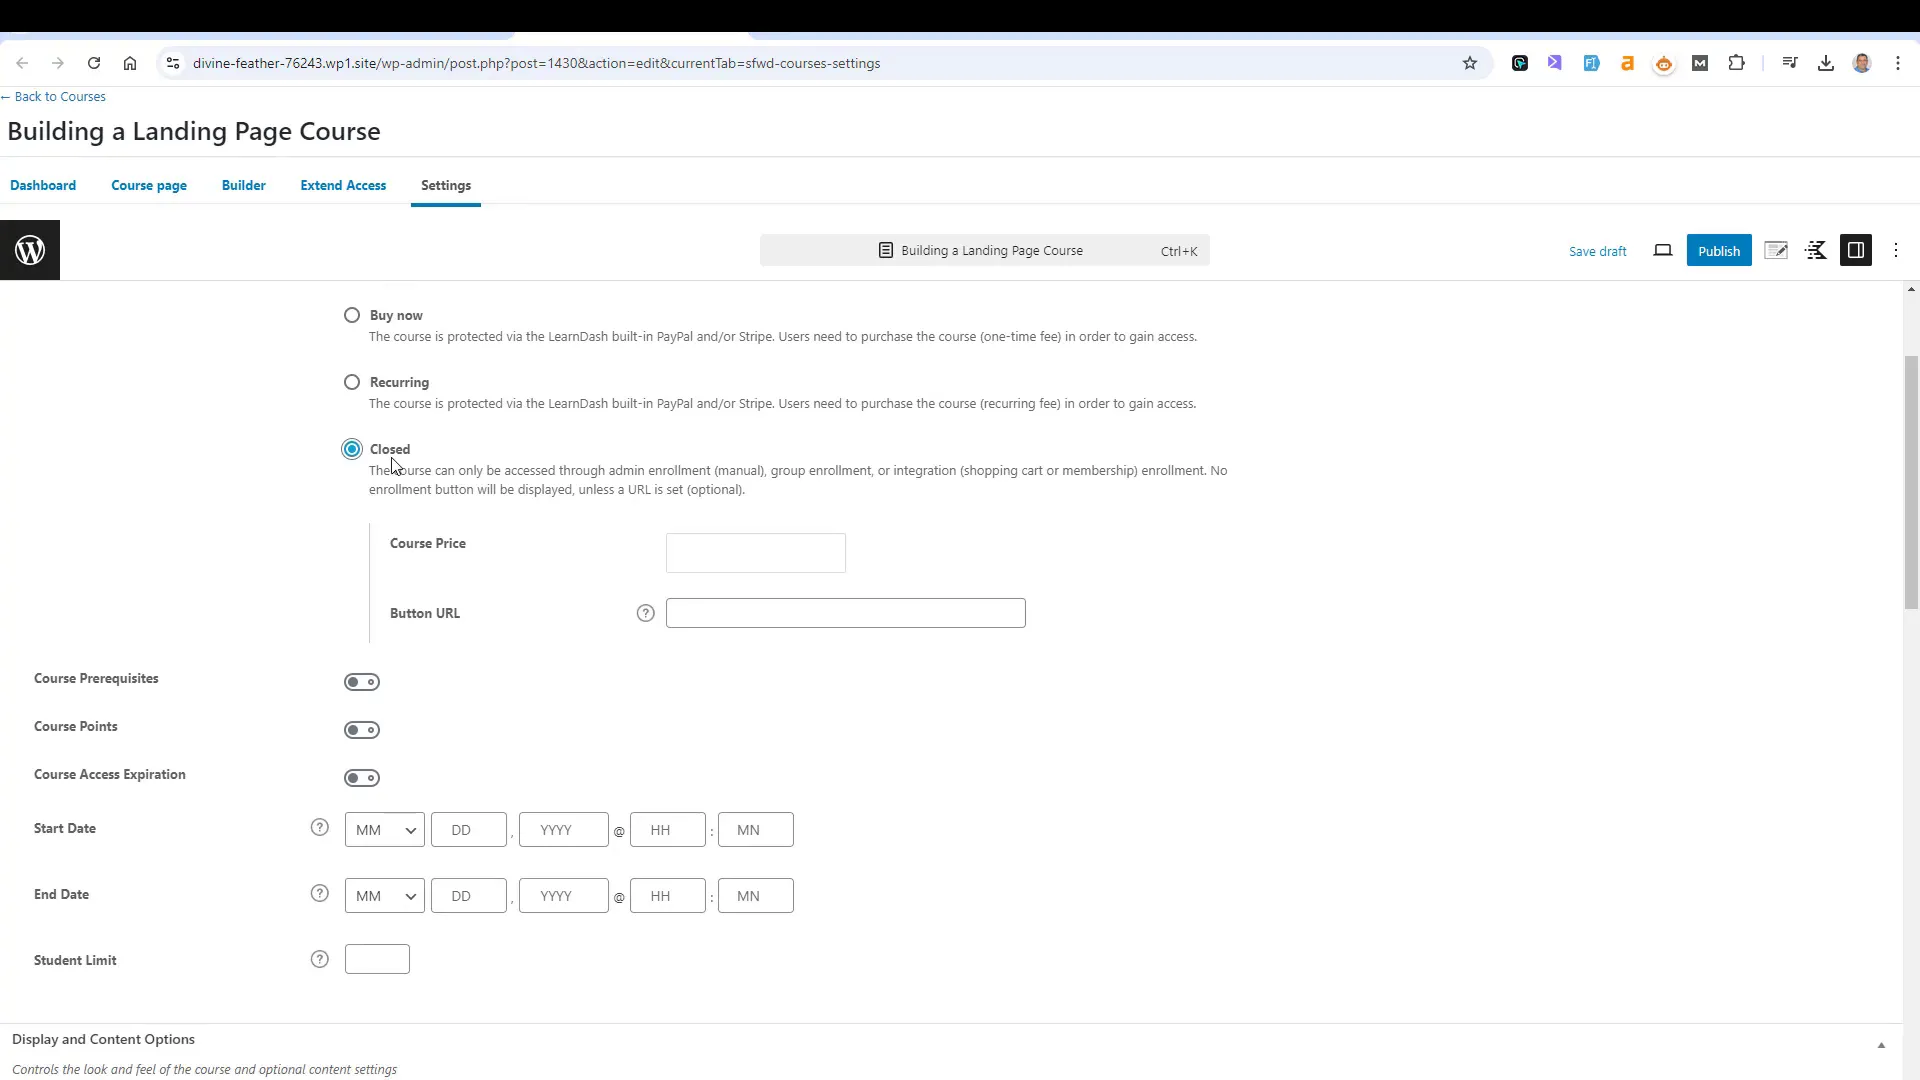
- Closed: Access is granted through specific payment methods, such as WooCommerce.
Configuring Course Settings
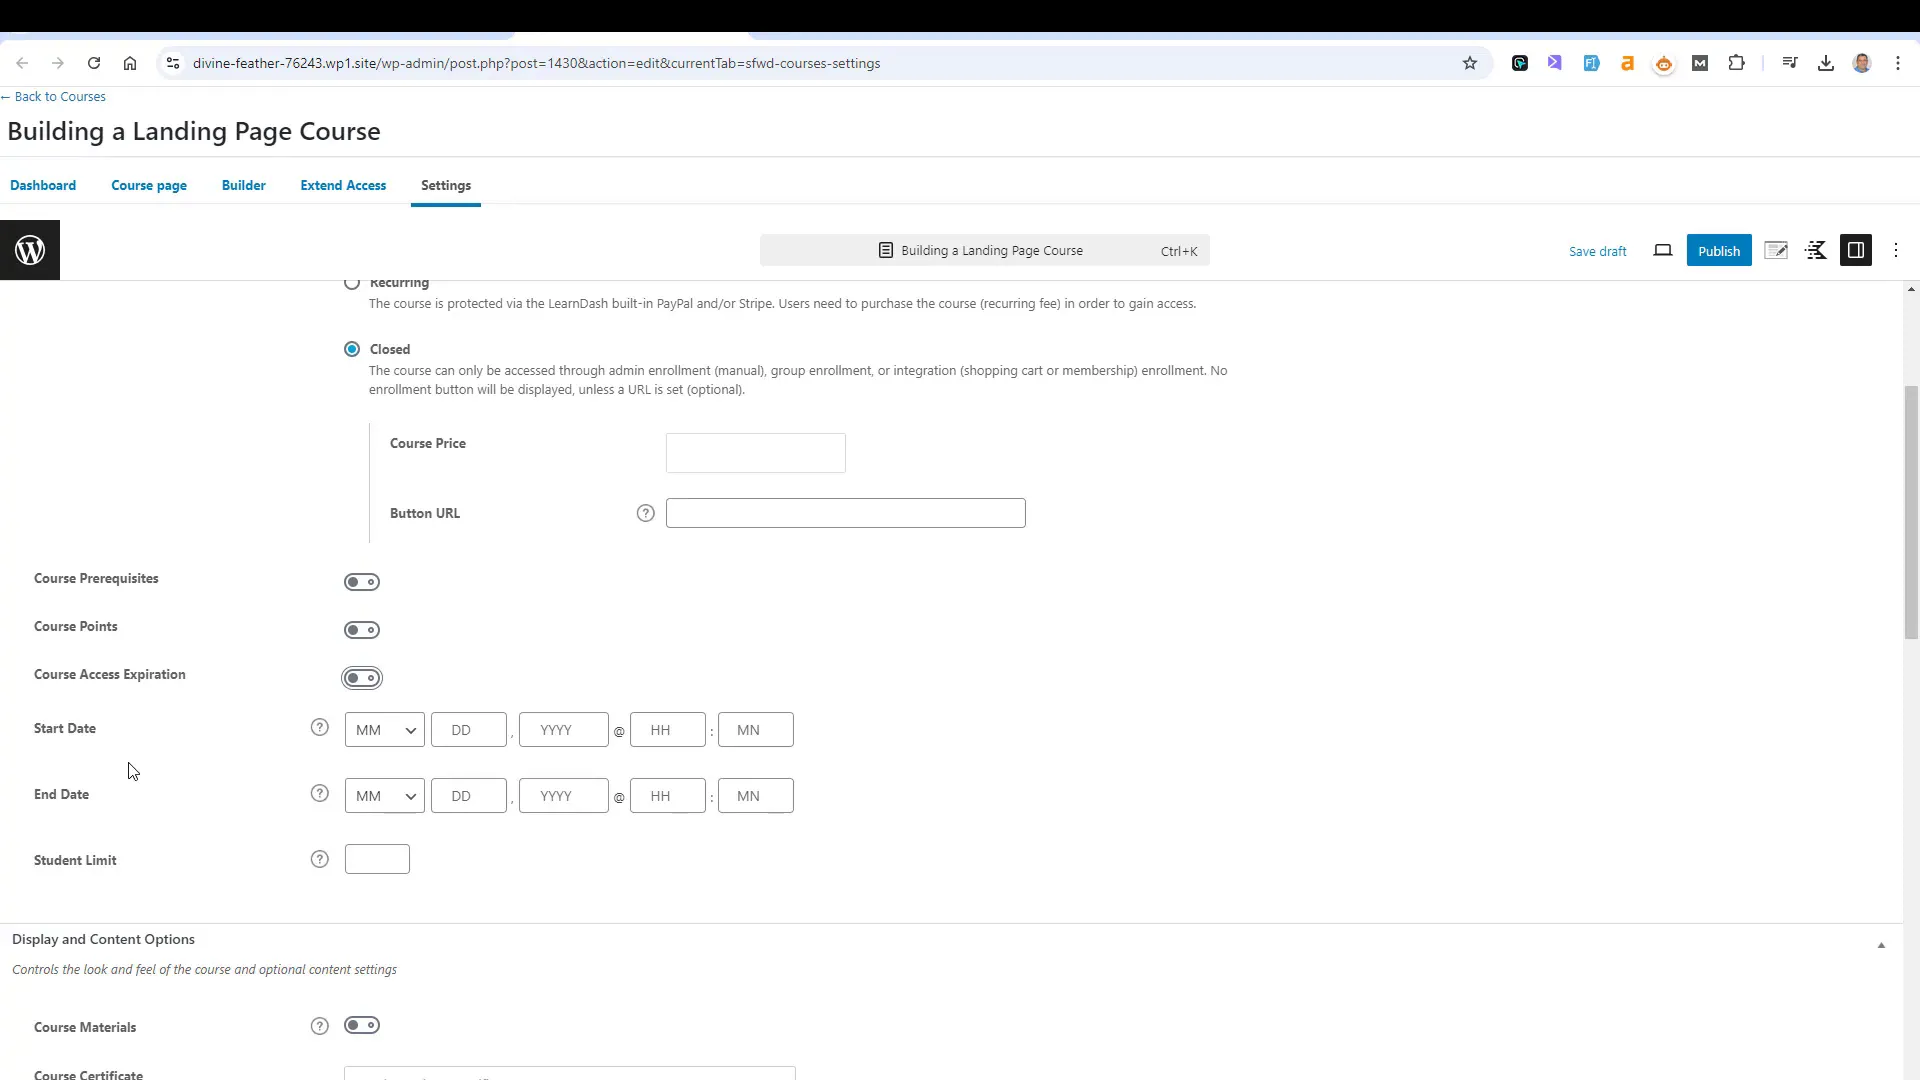
In the settings tab, you can customize access expiration and set prerequisites for course enrollment. For instance, if you want students to complete another course before enrolling, you can configure that here.
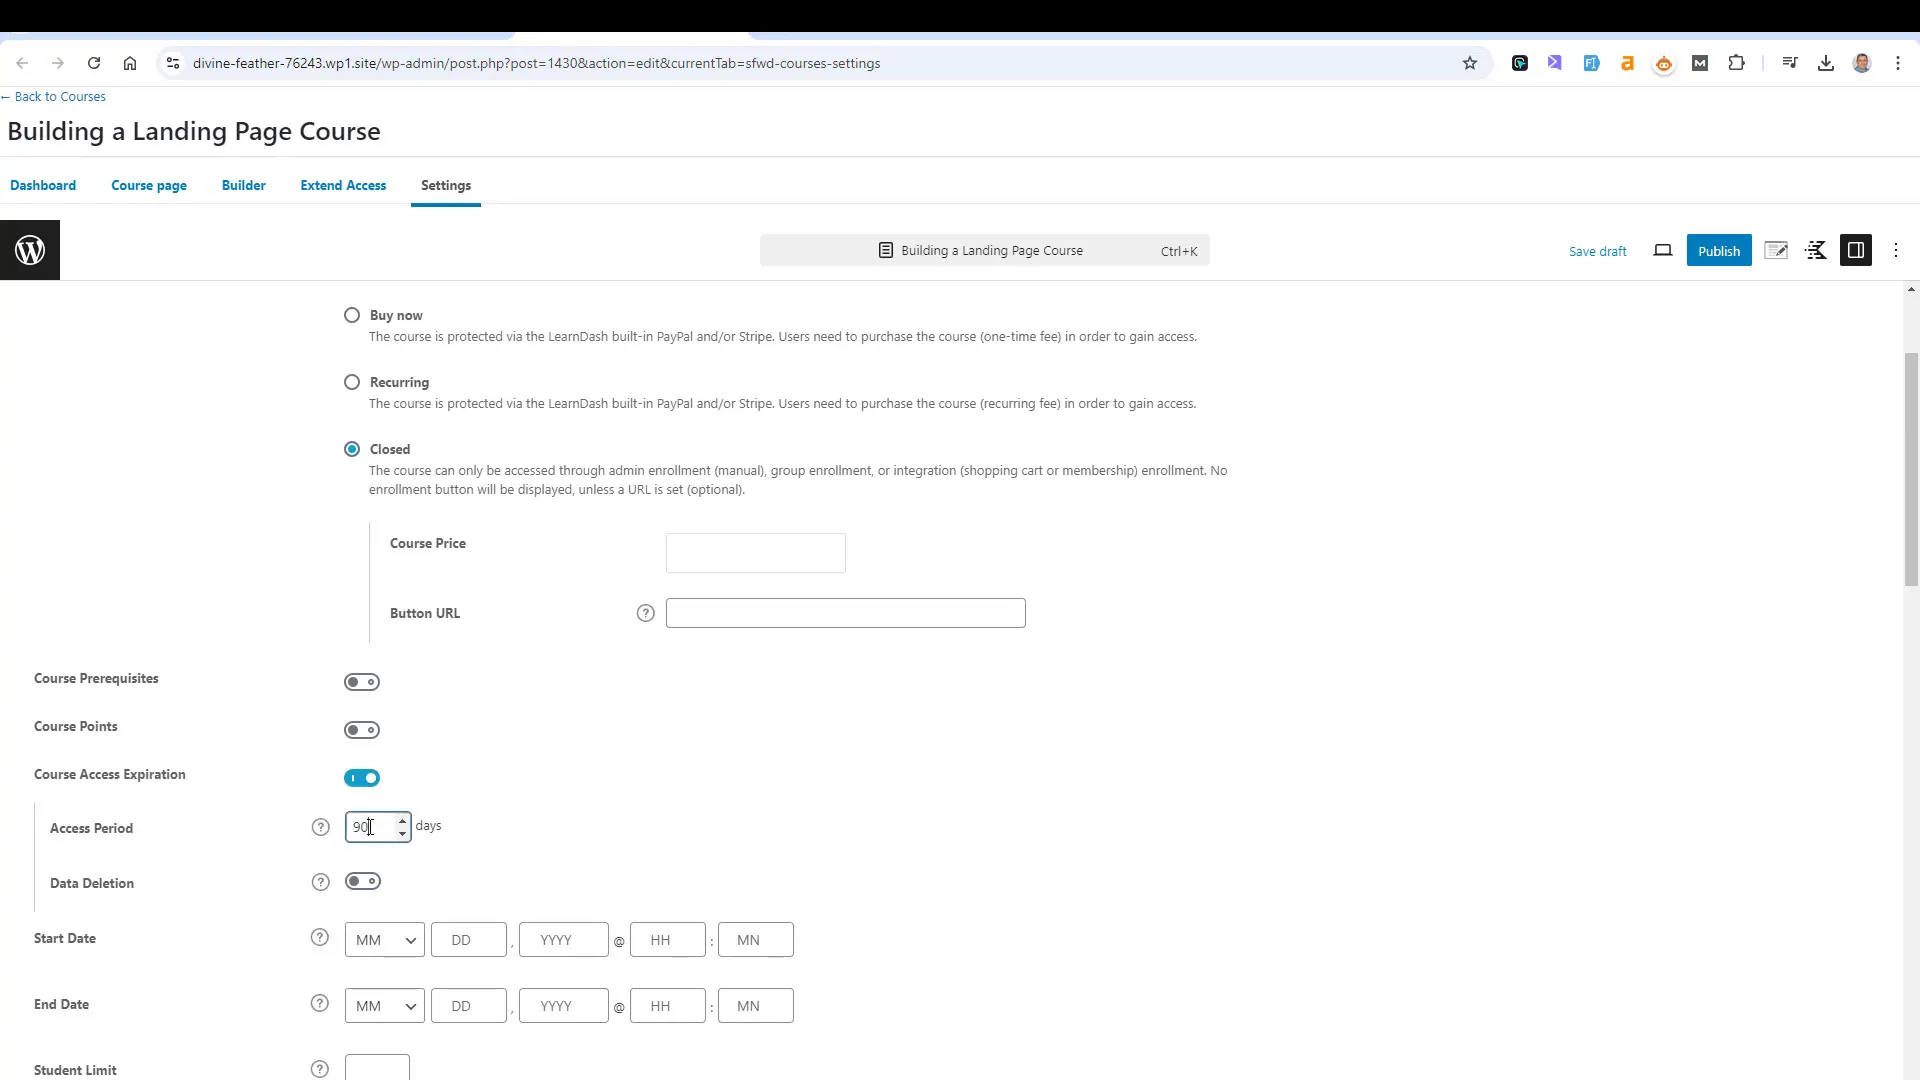
Access expiration is another important setting. You can limit how long students can access the course materials. For example, setting a 90-day access period encourages timely course completion.
Additionally, you can establish specific enrollment periods. This feature is particularly useful for courses offered seasonally or at set times of the year.
Course Structure and Content Creation
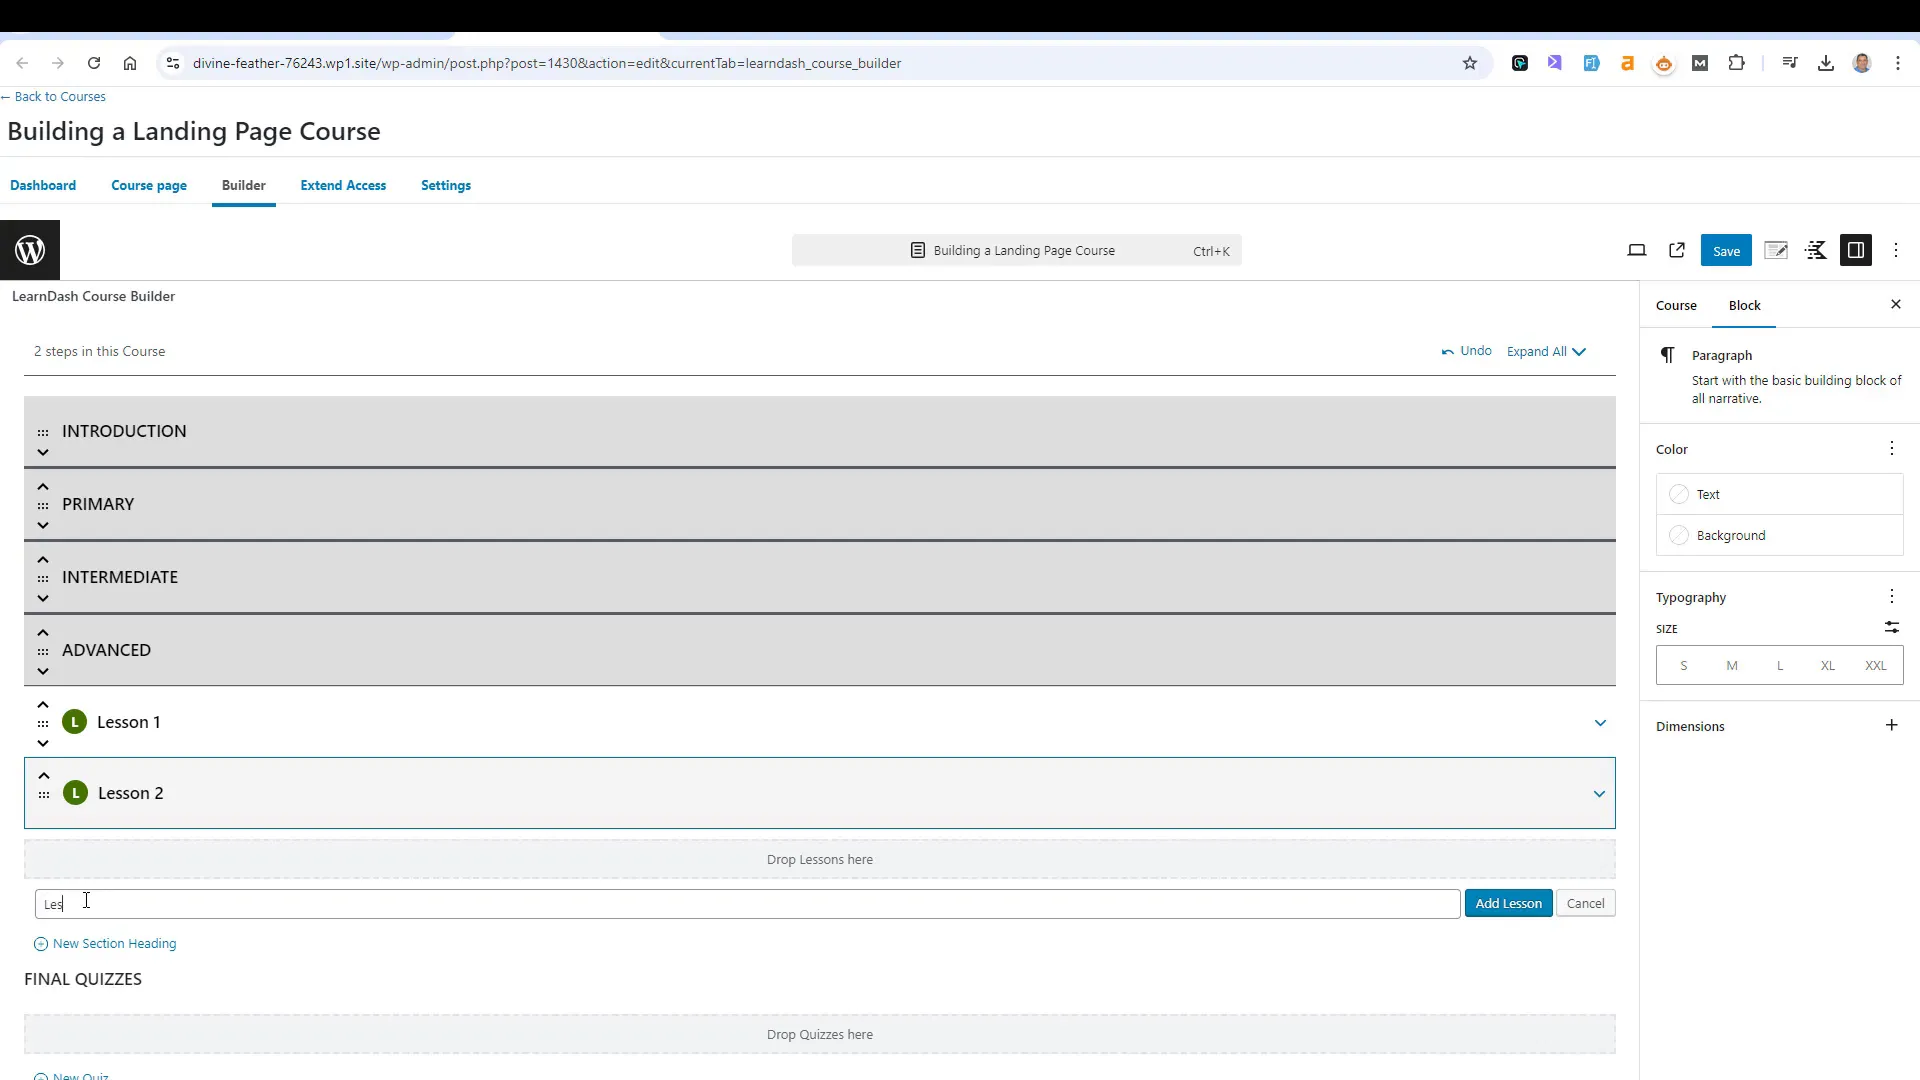
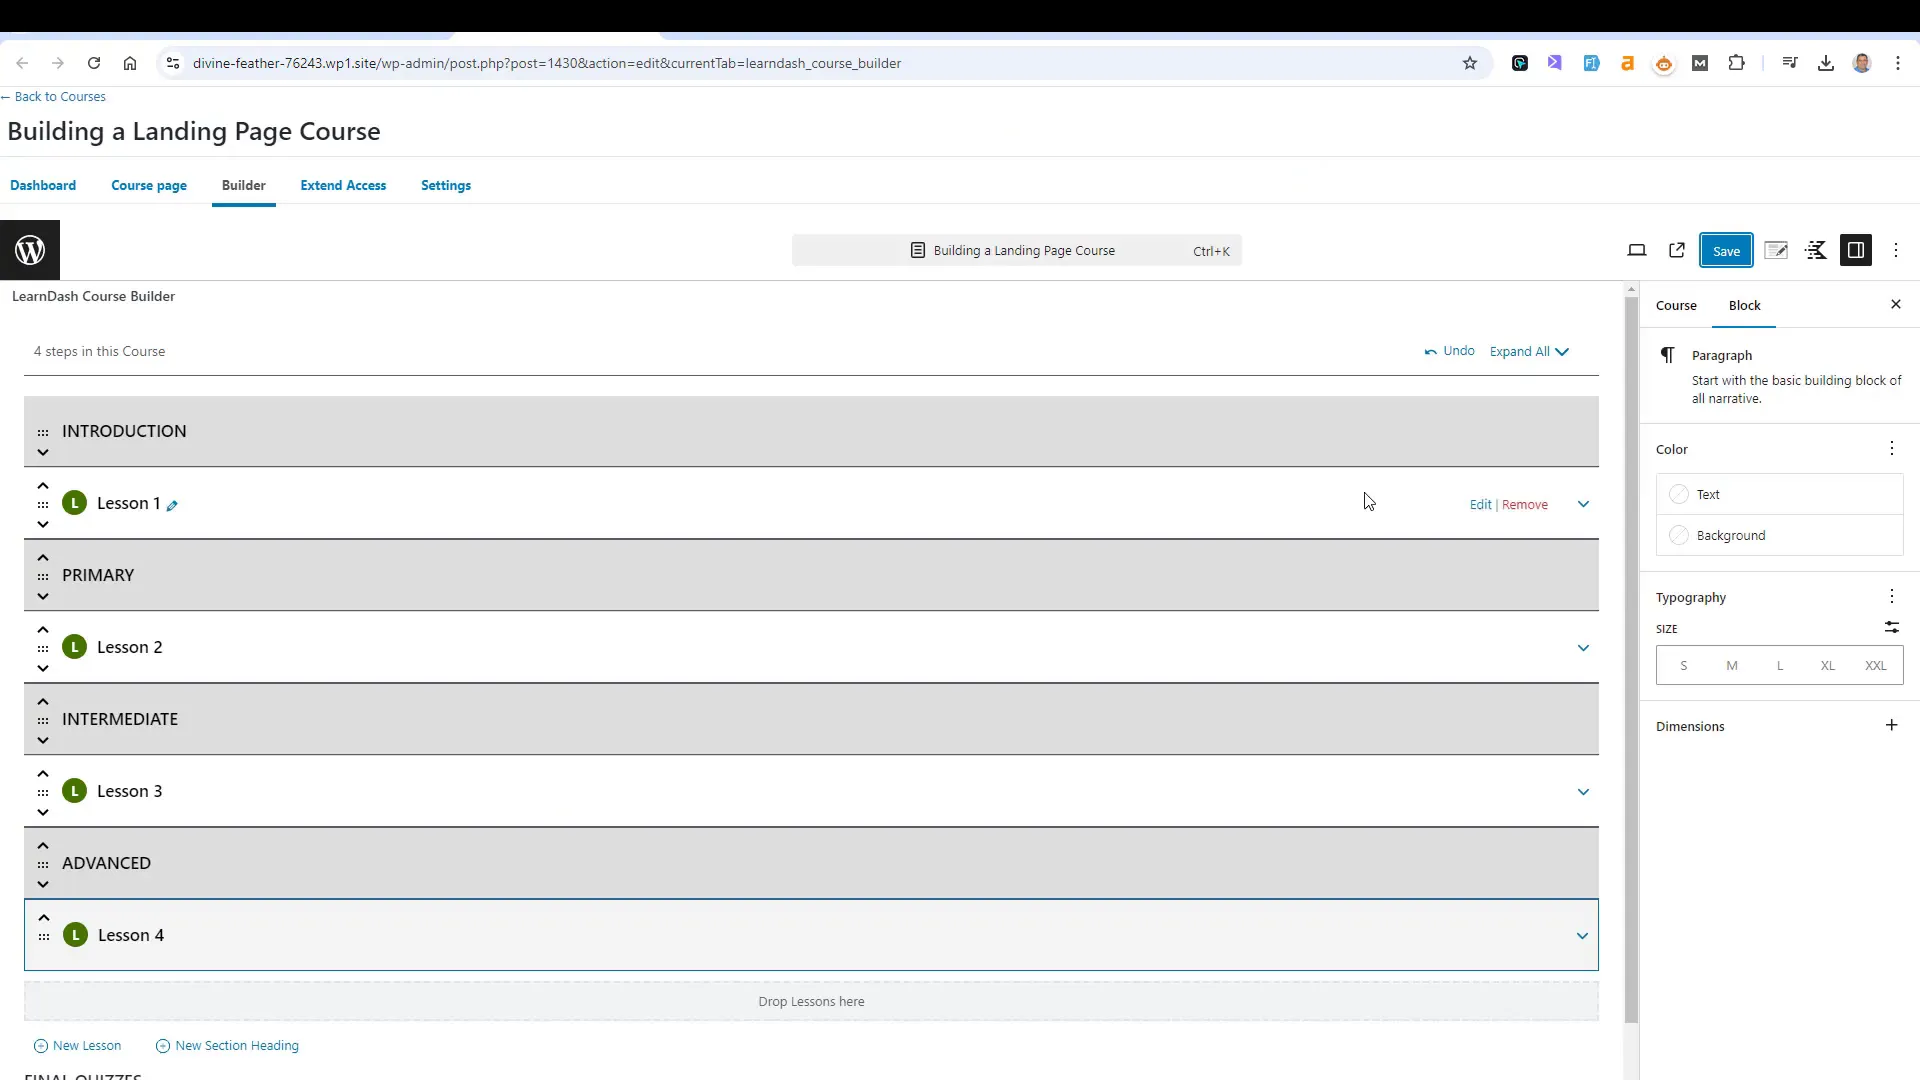
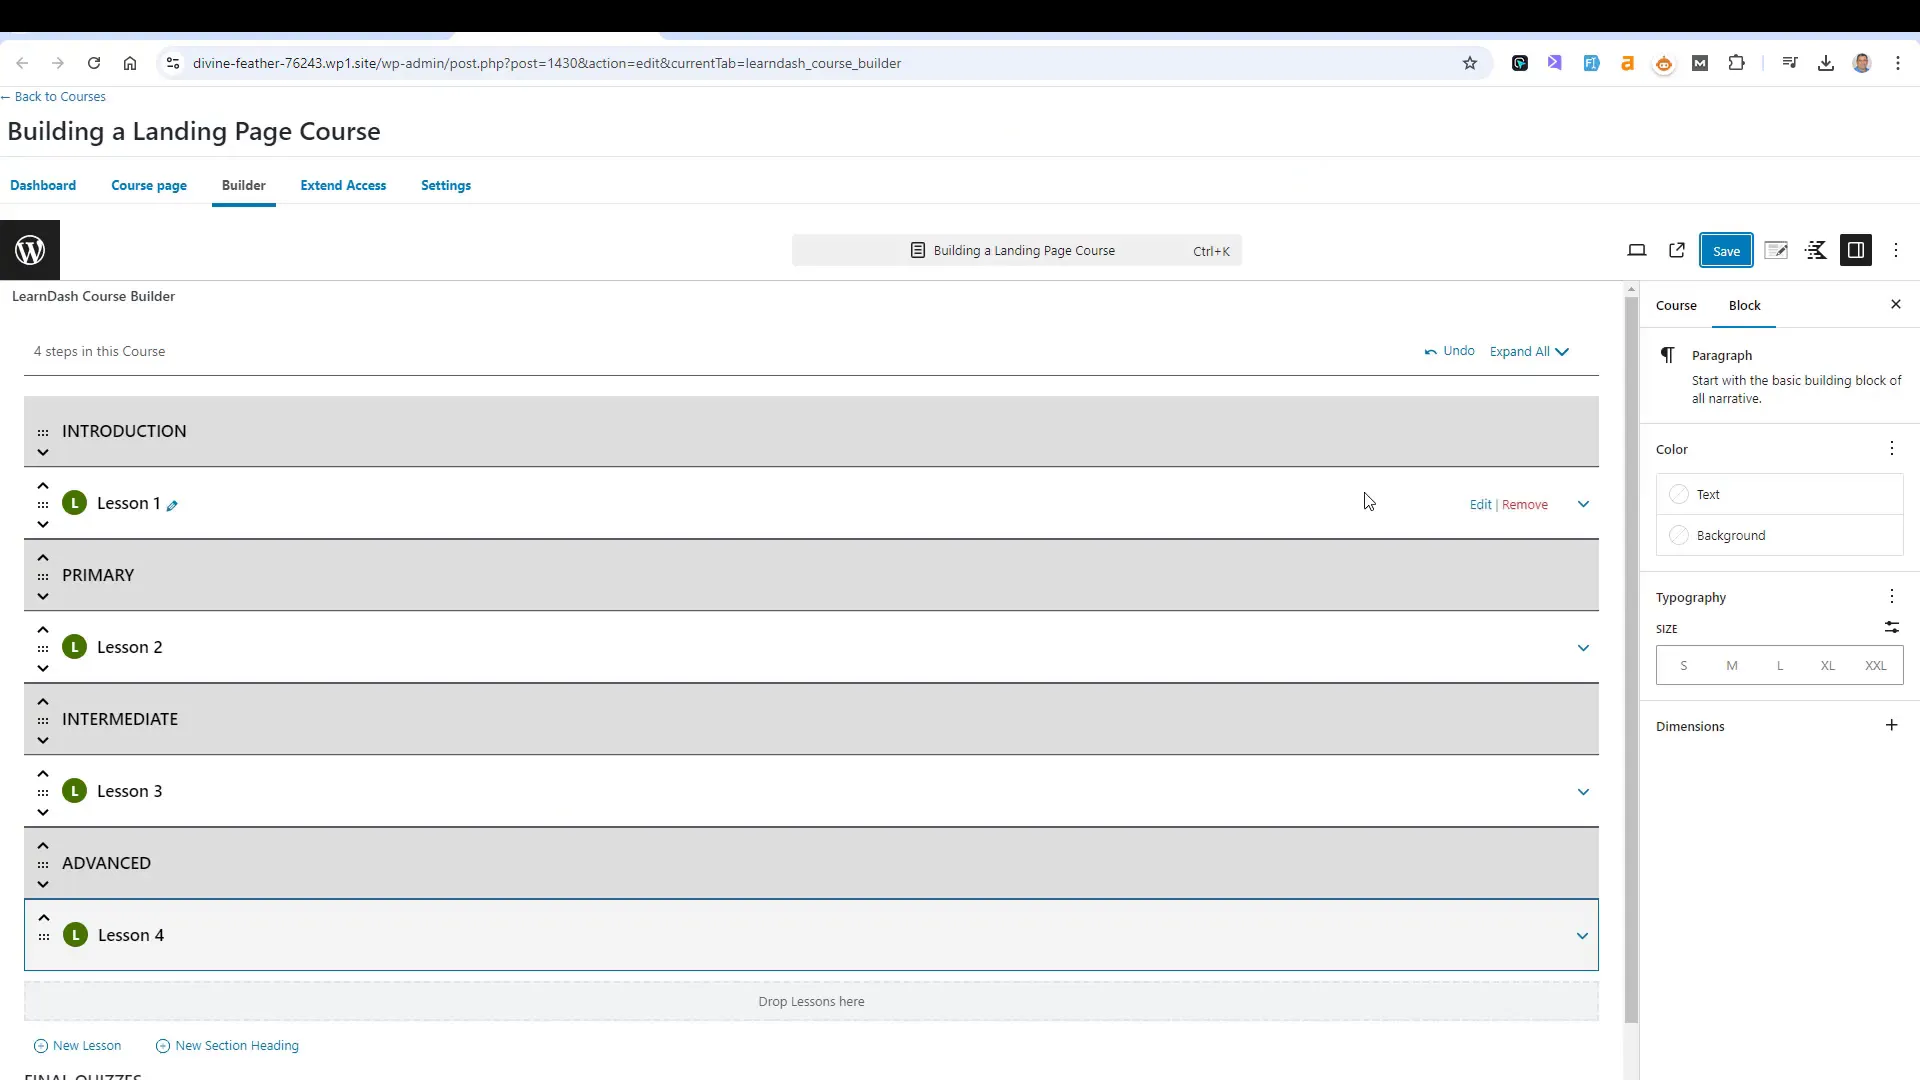
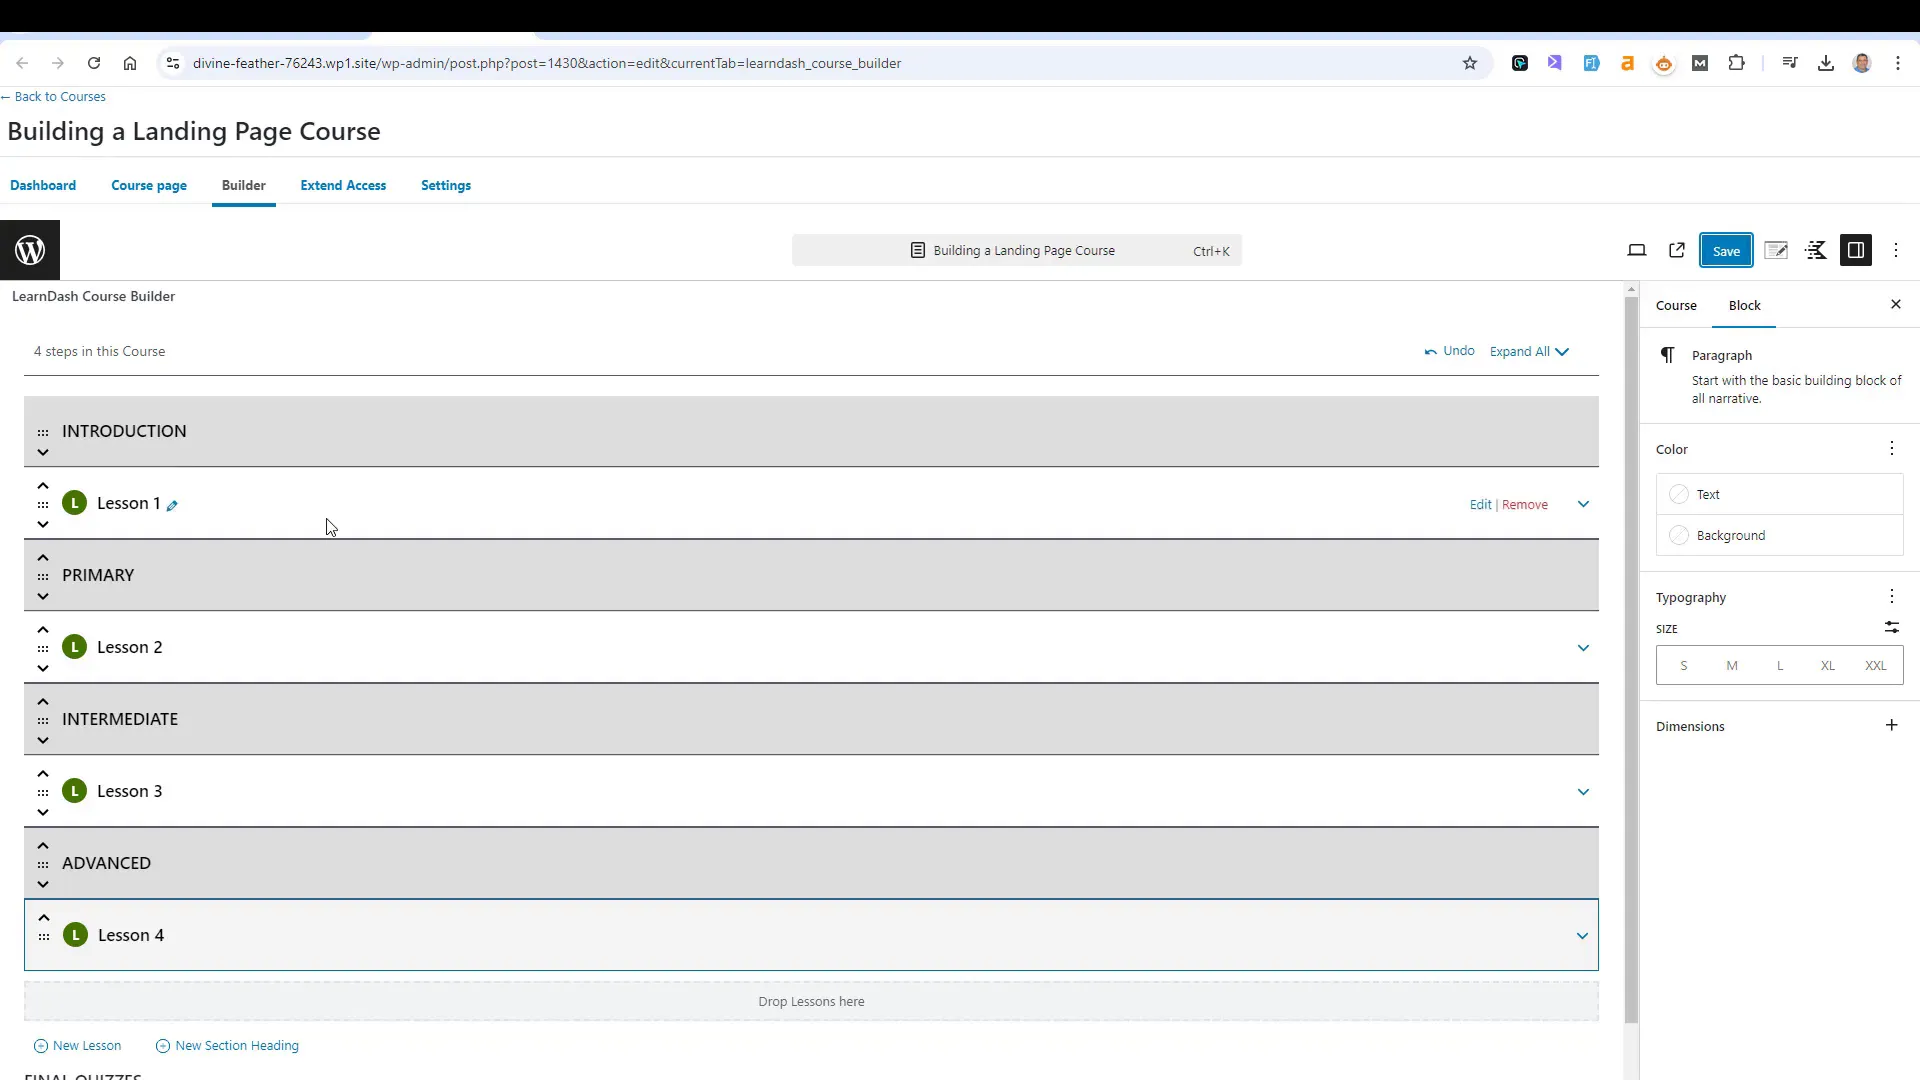
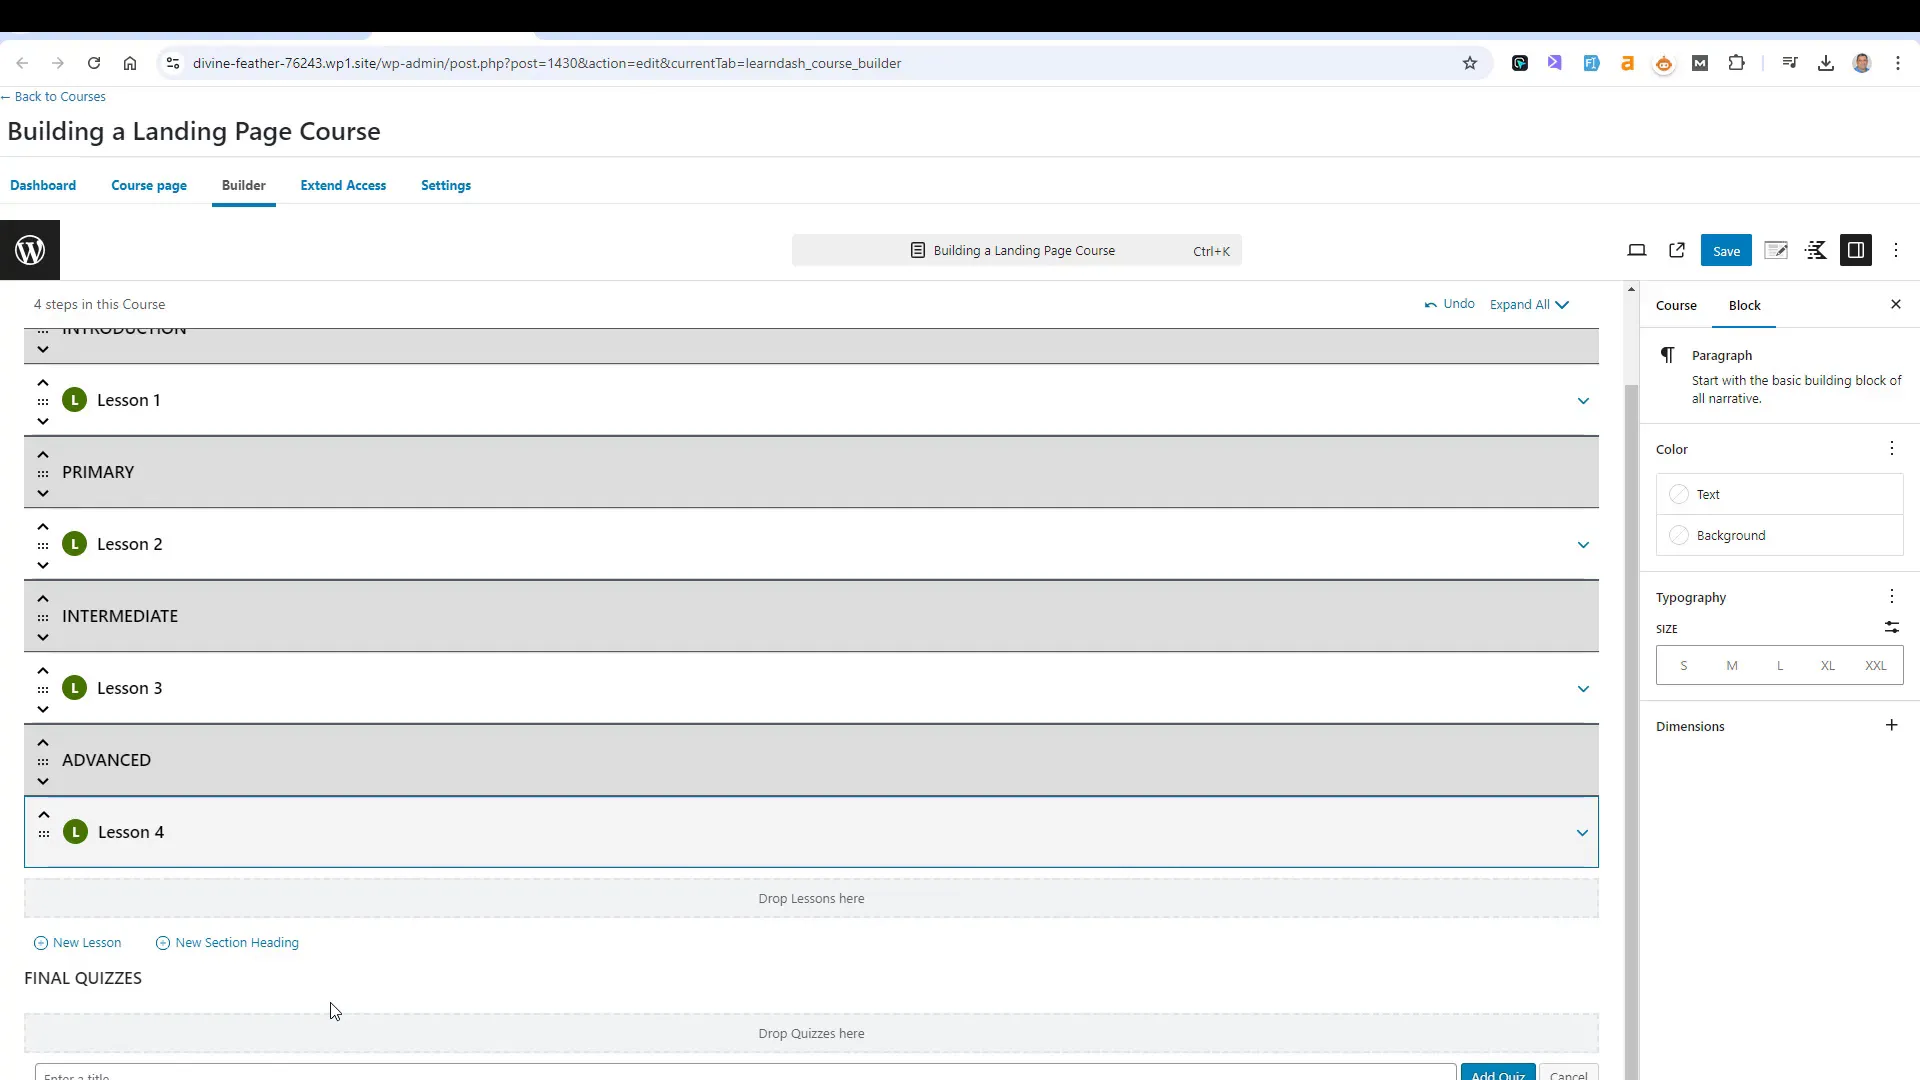
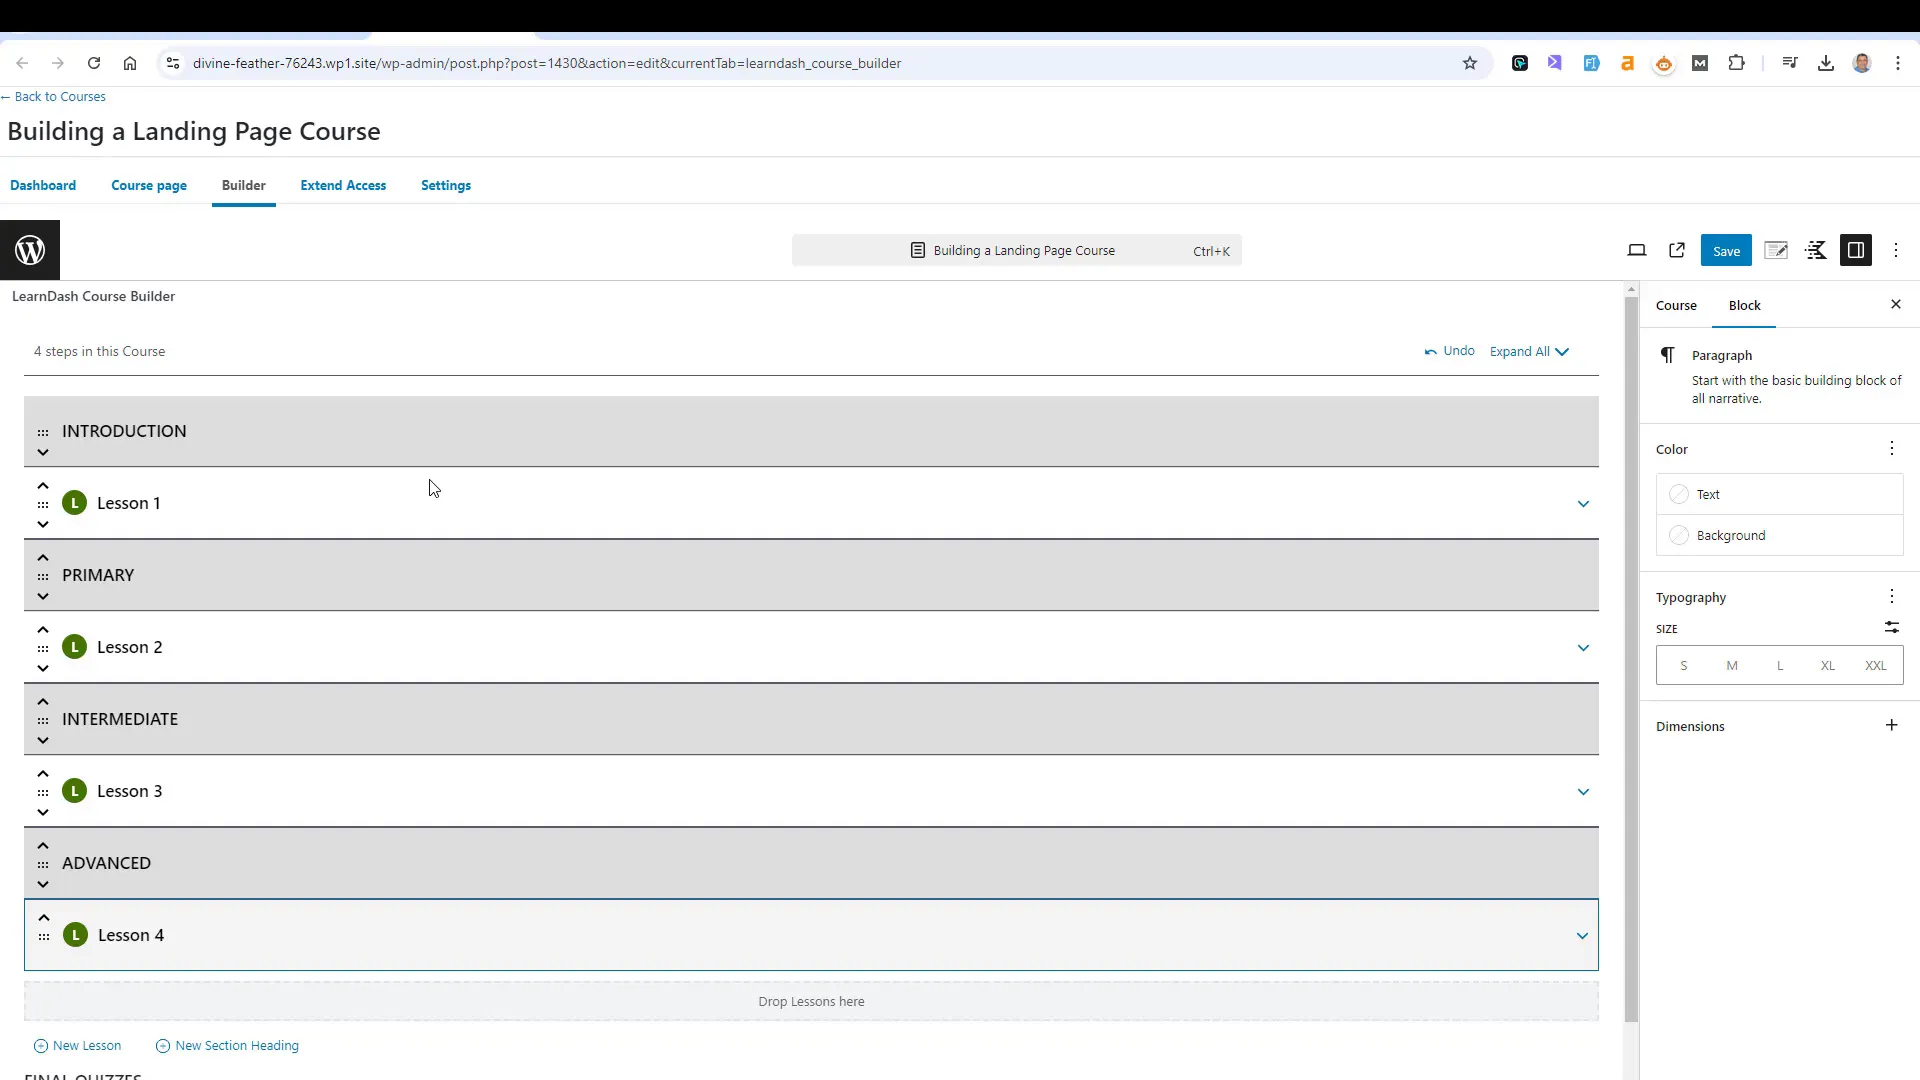
After configuring the settings, return to the course builder to add lessons. Organizing lessons into modules enhances the learning experience. For instance, you might create modules for introductions, primary topics, intermediate content, and advanced lessons.
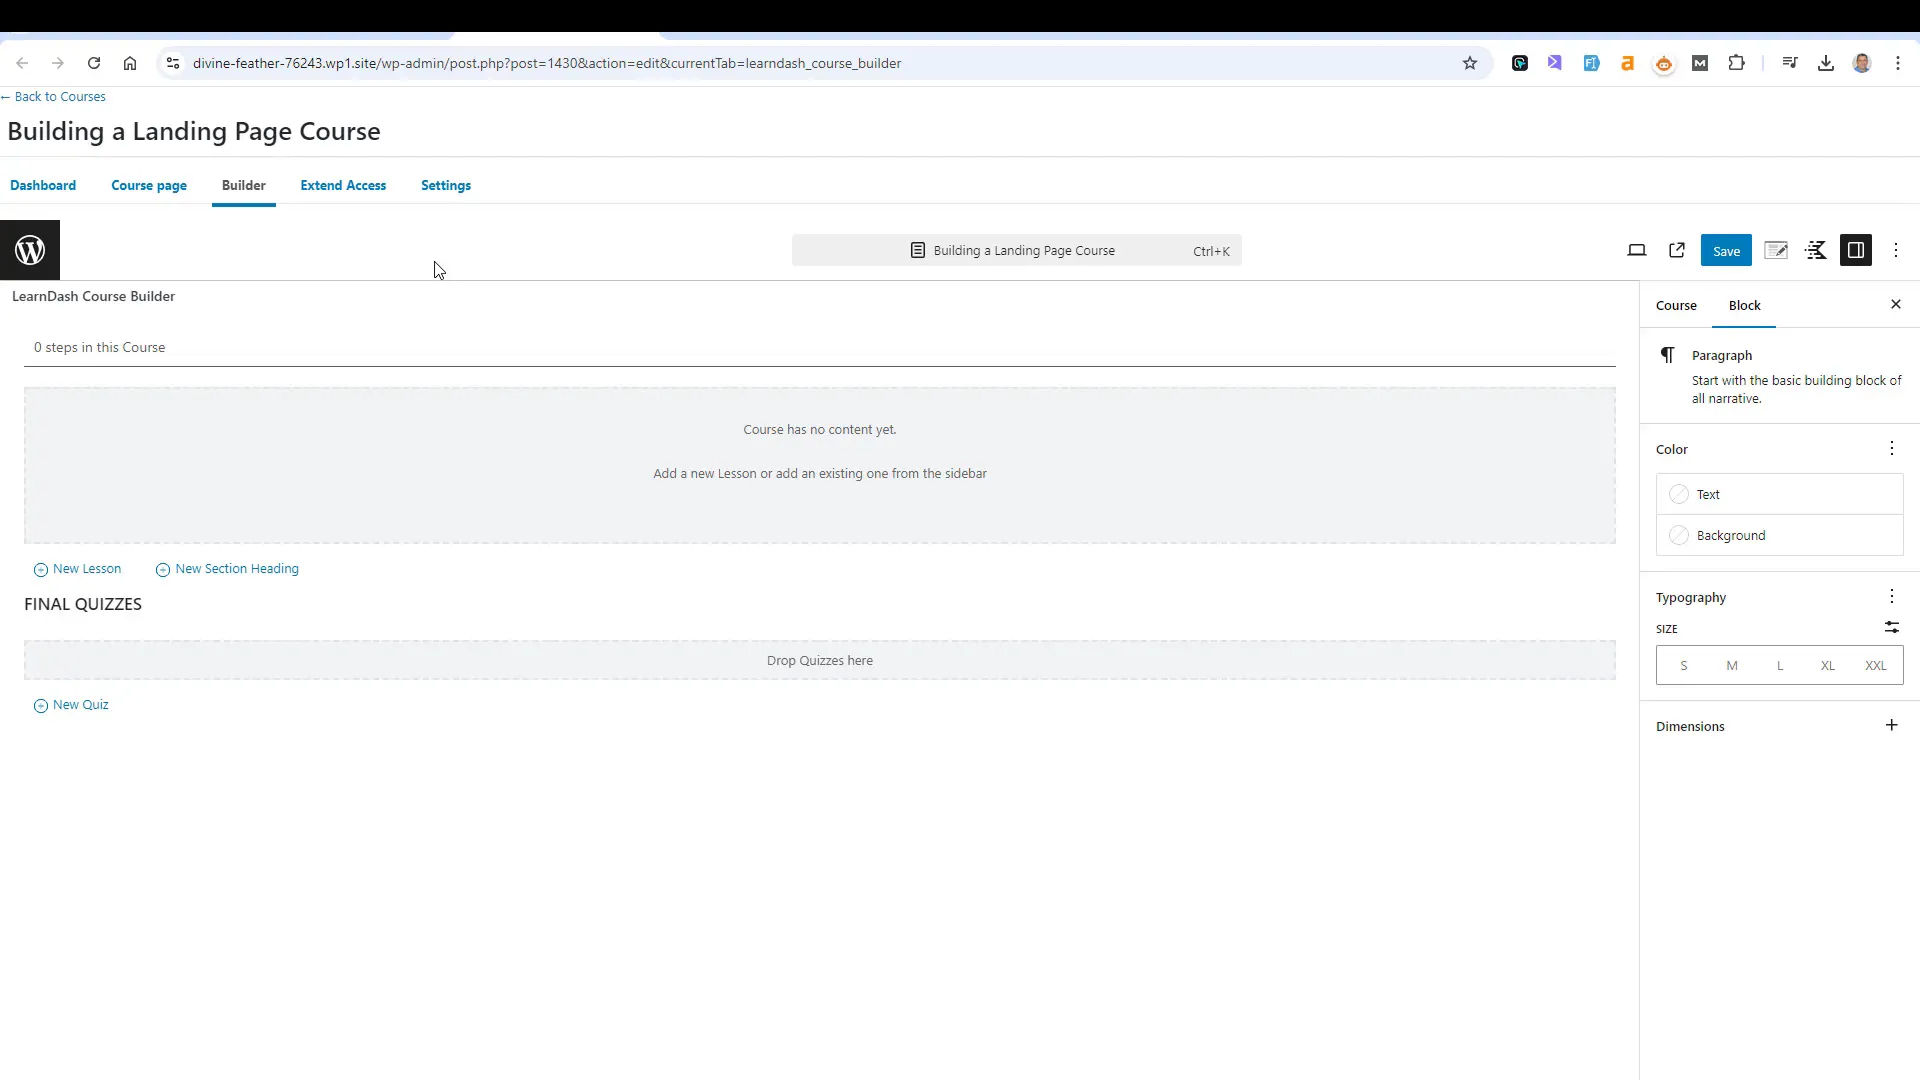
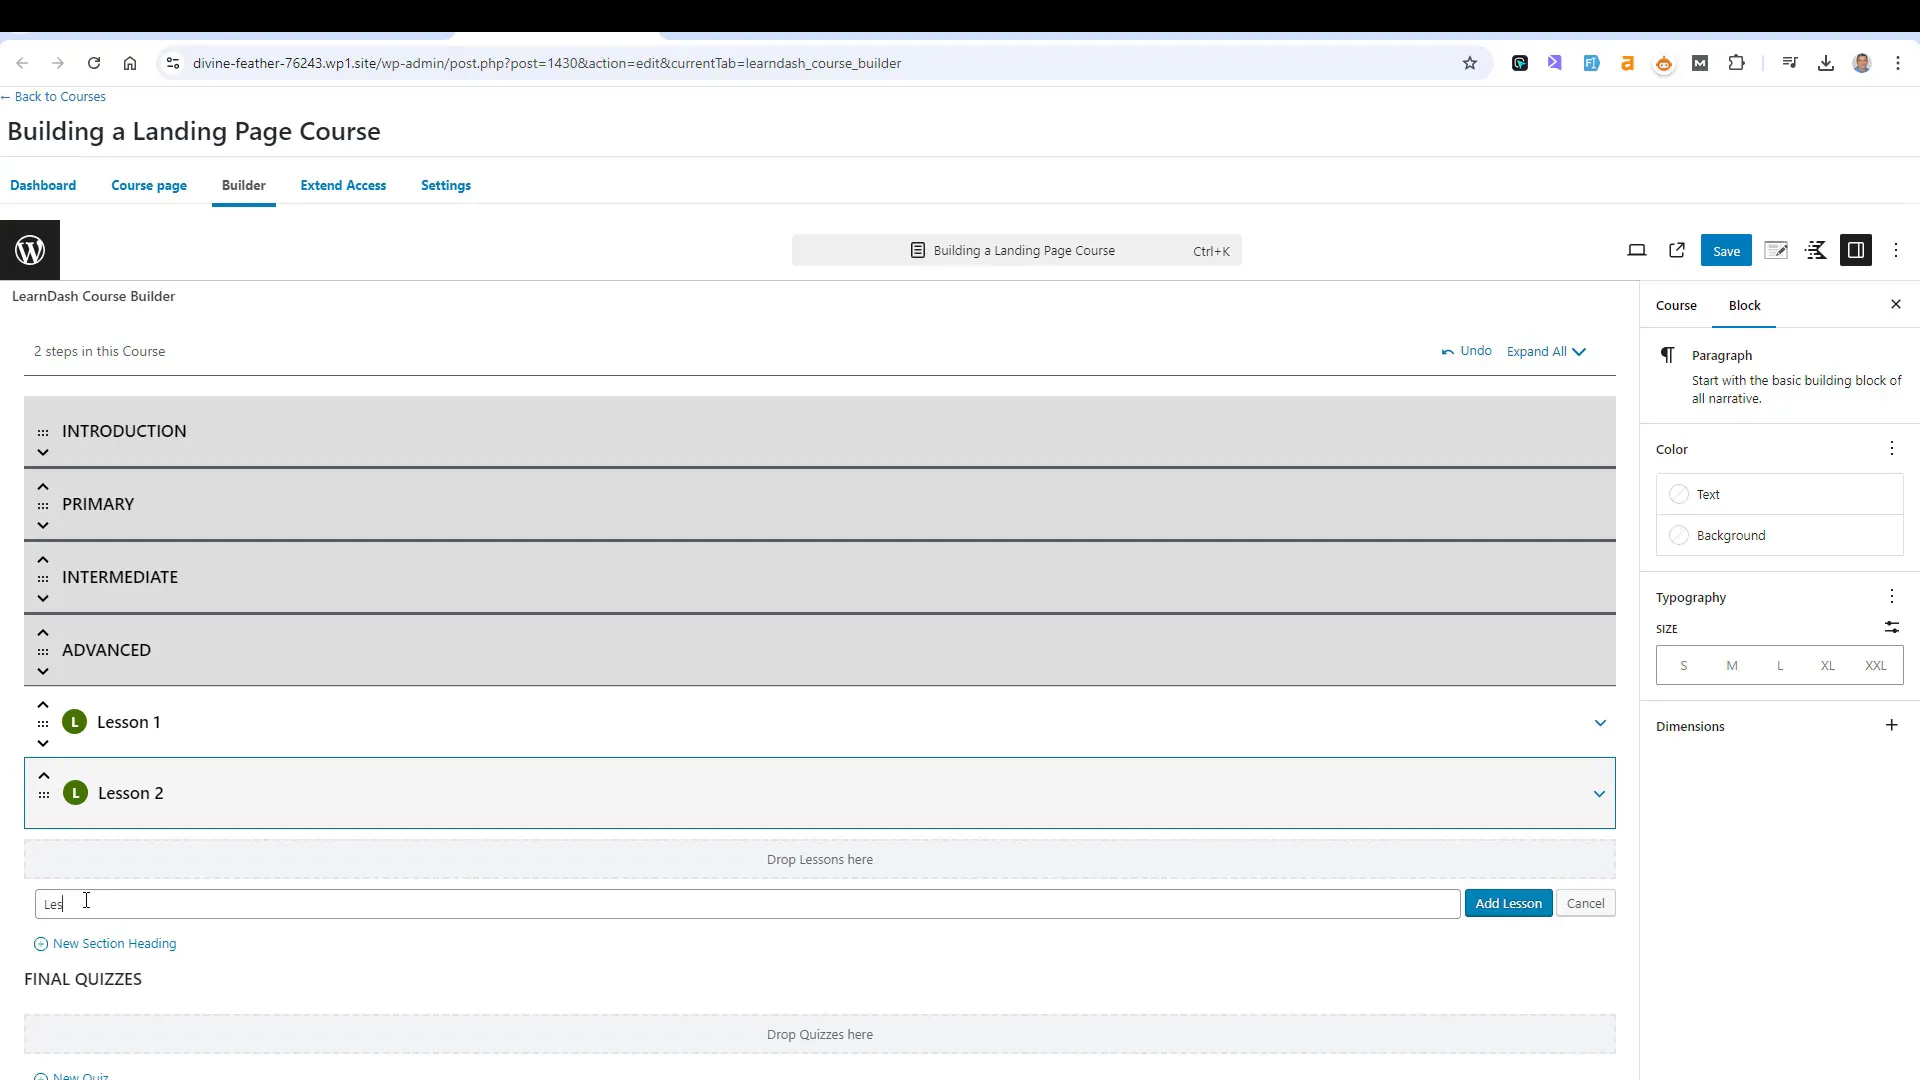
Adding lessons is simple—just click “New Lesson” and enter the lesson details. You can easily drag and drop lessons into the appropriate sections you’ve created, allowing for a flexible structure that can adapt to your teaching style.
Enhancing Student Engagement
To improve student engagement, consider adding various media types to your lessons. You can incorporate videos, images, and interactive elements to cater to different learning preferences.
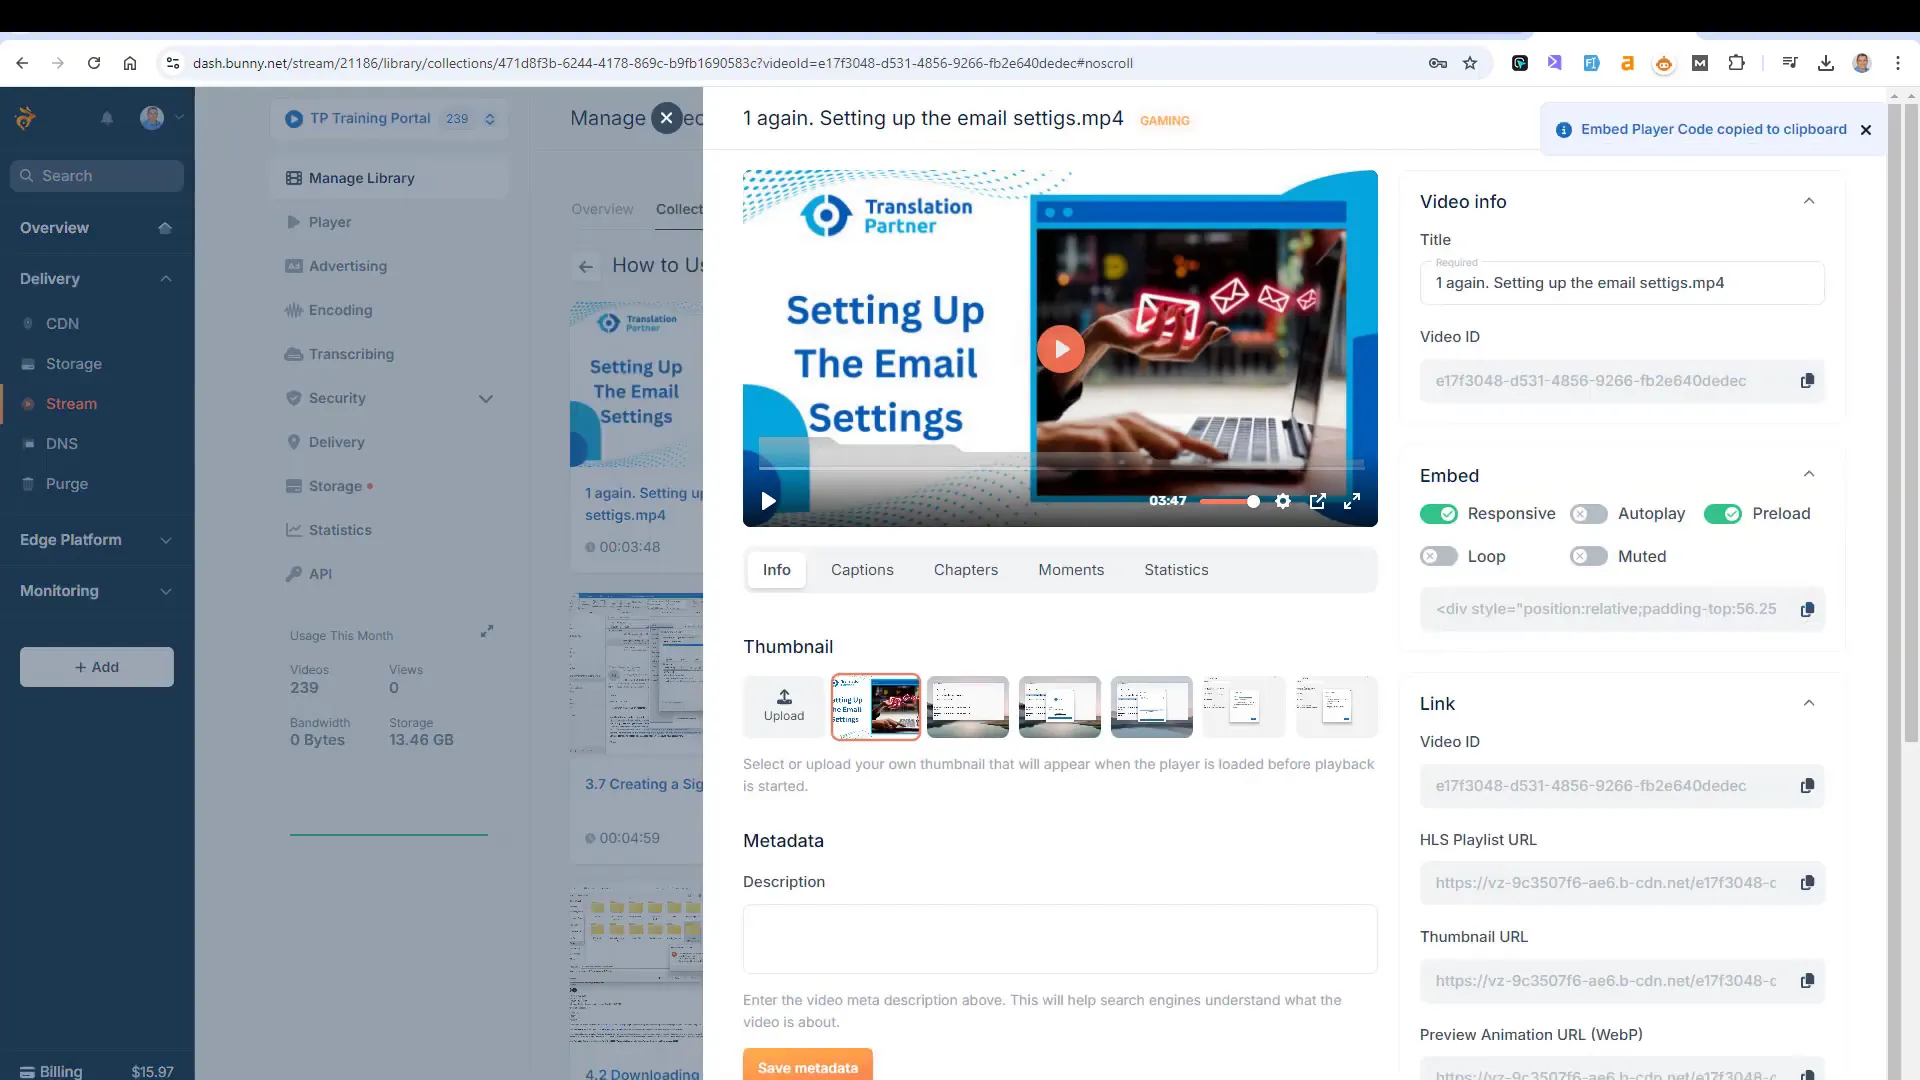
When embedding videos, it’s crucial to choose the right platform. While YouTube is popular, hosting videos on a platform like Vimeo or a dedicated service like Bali.net can provide more control over your content and enhance the user experience.
Utilizing Focus Mode
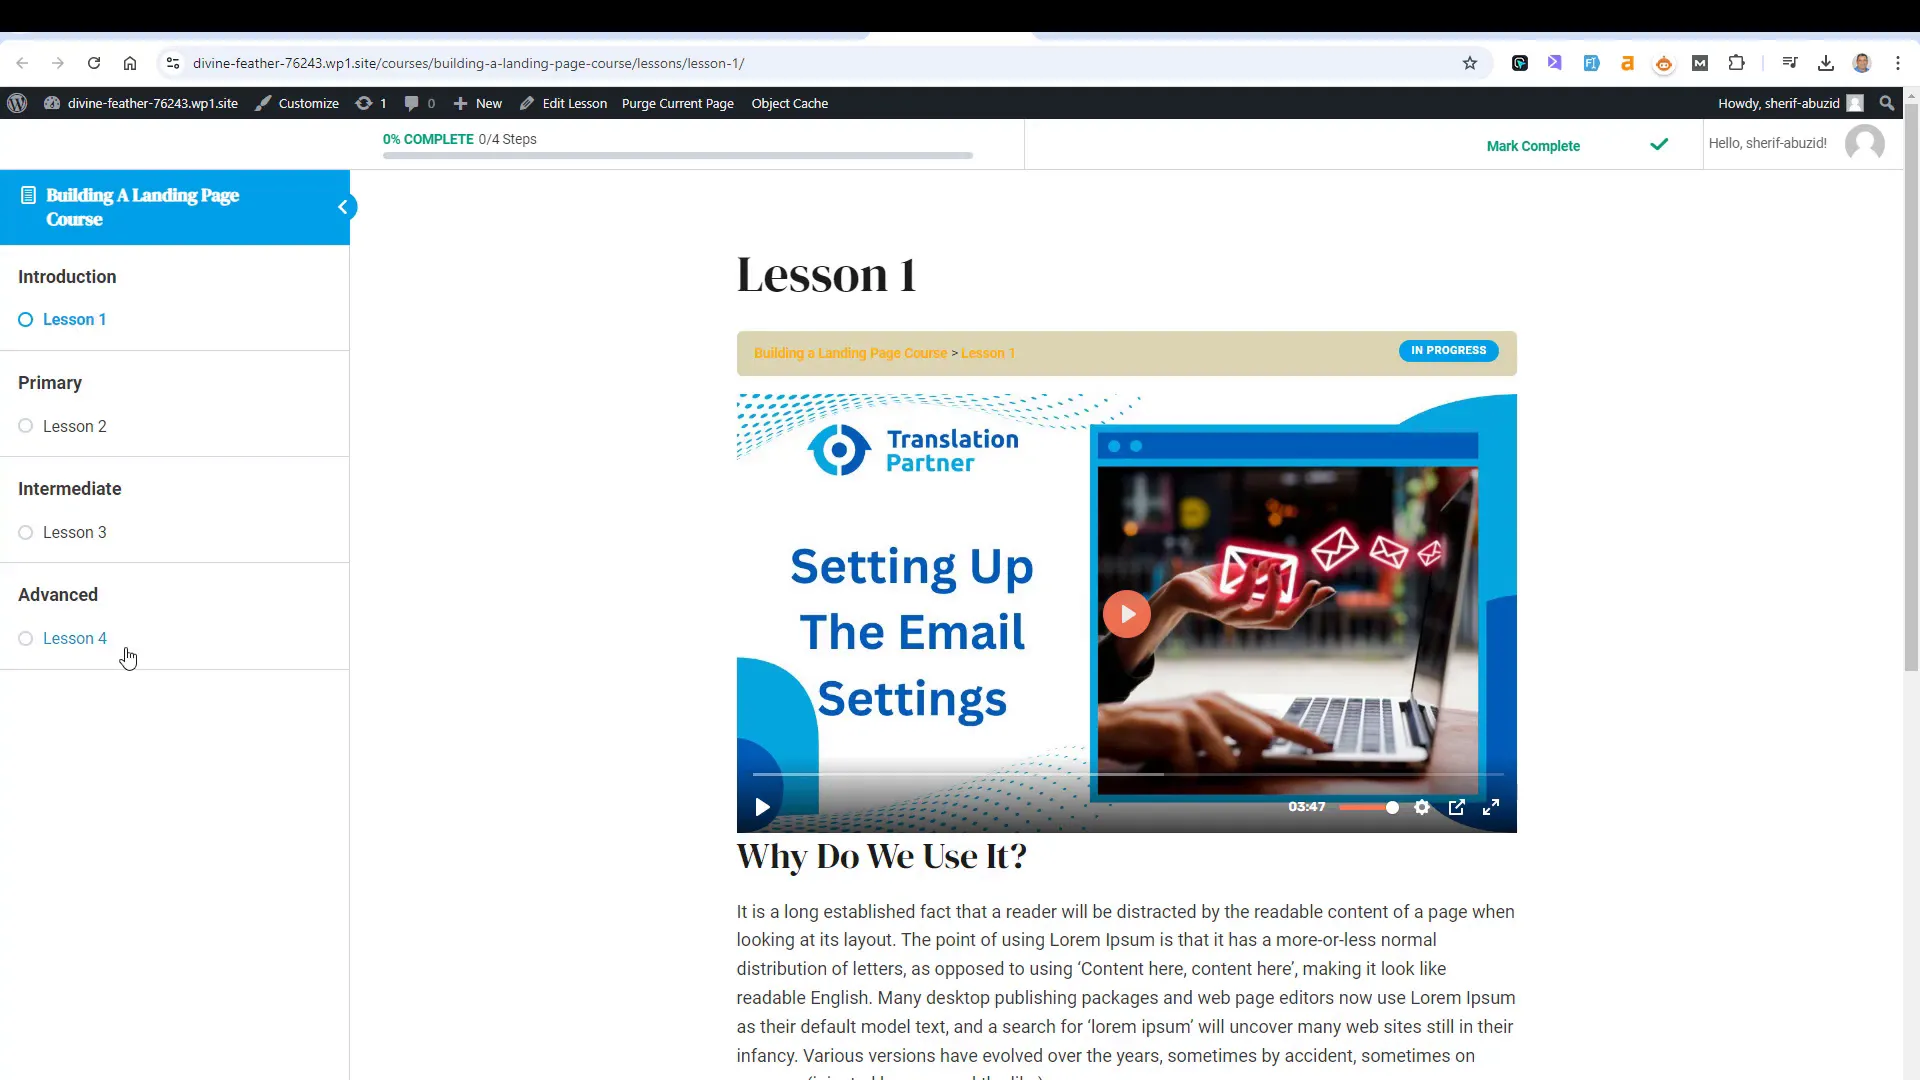
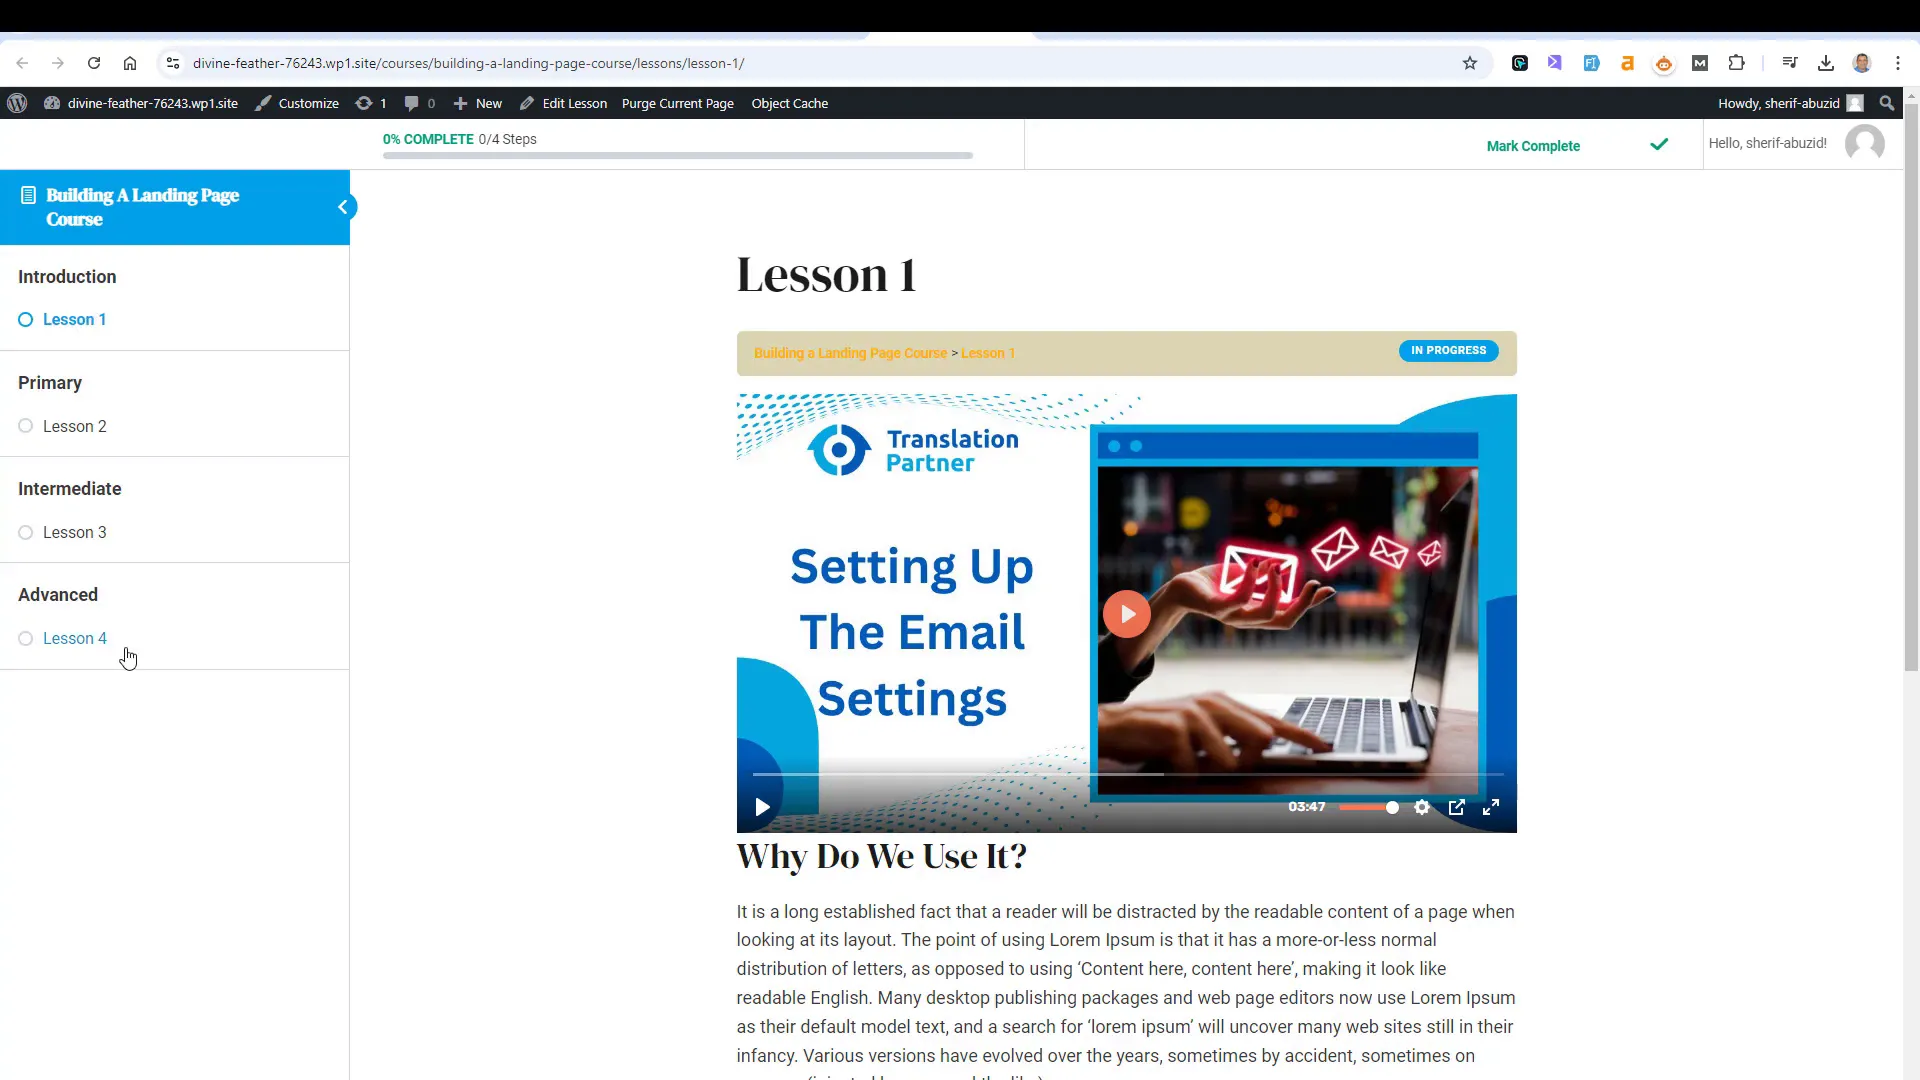
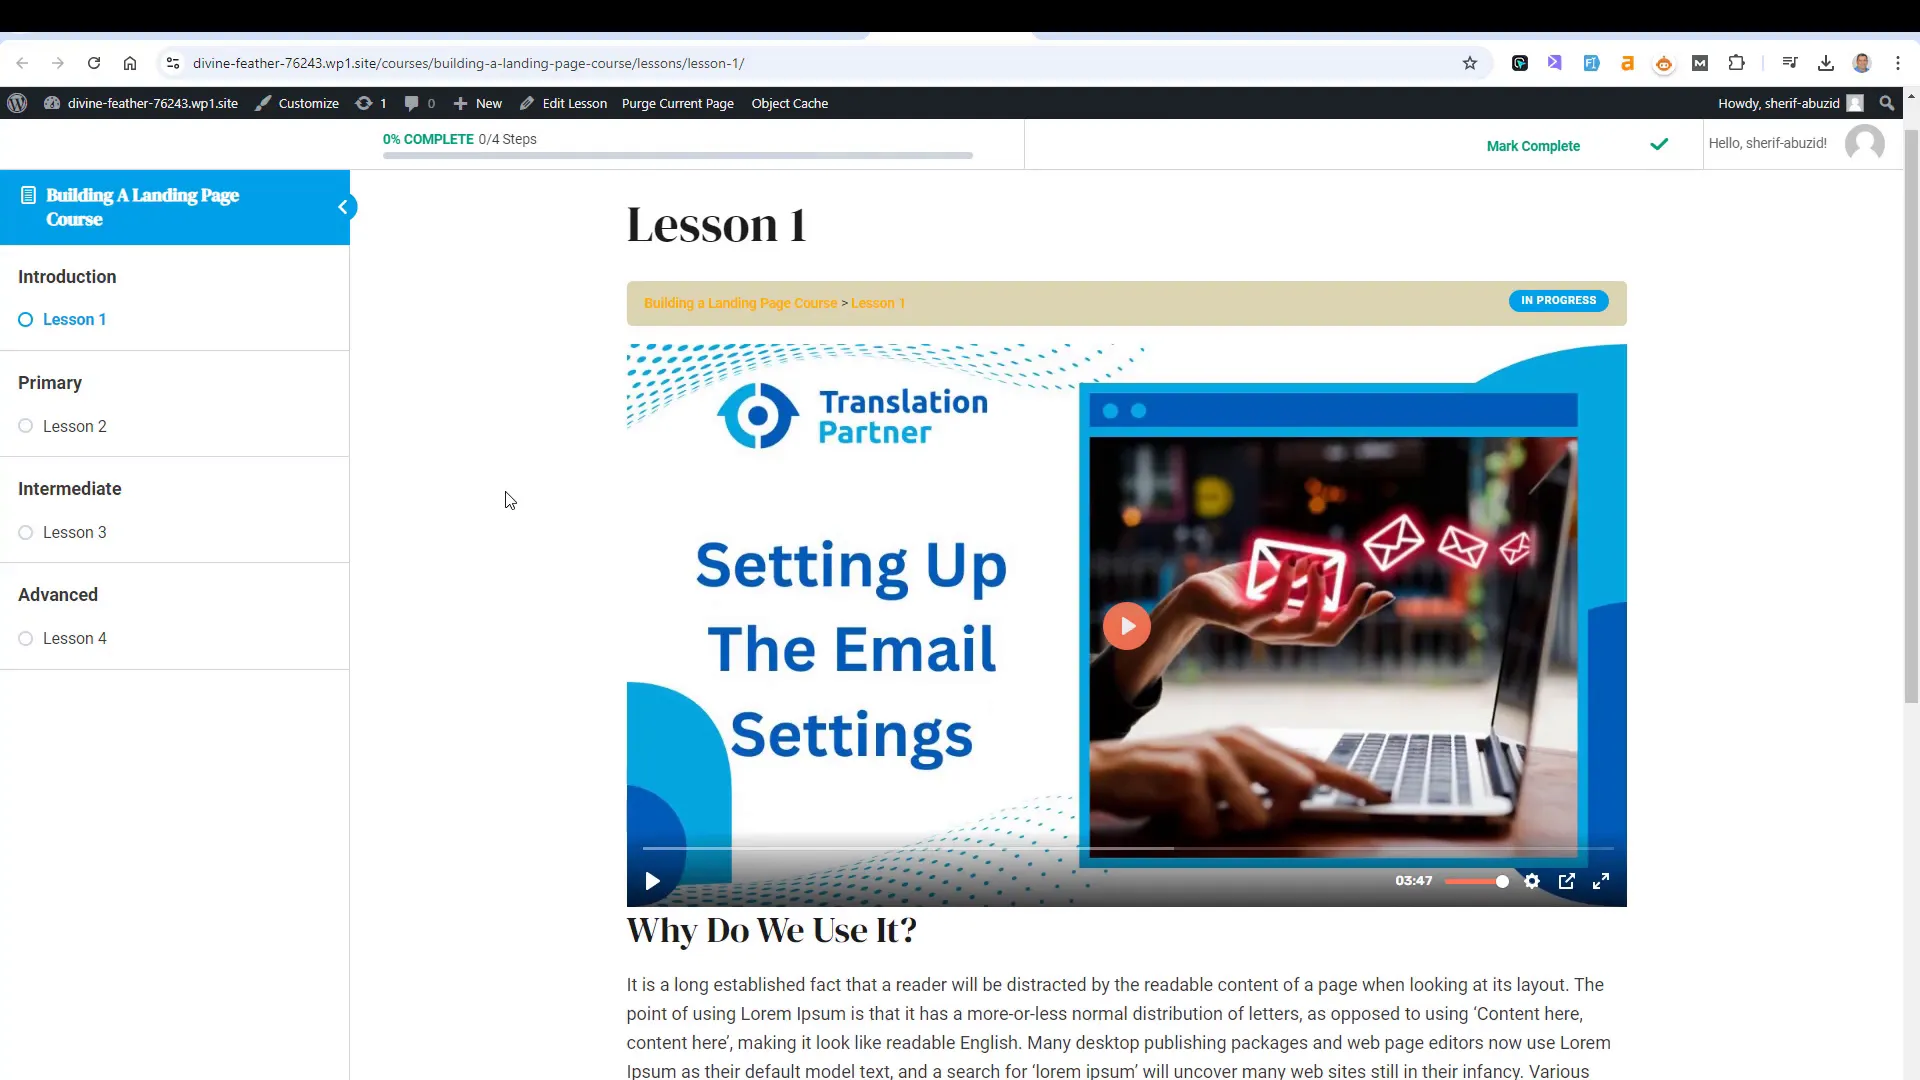
One of LearnDash’s standout features is the Focus Mode, which streamlines the learning environment by minimizing distractions. When activated, this mode provides a clean interface with a sidebar that helps students navigate through lessons efficiently.
Students can mark lessons as complete and track their progress directly from the sidebar, making it easier for them to stay organized and engaged with the course material.
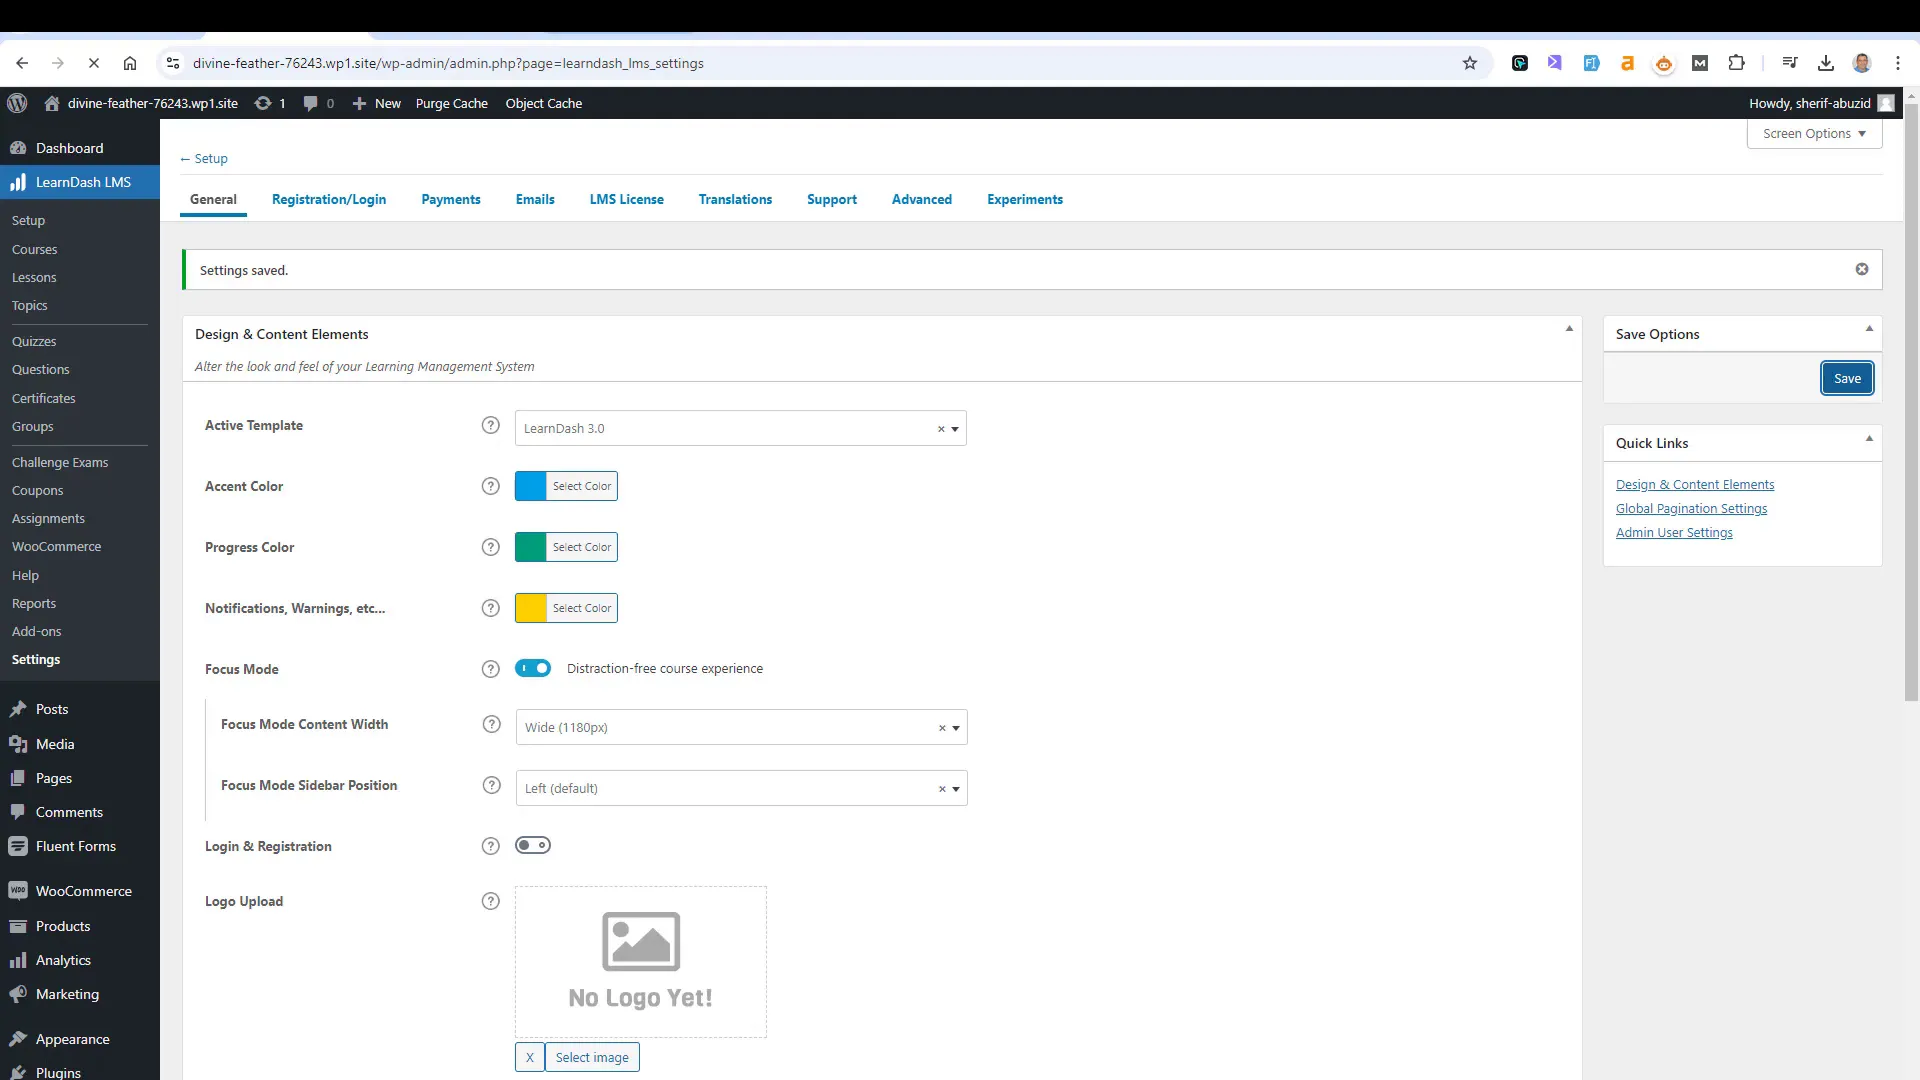
Experimenting with different settings in the Focus Mode can further enhance the visual appeal of your course, ensuring a consistent experience across different devices and themes.
Building Course Structure
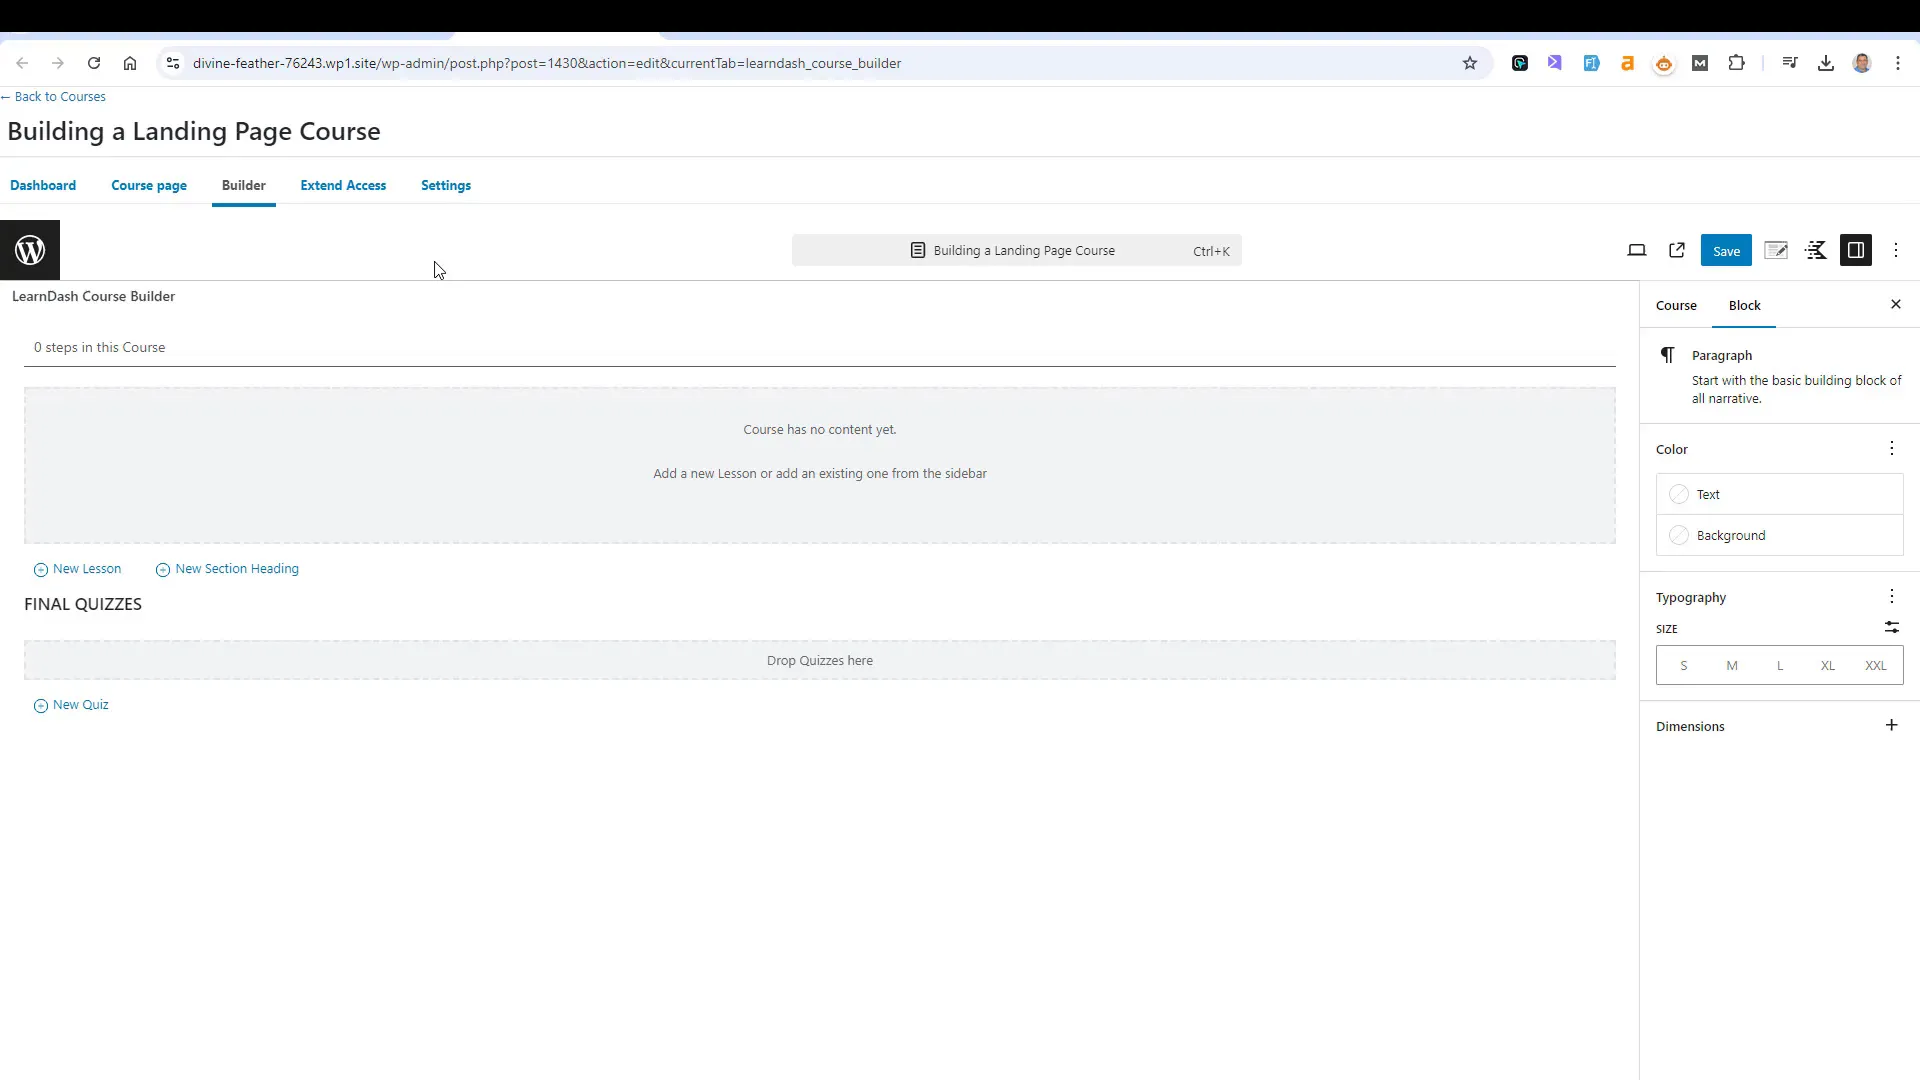
Creating a well-organized course structure is vital for effective learning. In LearnDash, you can create sections or modules that categorize your content, making it easier for students to navigate.
Creating Modules
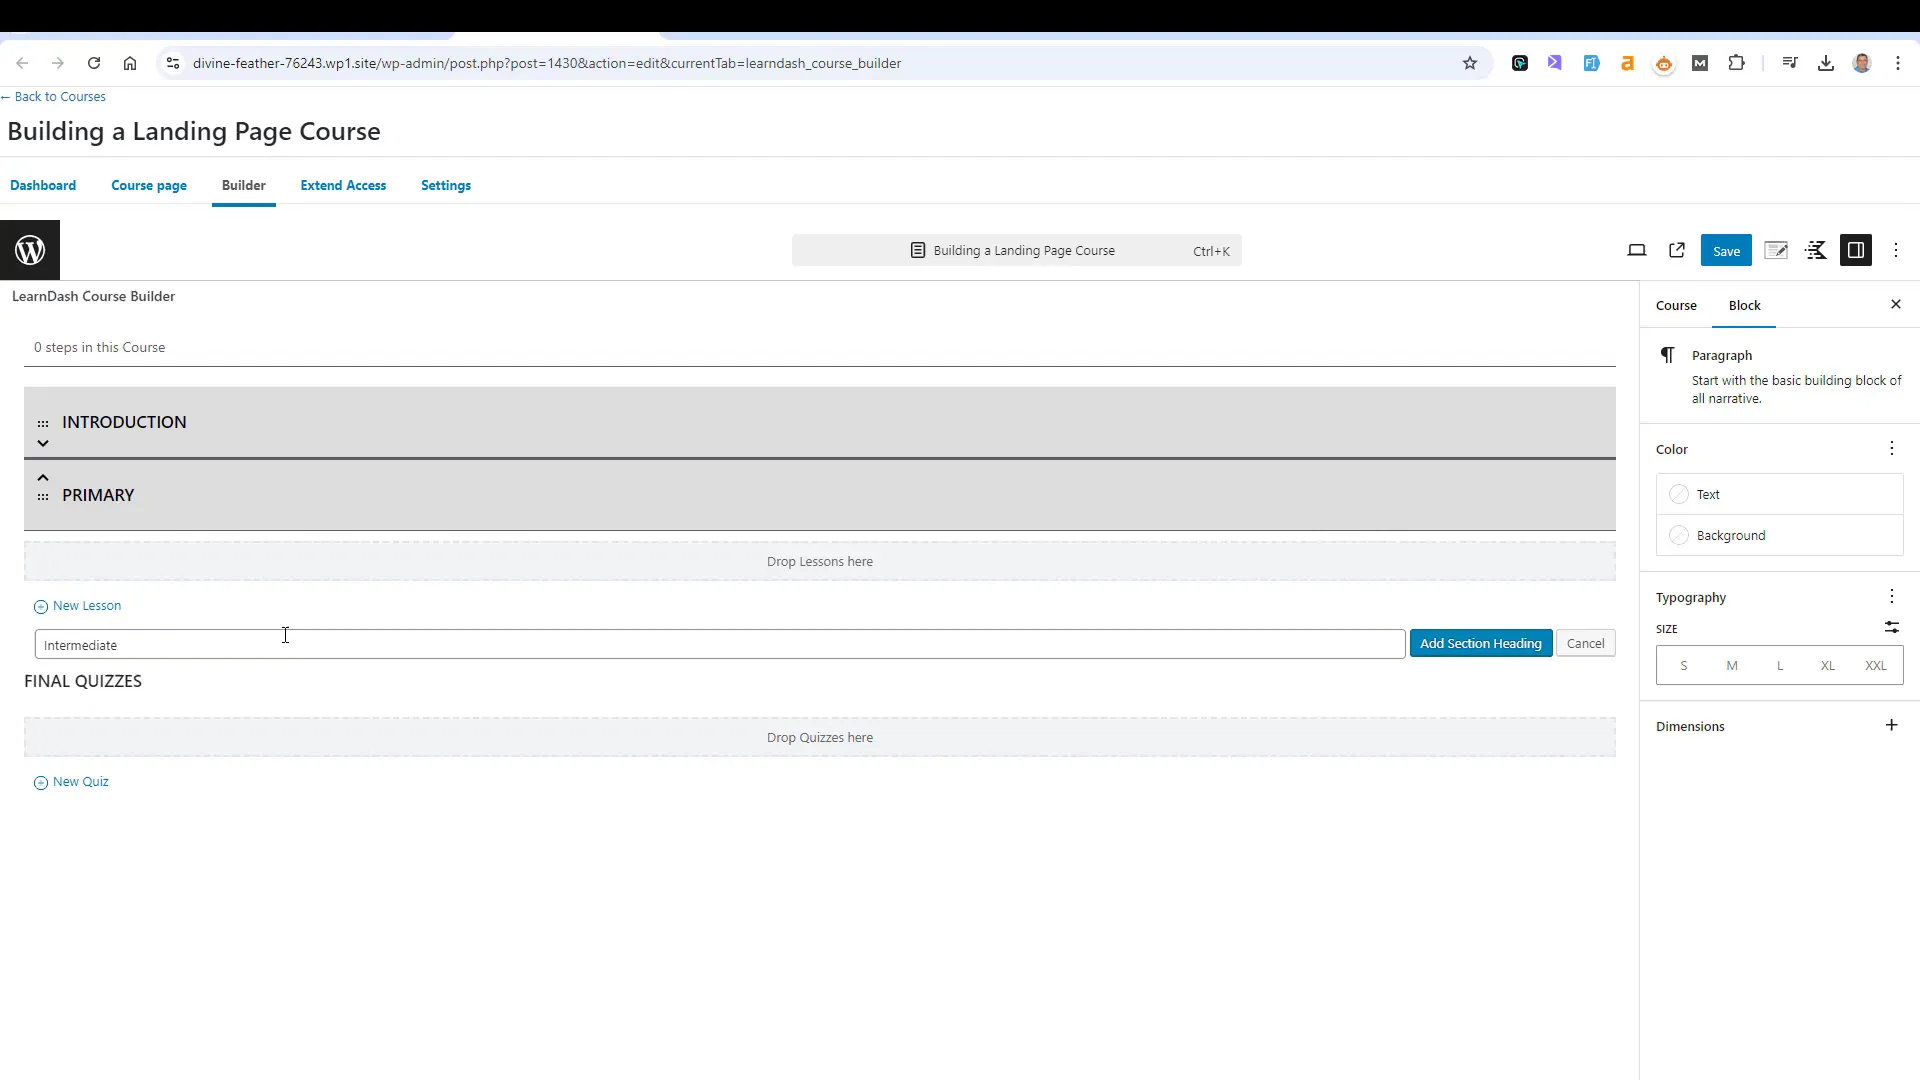
To create a module, simply add a section in the course builder and label it appropriately, such as “Introduction,” “Primary,” “Intermediate,” and “Advanced.” This structure not only organizes the content but also sets clear expectations for students.
Adding Lessons
Once your modules are set, you can start adding lessons. Click on “New Lesson” to create lessons under each module. This drag-and-drop feature allows you to arrange lessons in a way that suits your teaching style.
Adding Lessons and Content
With your course structure in place, it’s time to populate it with engaging content. Each lesson can include various types of media, such as text, videos, and images, to cater to different learning styles.
Content Types
- Text: Provide clear, informative text to explain concepts.
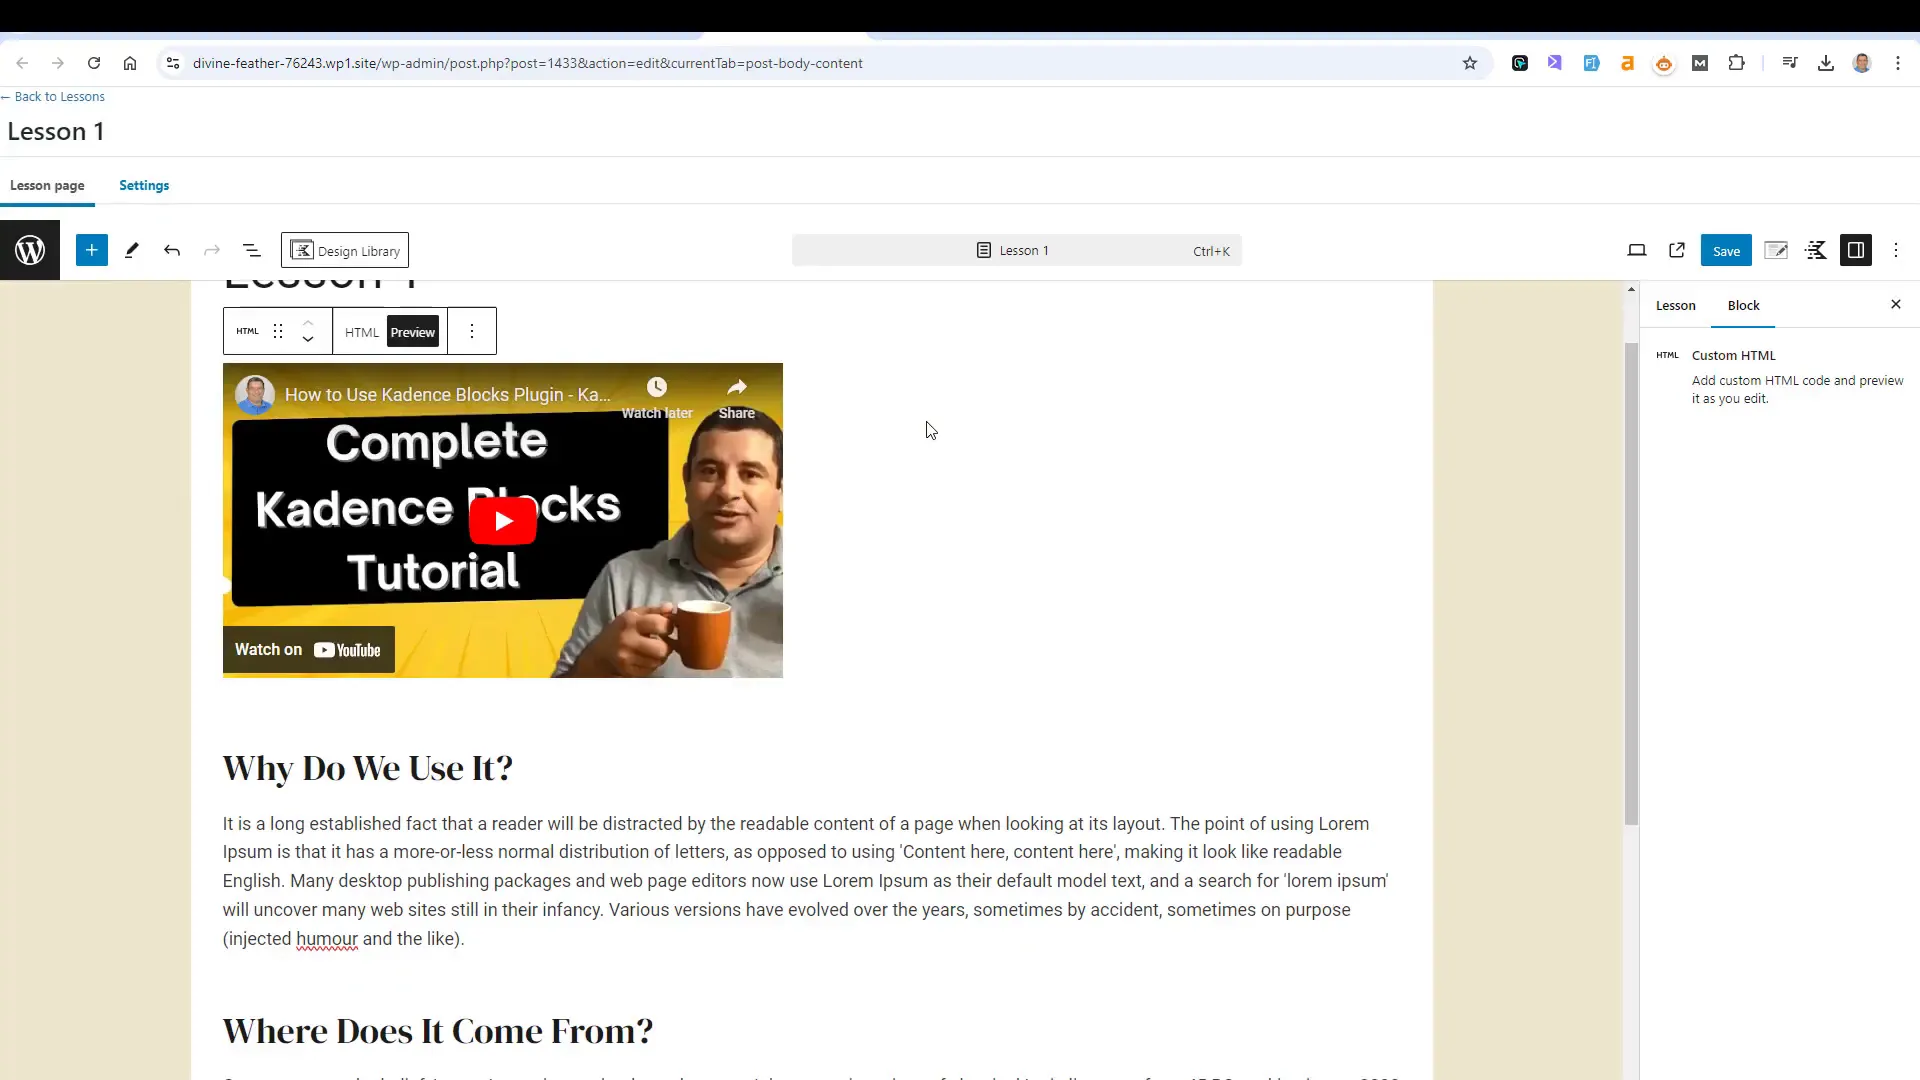
- Videos: Embed videos to offer visual explanations. Consider using dedicated platforms for hosting.
- Images: Use relevant images to enhance understanding and retention.
Embedding Videos
When embedding videos, choose a reliable hosting platform. While YouTube is common, using services like Bali.net ensures better control over your content and avoids unauthorized access.
Incorporating Quizzes
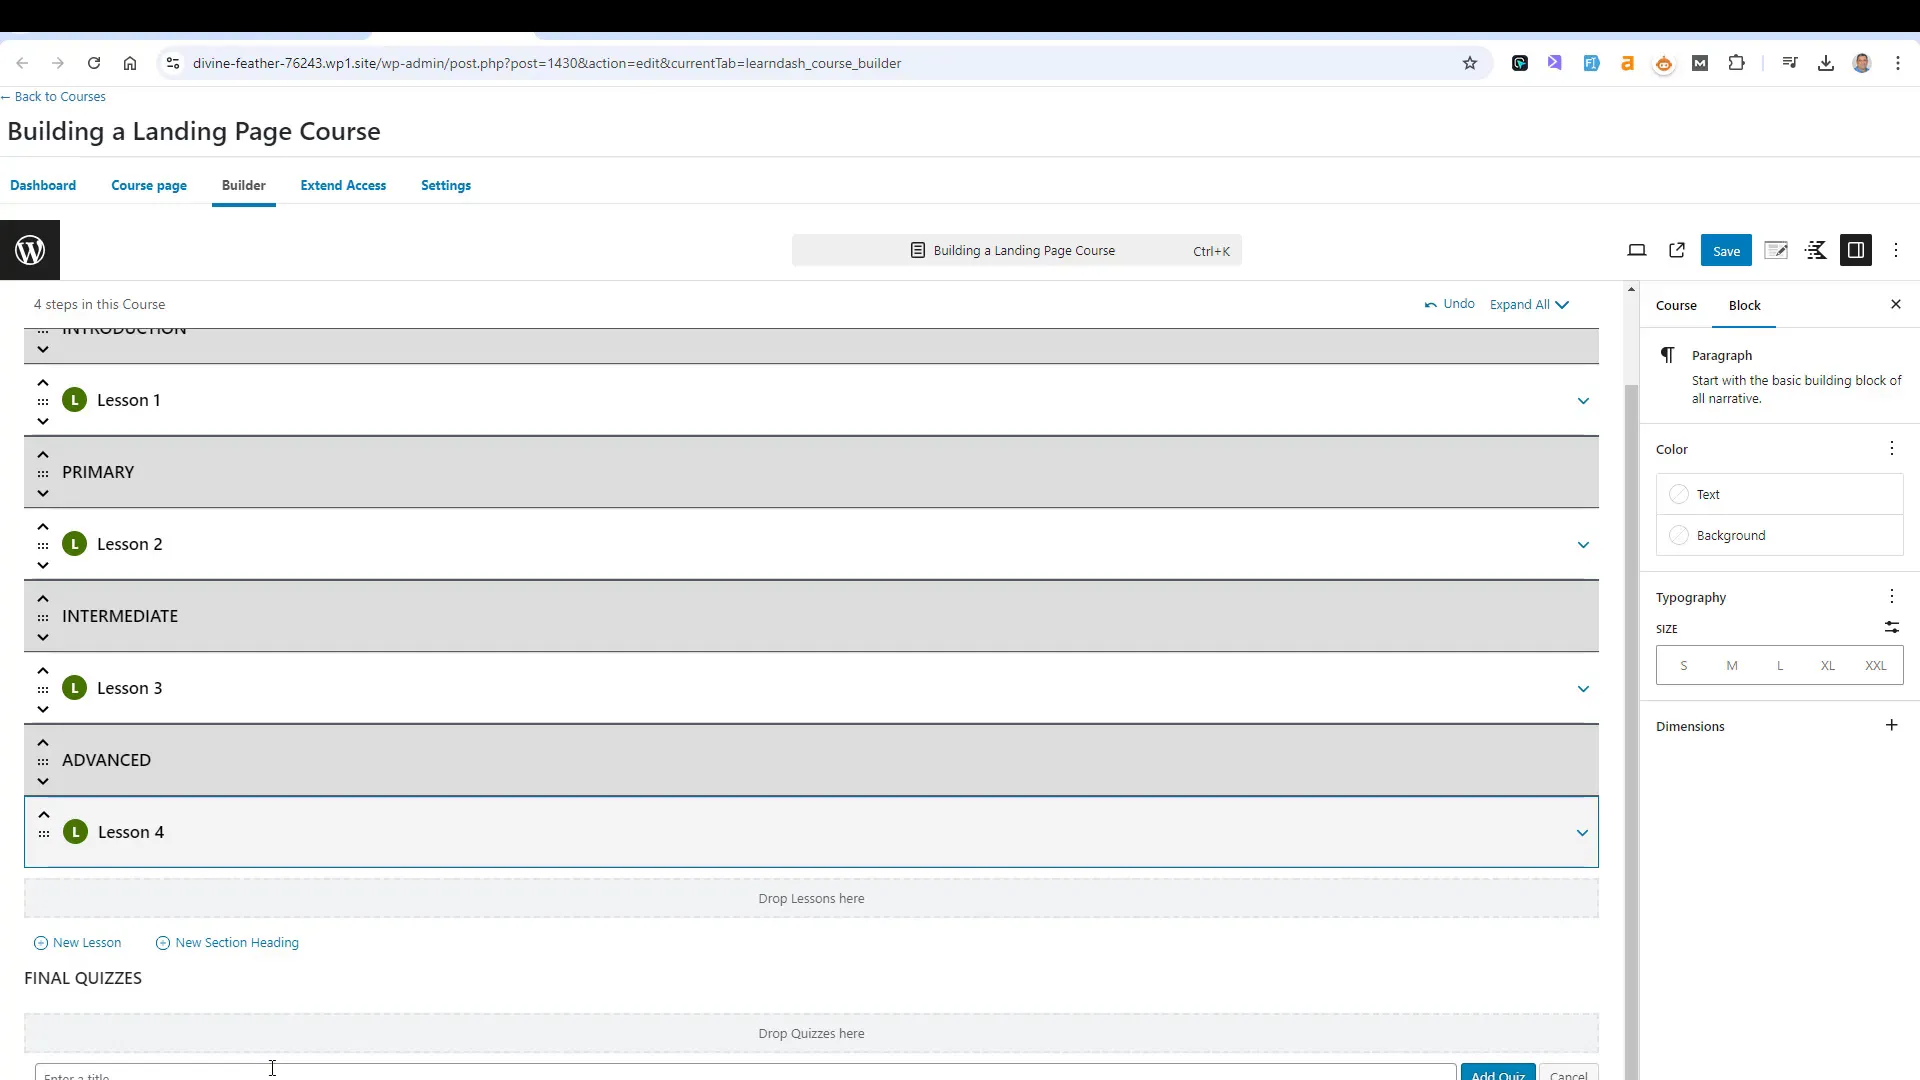
Quizzes are an integral part of any online course as they reinforce learning and assess student knowledge. In LearnDash, adding quizzes is straightforward and can be done within the course builder.
Creating a Quiz
To create a quiz, select the “Add Quiz” option within your course. You can define the title and customize the quiz settings to align with your course goals.
Quiz Features
- Question Types: Choose from multiple-choice, true/false, or open-ended questions.
- Grading Options: Set automatic grading or manual review based on your preference.
- Feedback: Provide immediate feedback to enhance the learning experience.
Enhancing Student Experience with Focus Mode
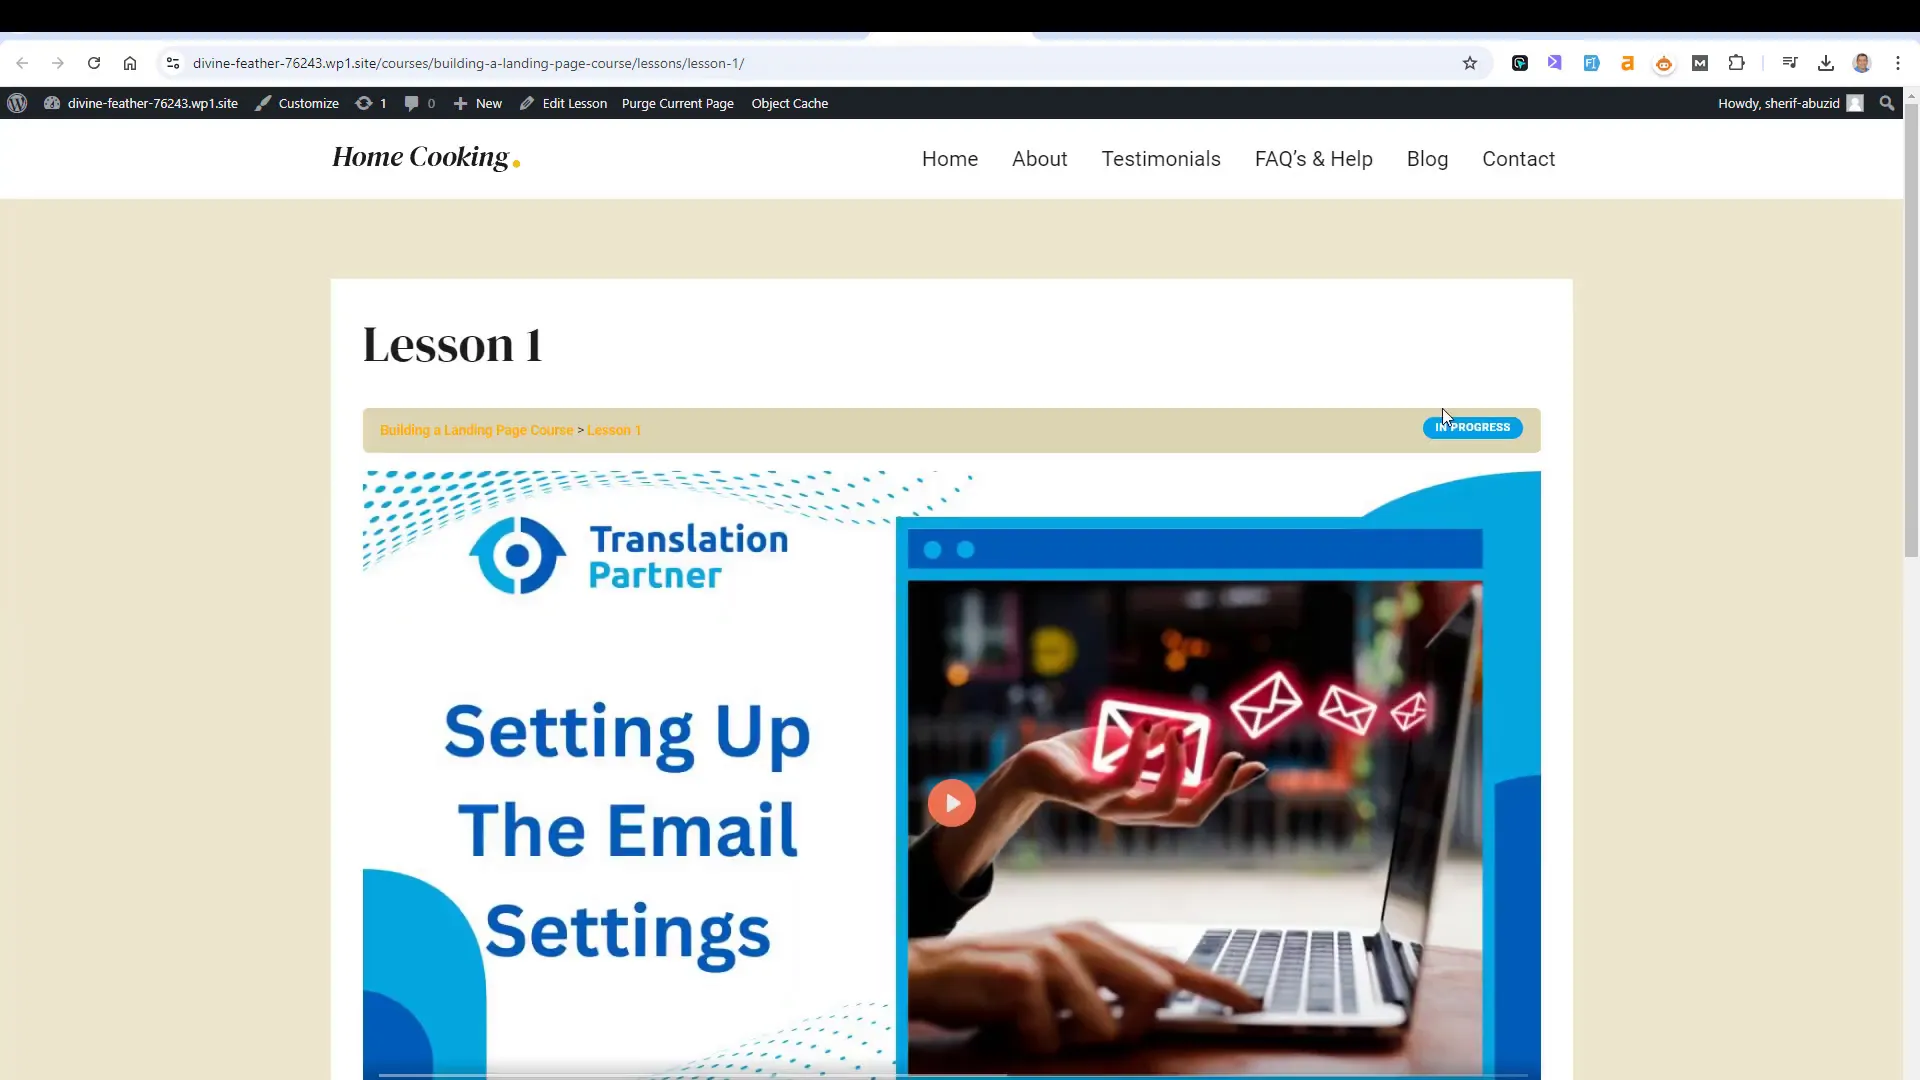
Focus Mode is a powerful feature in LearnDash that enhances the learning experience by minimizing distractions. It streamlines the interface, allowing students to concentrate on their lessons.
Benefits of Focus Mode
- Distraction-Free Learning: Removes unnecessary elements from the screen.
- Progress Tracking: Students can easily mark lessons as complete and track their progress.
- Customizable Settings: Adjust settings to suit your course’s visual style and layout.
Activating Focus Mode
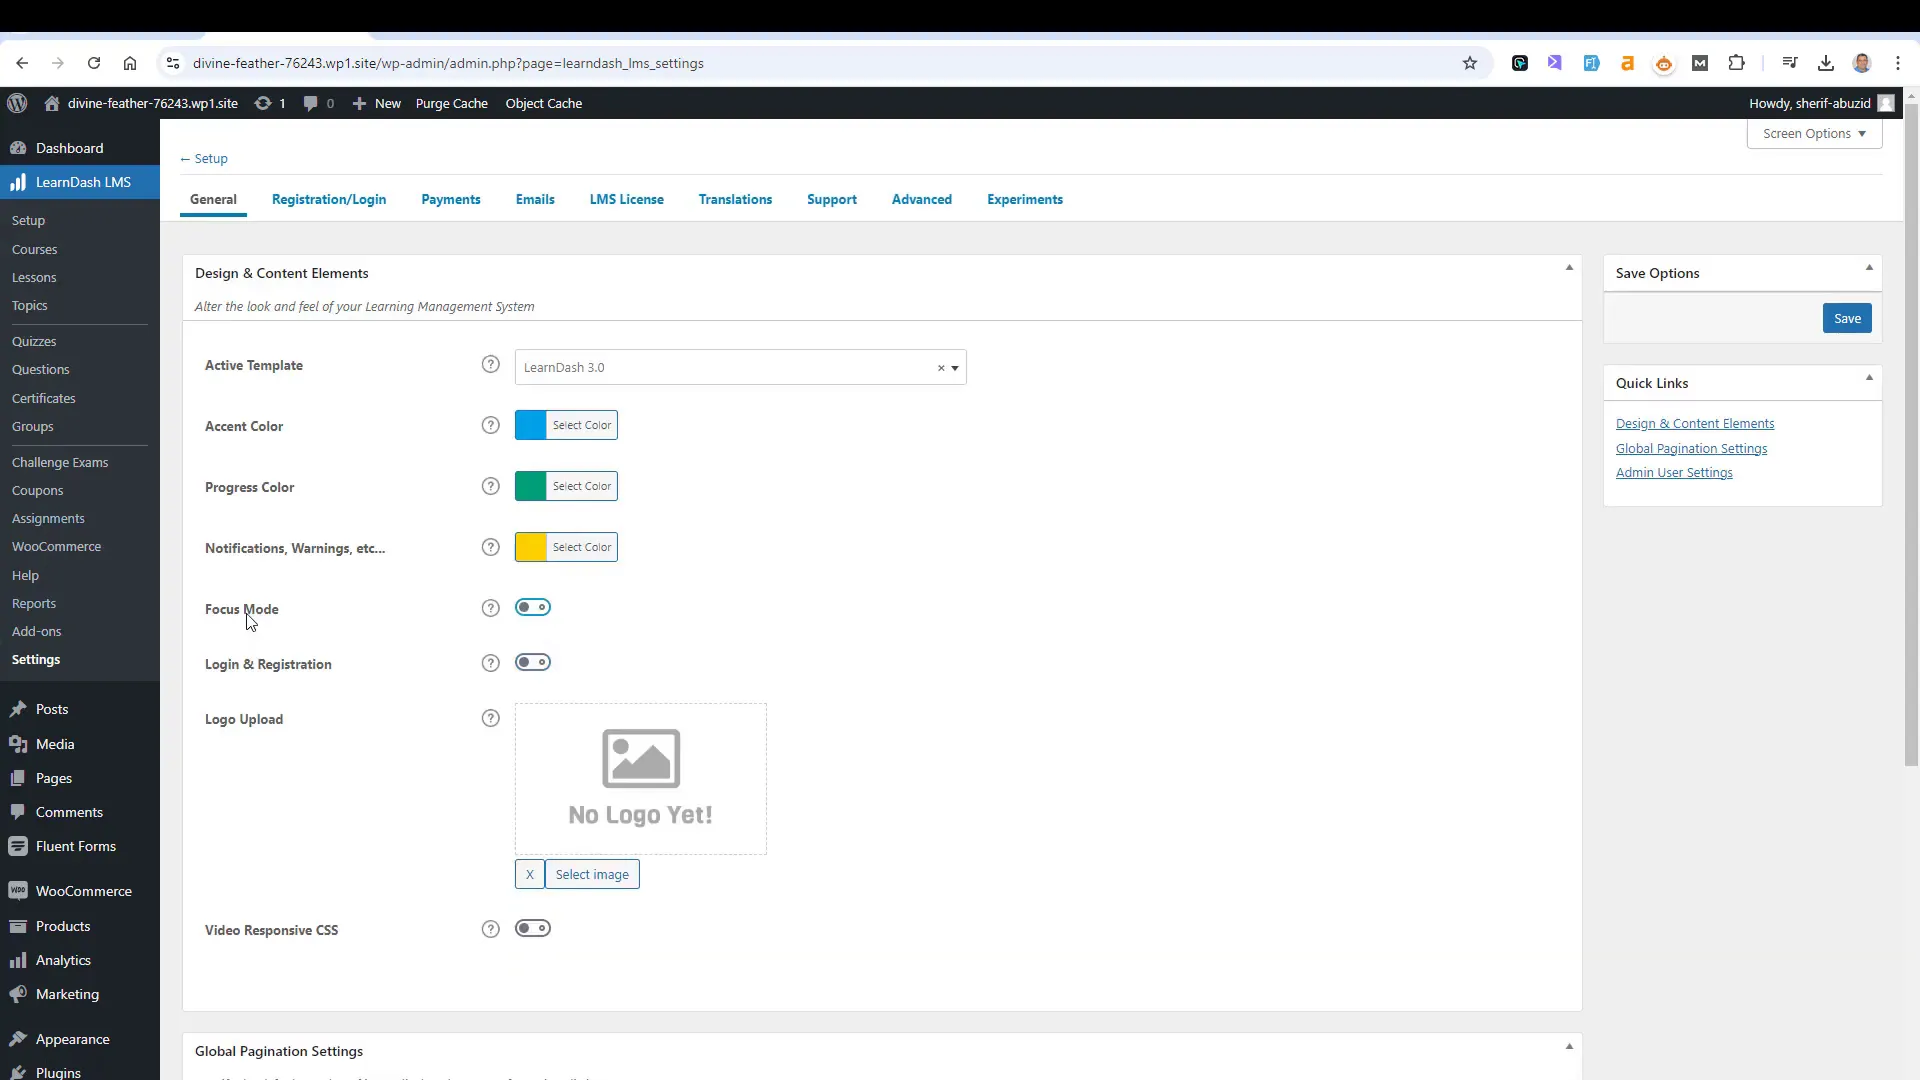
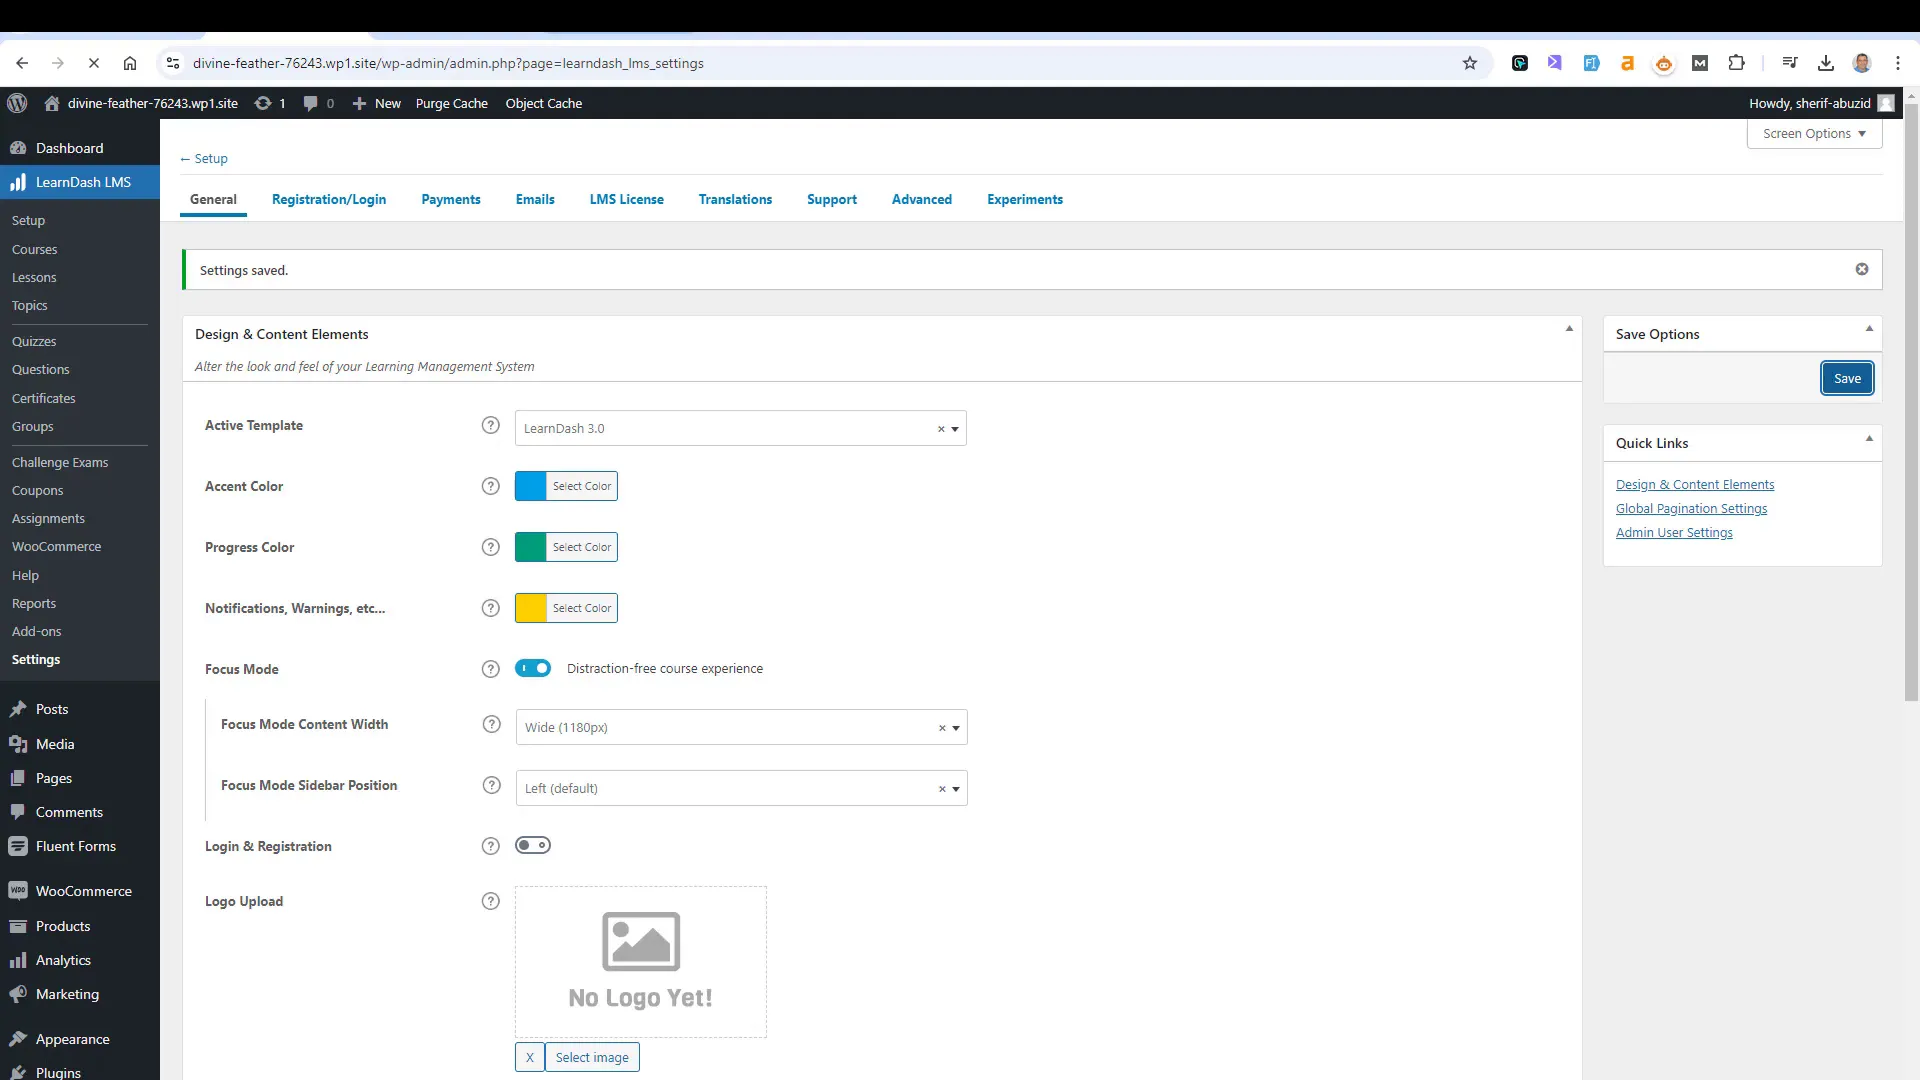
To activate Focus Mode, navigate to the settings tab and toggle the feature on. You can customize various aspects, including the sidebar’s position and appearance.
Final Thoughts and Recommendations
Creating an online course website with WordPress using LearnDash is a rewarding endeavor. By carefully structuring your course, adding diverse content, and utilizing features like quizzes and Focus Mode, you can significantly enhance the learning experience.
Consider gathering feedback from your students regularly. This feedback will help you understand their needs better and make necessary adjustments to improve course delivery.
Frequently Asked Questions

