In this comprehensive guide, we will delve into creating a Lead Generation Page in WordPress using powerful yet free tools like Fluent Forms and Kadence Blocks. Whether you’re a business owner or a marketer, this step-by-step approach will help you effectively capture leads and enhance your online presence.
Introduction to Lead Generation Pages
Creating a Lead Generation Page in WordPress is essential for businesses looking to capture potential customers effectively. A well-designed lead generation page is a powerful tool to drive conversions by encouraging visitors to provide their contact information. This process not only enhances your marketing efforts but also helps in building a robust customer database.
Essential Tools for Building Your Page
To create an effective Lead Generation Page in WordPress, you’ll need some essential tools. The primary tool is Fluent Forms, a powerful form builder that allows you to create custom forms easily. The second is Kadence Blocks, which helps in designing the layout of your page. Both tools are free and user-friendly, making them ideal for anyone looking to enhance their website’s functionality.
Installing Fluent Forms
To get started, navigate to your WordPress dashboard. Click on ‘Plugins’ and then ‘Add New’. In the search bar, type ‘Fluent Forms’. Once the plugin appears, click ‘Install Now’ and then ‘Activate’. This will add Fluent Forms to your list of installed plugins.
Installing Kadence Blocks
Next, repeat the process for Kadence Blocks. Search for ‘Kadence Blocks’ in the ‘Add New’ plugins section. Click ‘Install Now’ and then ‘Activate’. With both plugins installed, you’re ready to create your Lead Generation Page.
Creating a New Page in WordPress
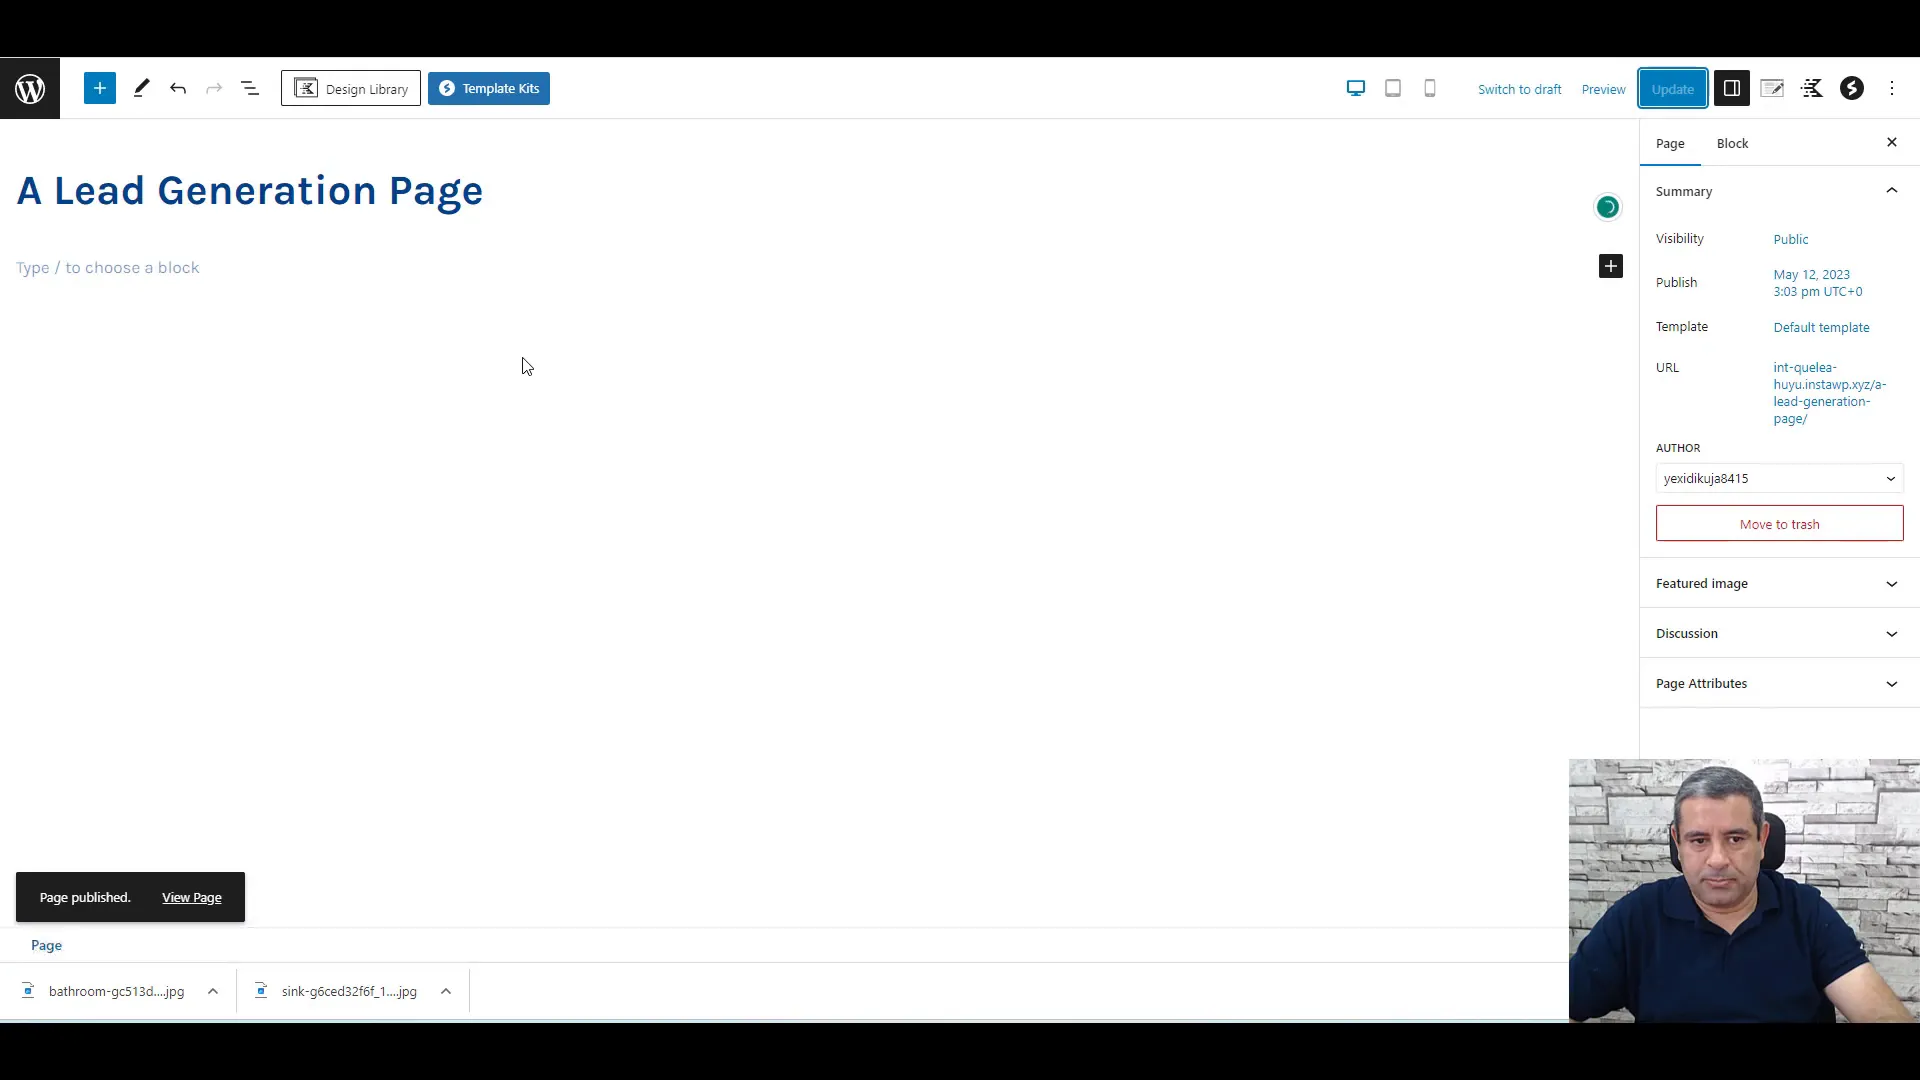
Now that you have the necessary tools, it’s time to create your new page. Go to ‘Pages’ and click ‘Add New’. Name your page something like ‘Lead Generation Page’ and hit ‘Publish’. This will set the foundation for your lead-generation efforts.
Designing the Page Layout
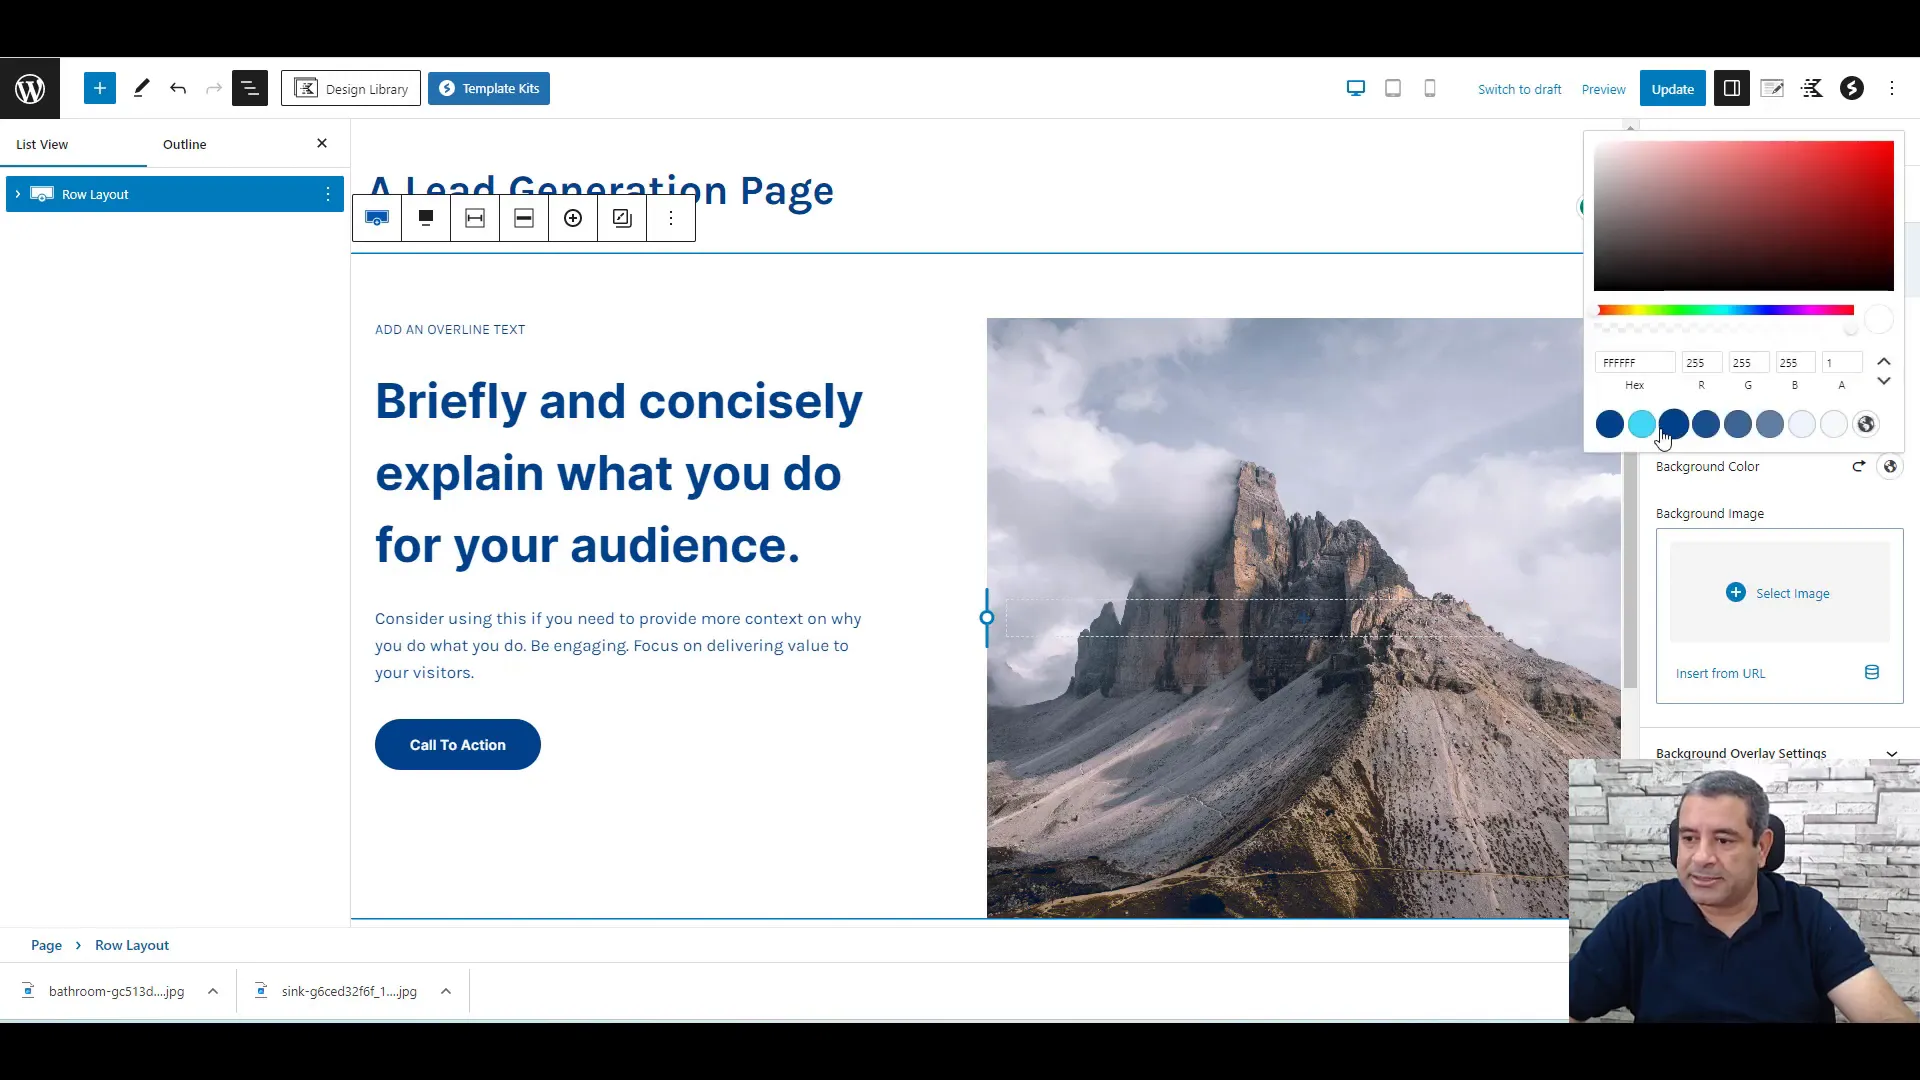
With your page created, it’s time to focus on the layout. Use Kadence Blocks to add different sections to your page. Start by selecting a hero section to make your page visually appealing. Adjust the background color and text colors to match your branding.
To create a cohesive look, you can duplicate sections as needed and modify the content accordingly. This will help maintain a consistent design throughout your page.
Adding Additional Sections and Testimonials
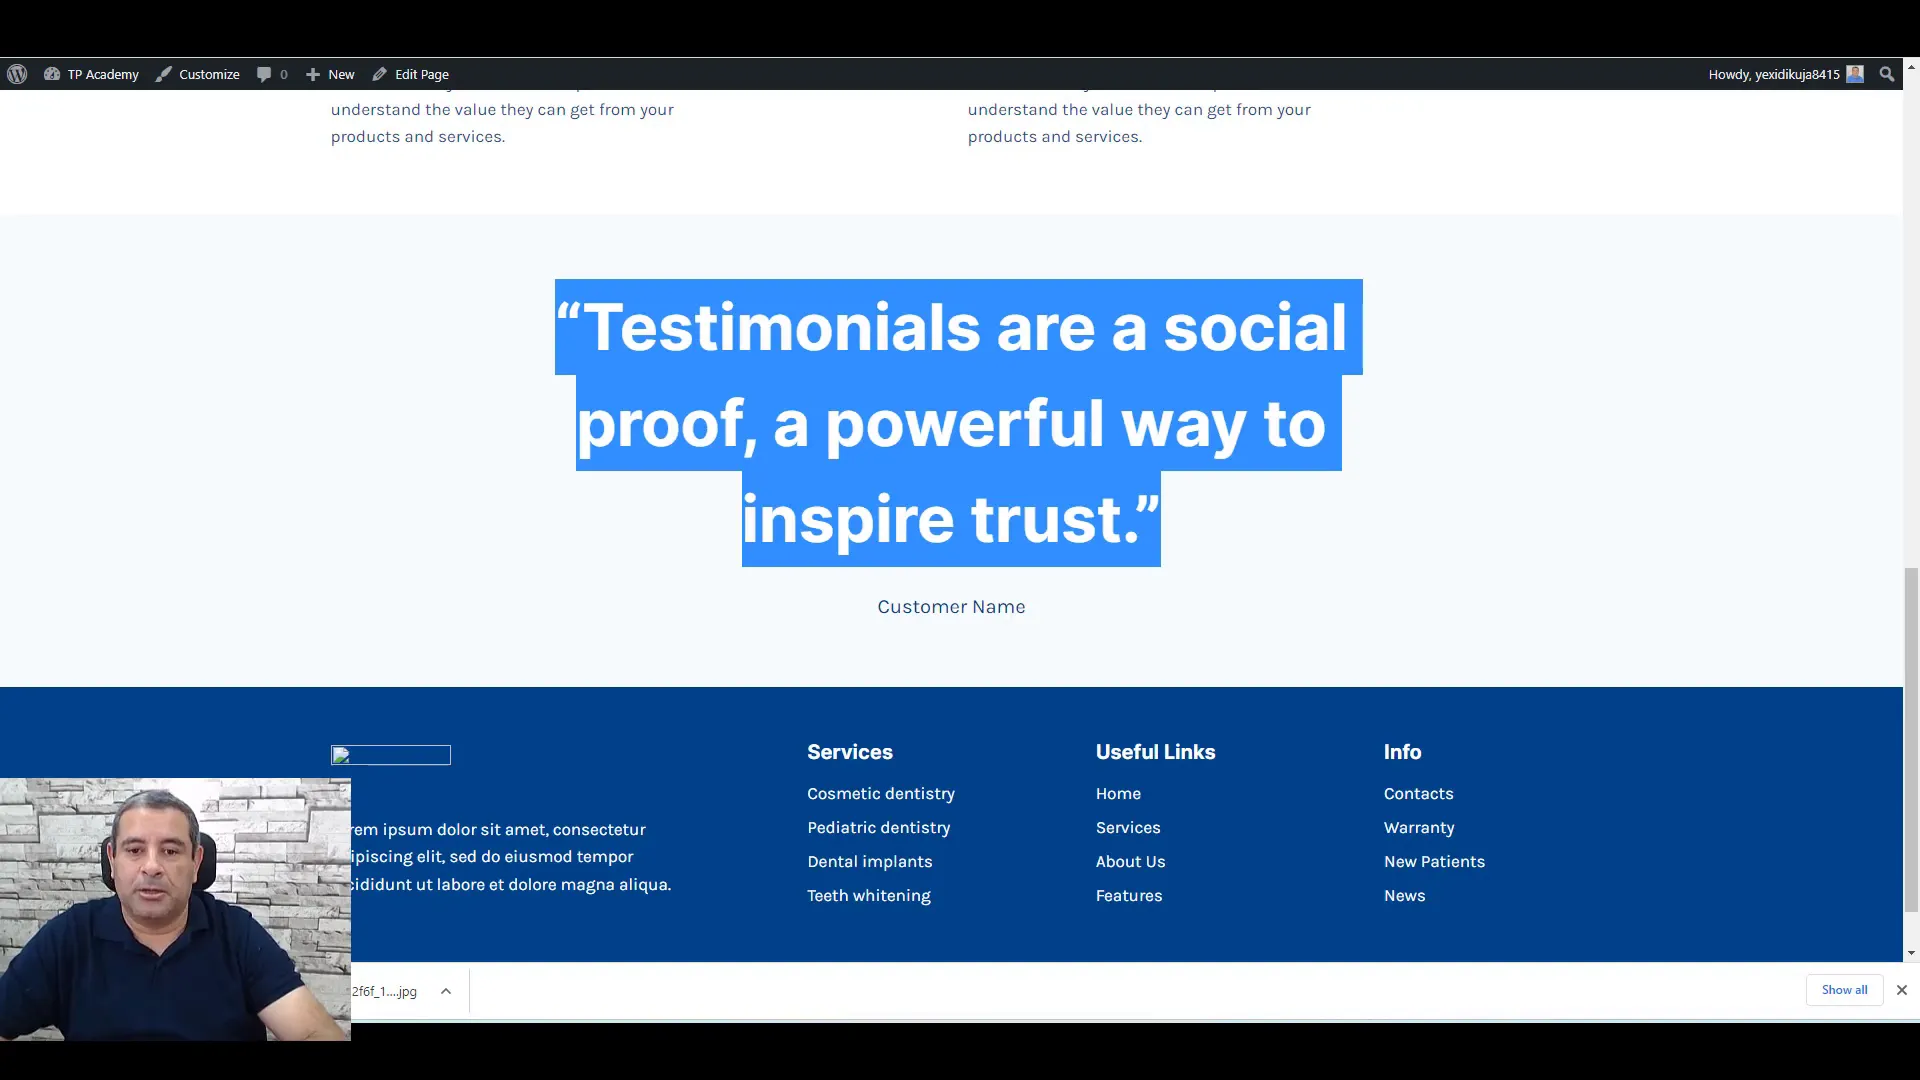
Once you have the basic layout, it’s important to add additional sections that can enhance the user experience. Consider including testimonials, which are critical for building trust with potential clients. Navigate to the design library and select a testimonial block to incorporate positive feedback from previous customers.
Additionally, adding images of your services can provide visual context and further entice visitors to fill out your lead form. Each element should work together to create a compelling narrative that encourages action.
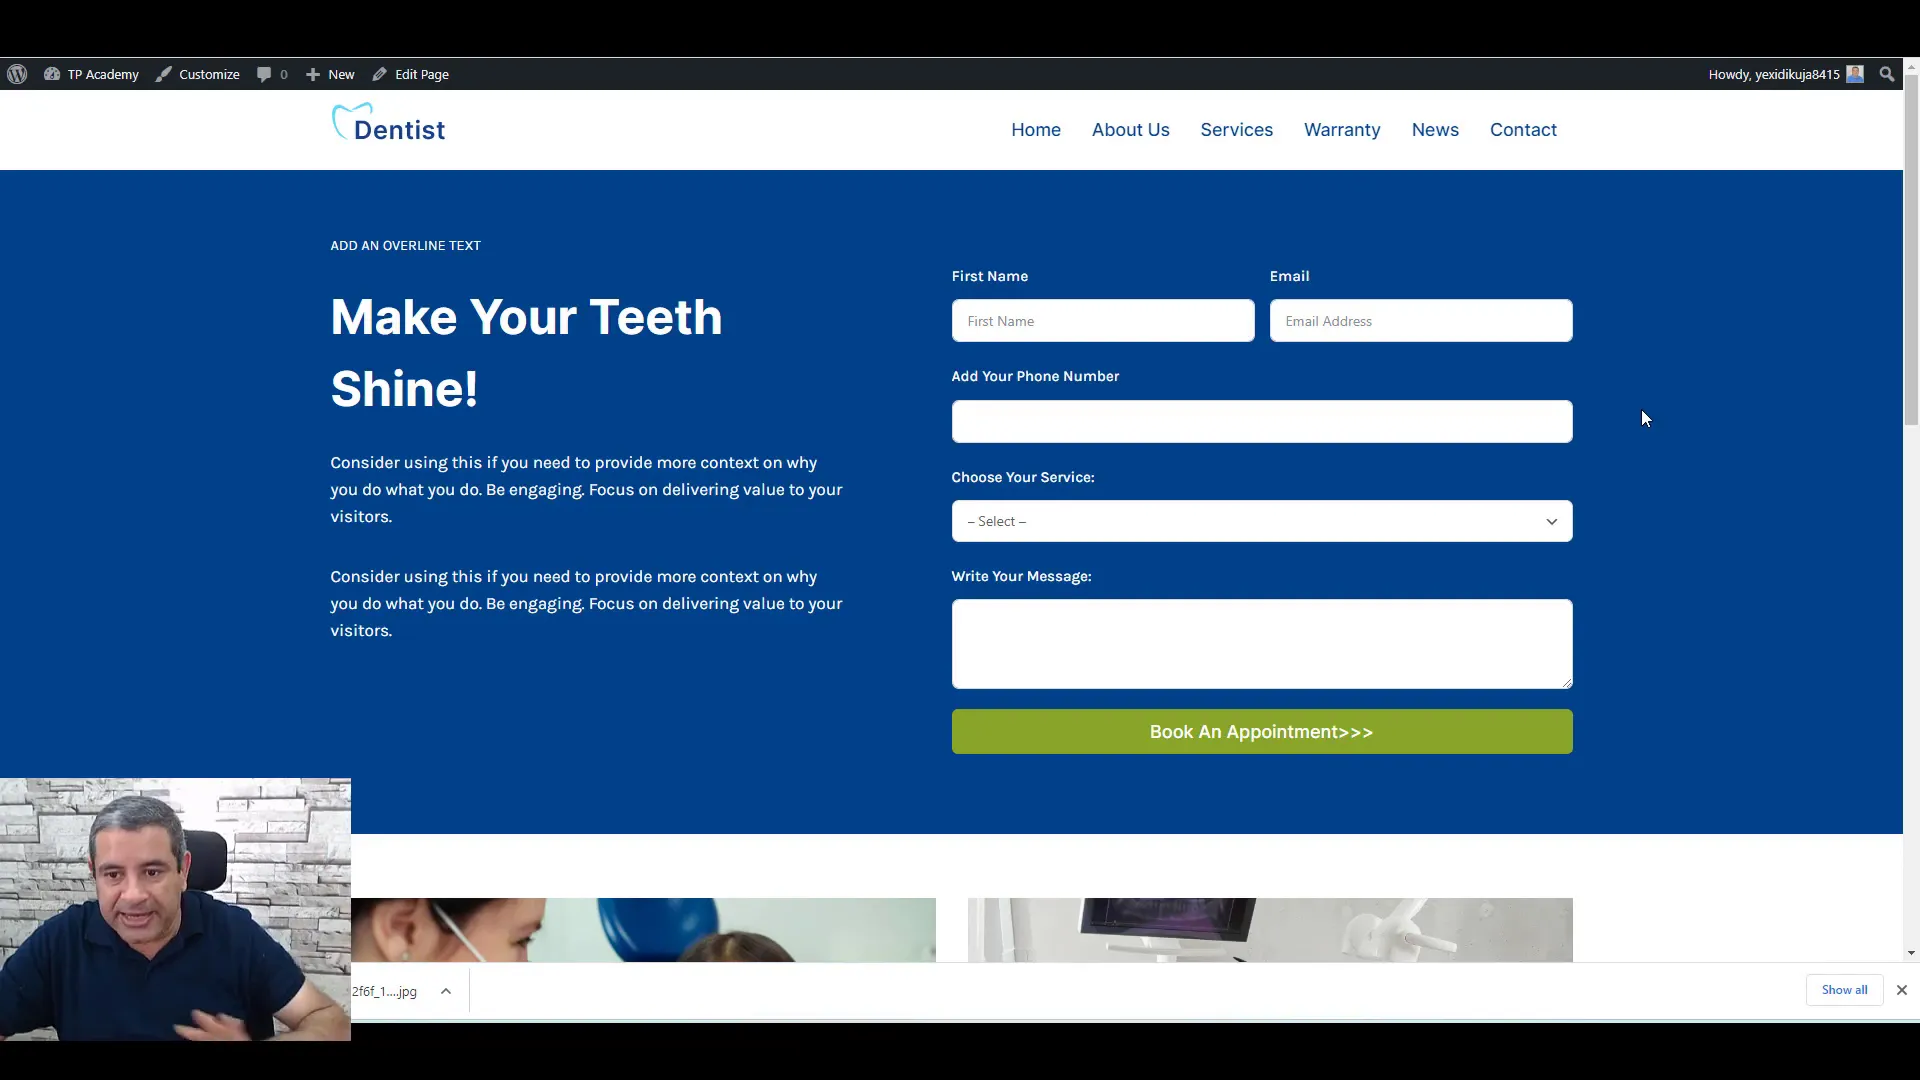
Don’t forget to include a clear and concise lead form. This is where Fluent Forms shines. Create a form that requests essential information such as the user’s name, email, phone number, and the service they are interested in. Make sure the form is easily accessible and visually appealing to maximize conversions.
Building the Lead Generation Form
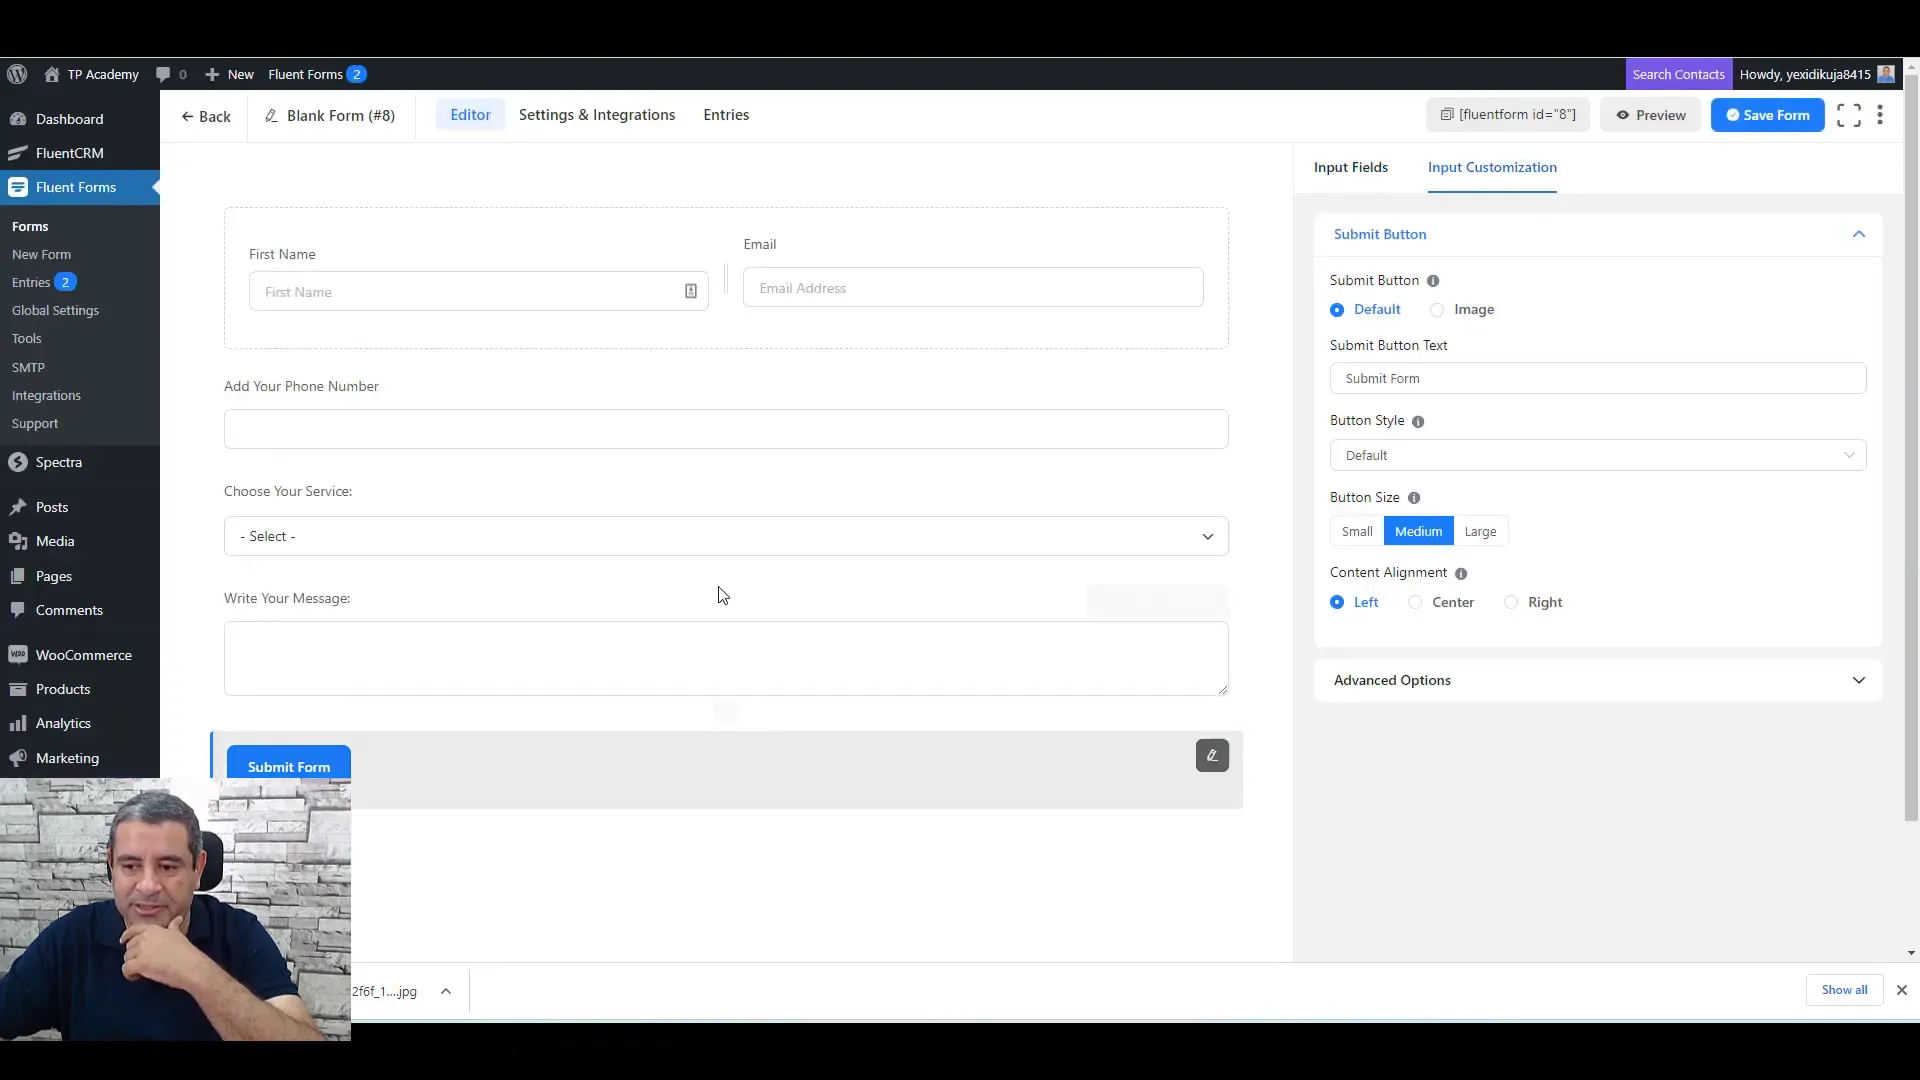
The heart of any Lead Generation Page in WordPress is the lead generation form itself. This is where your potential clients will provide their contact details and express their interest in your services. To create an effective form, you should focus on simplicity and clarity. Use Fluent Forms to craft a form that includes fields for the user’s first name, email address, phone number, and a dropdown menu for selecting services.
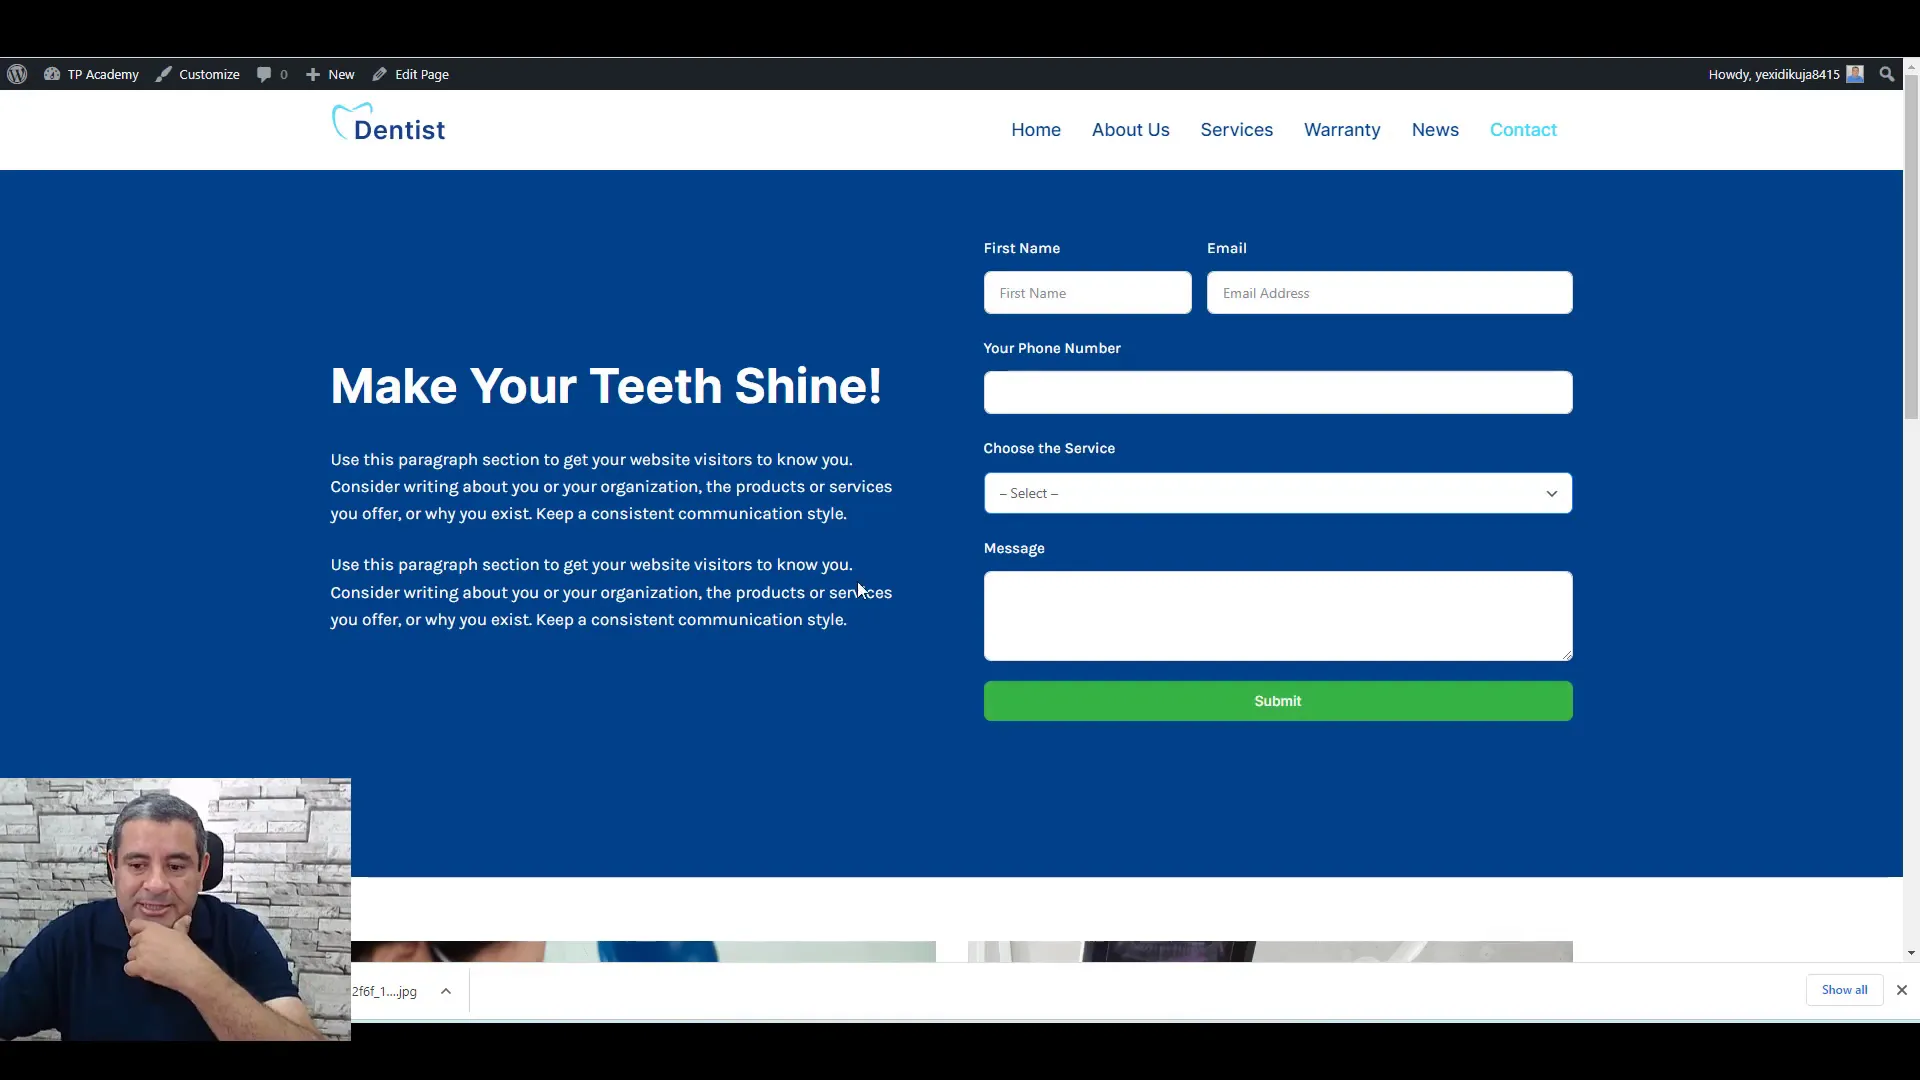
When designing your form, consider the following elements:
- First Name and Email: These fields should be prominently placed and easy to fill out. Group them side by side to save space.
- Phone Number: A numeric field is essential for direct communication. Clearly label it to prompt users to provide their number.
- Service Selection: Use a dropdown list to allow users to choose the services they are interested in. This not only streamlines the process but also helps you categorize leads effectively.
- Message Box: Include a text area for users to leave additional comments or questions.
- Call to Action Button: Make you submit button stand out with a contrasting color and a clear action phrase like “Book Now” or “Send Inquiry”.
Customizing Your Form for Better Engagement
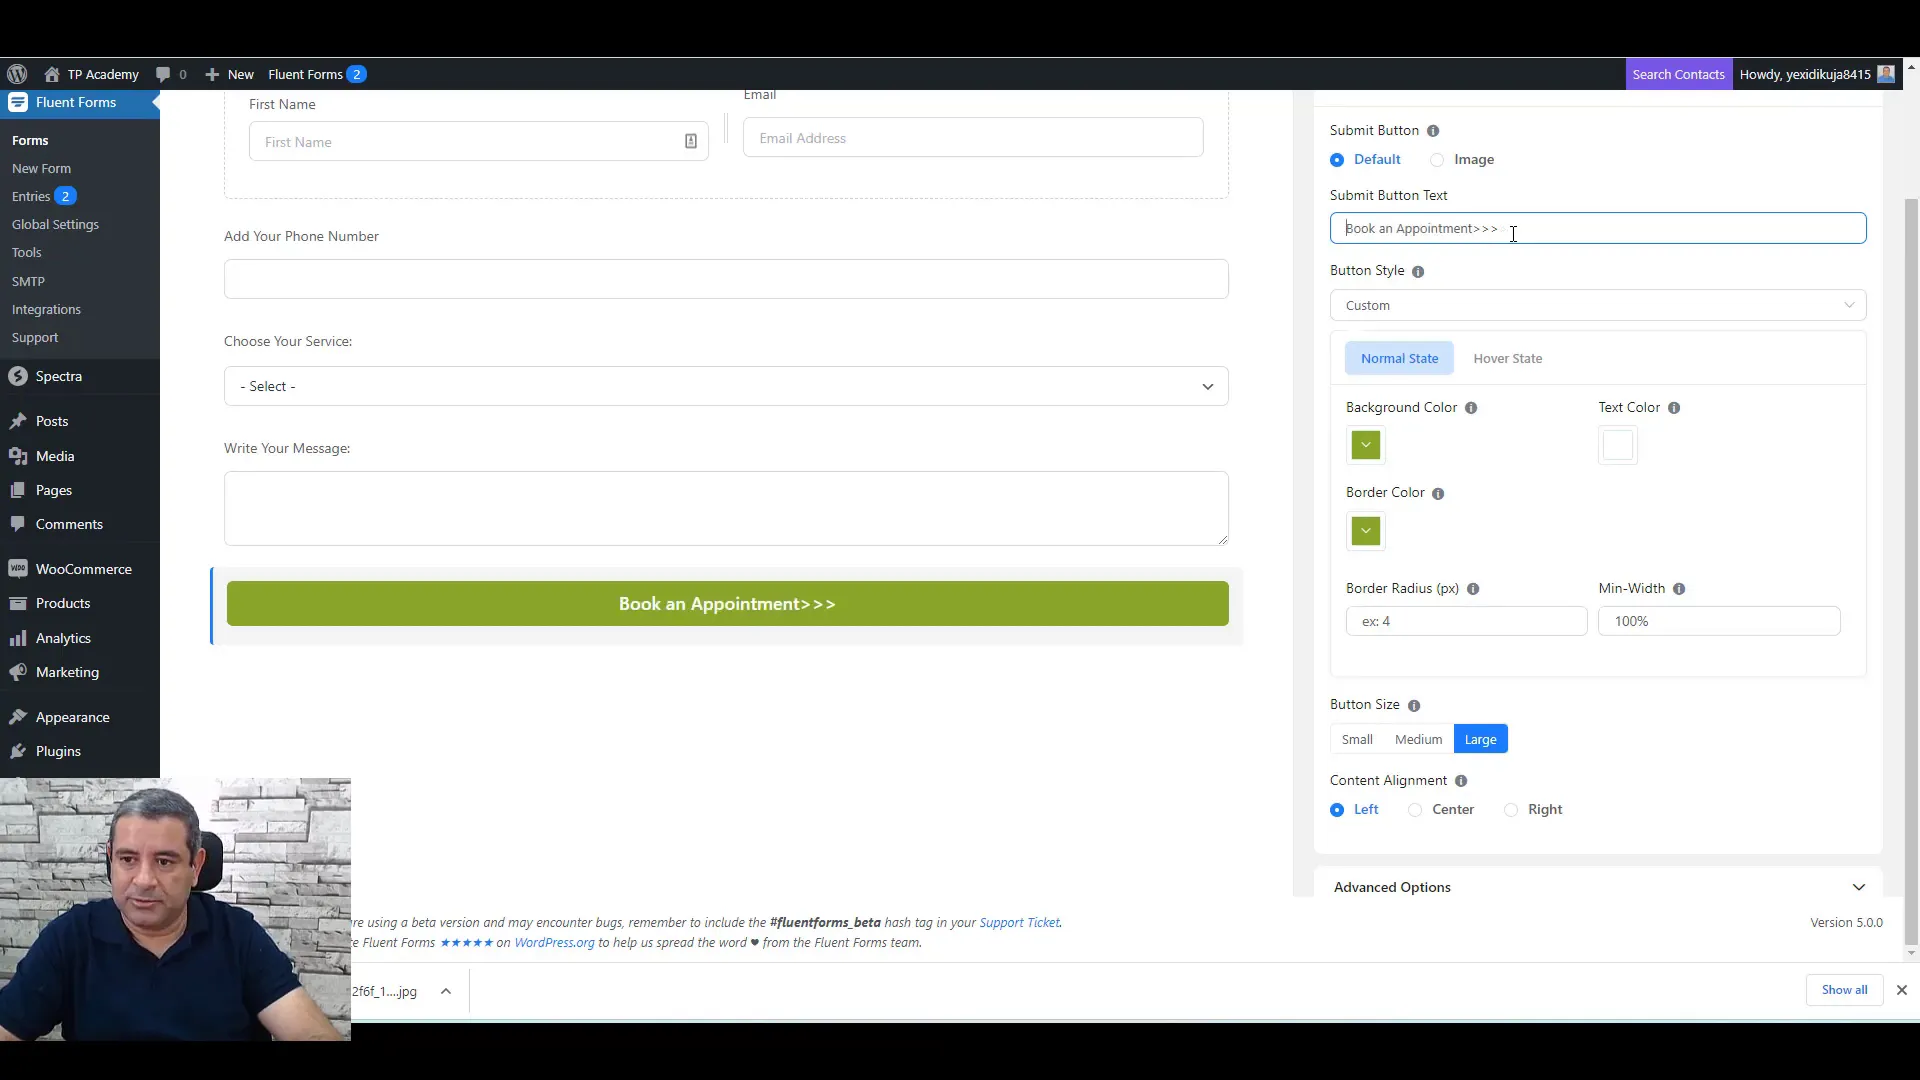
Customization is key to enhancing user engagement. Ensure your form reflects your brand’s identity through the use of colors, fonts, and styles that align with your overall website design.
- Color Scheme: Use colors that match your branding. A vibrant button color can draw attention and encourage clicks.
- Field Labels: Use clear and concise labels. This reduces confusion and improves the user experience.
- Form Layout: Organize fields logically. Group related fields together and maintain a clean layout to avoid overwhelming users.
Integrating the Form into Your Page
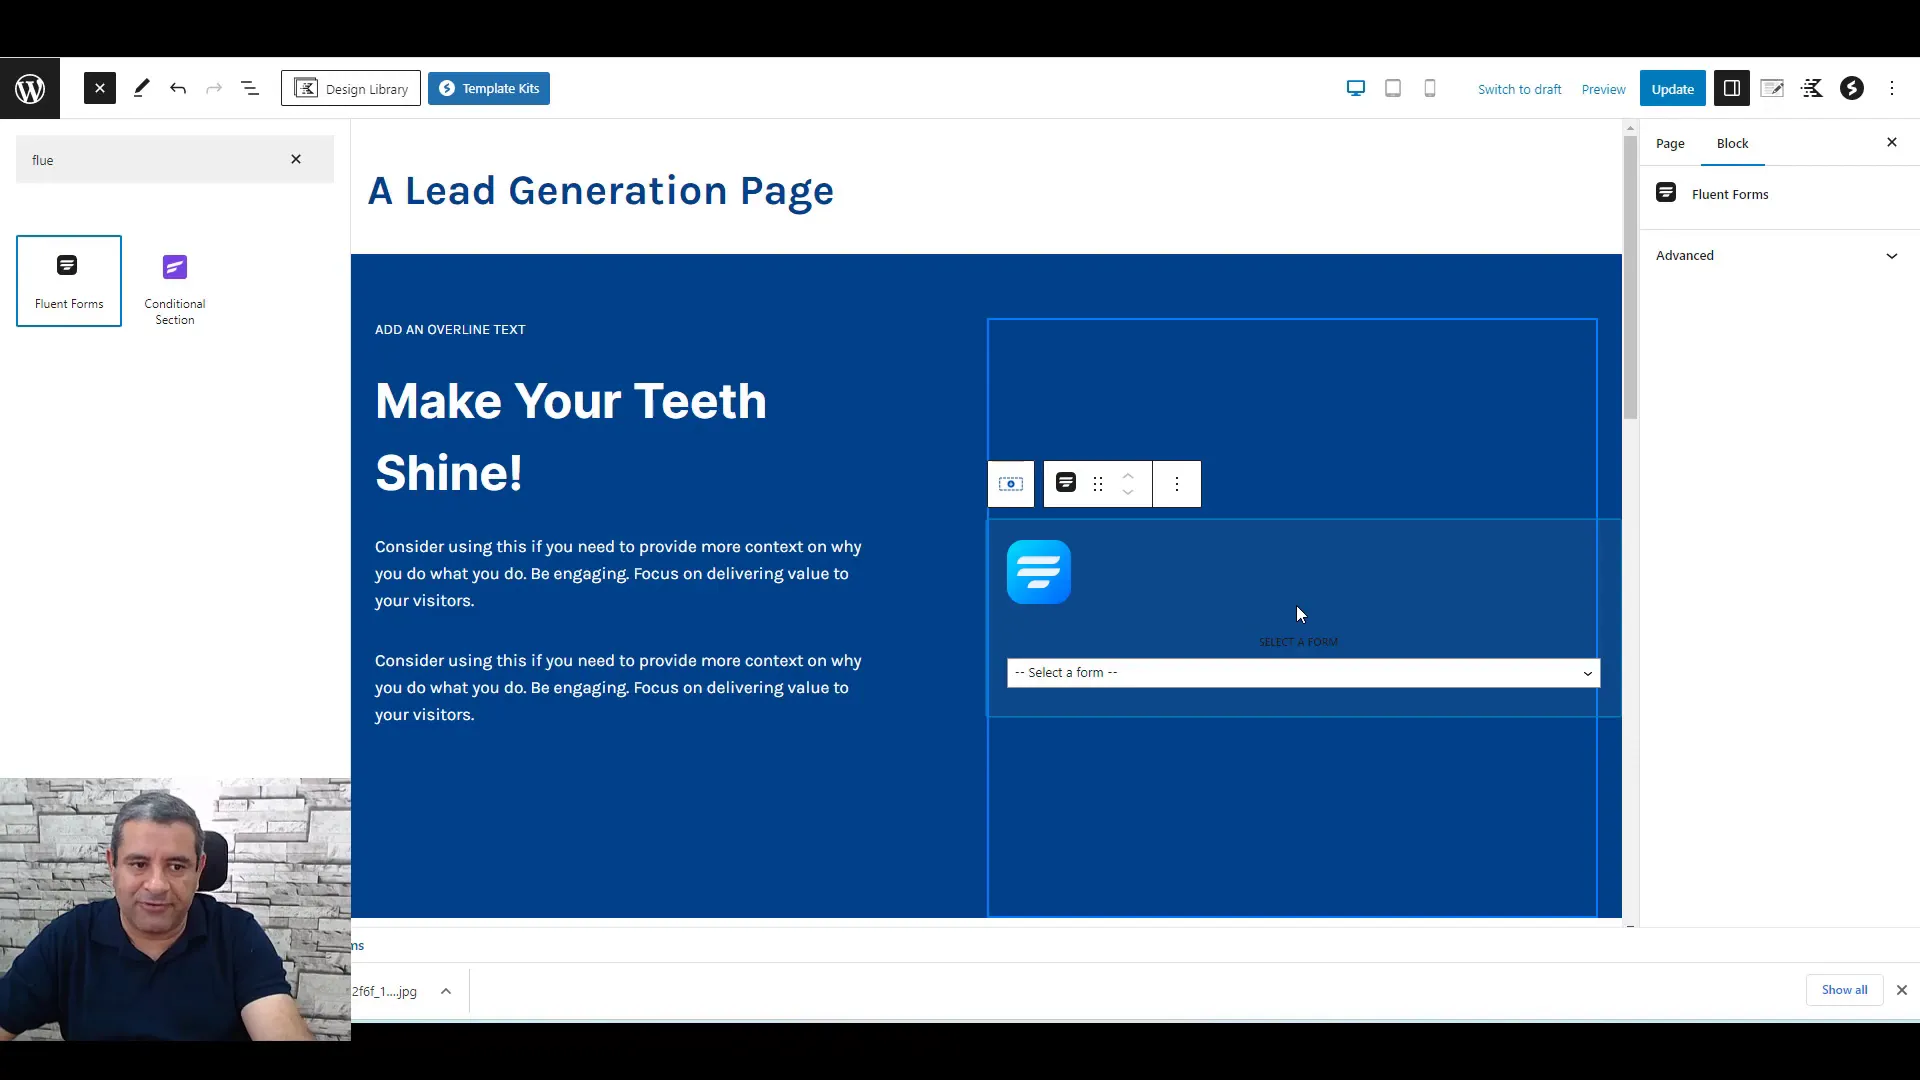
Once your lead generation form is designed, the next step is to integrate it into your Lead Generation Page in WordPress. This is a straightforward process using the Fluent Forms block.
To add your form:
- Edit your Lead Generation Page.
- Click the “+” button to add a new block.
- Search for “Fluent Forms” and select it.
- Choose the form you created from the dropdown list.
- Update the page to save your changes.
Bonus Tips for Increasing Conversions
To maximize the effectiveness of your Lead Generation Page, consider implementing these bonus tips:
- Repeat the Form: If your page is lengthy, consider placing the lead form in multiple locations. This ensures that users can easily access it without scrolling back up.
- Use Urgency: Incorporate phrases that create a sense of urgency, such as “Limited Time Offer” or “Book Your Appointment Today!”
- Testimonials: Add testimonials strategically near the form to build trust and encourage action. Potential clients are more likely to fill out the form if they see positive feedback from others.
Final Thoughts and Recommendations
Creating an effective Lead Generation Page in WordPress doesn’t have to be complicated. By using free tools like Fluent Forms and Kadence Blocks, you can design a page that not only looks professional but also converts visitors into leads.
Remember to keep your form simple, customize it to fit your brand, and strategically place it throughout your page. Regularly test different layouts and calls to action to see what resonates best with your audience.
