Membership websites are a powerful way to monetize content and build a community around specific interests or topics. By offering exclusive access to members, you can create a sense of belonging and loyalty among your audience. These websites often include features like tiered membership levels, protected content, and community forums.
Creating a membership website can seem daunting due to the various components involved. However, with the right tools and guidance, you can streamline the process. The combination of WordPress, the Kadence theme, and plugins like Wishlist Member make it easier than ever to set up a fully functional membership site.
Benefits of Membership Websites
- Recurring Revenue: Membership sites provide a steady income stream through subscription fees.
- Community Building: Engage with your audience and foster relationships through exclusive content and forums.
- Control Over Content: You can decide what to share with the public and what to keep behind a paywall.
- Scalability: Easily add new content and features as your membership grows.
Part 1: A Comprehensive Guide to Building Your Membership Website
In this detailed guide on installing a Kadence Starter Template, we will walk you through the essential steps to create a professional membership website using WordPress. Whether you’re a beginner or looking to enhance your existing site, this blog will cover everything you need to know about the Kadence theme and its powerful features.
Overview of the Kadence Theme
The Kadence theme is a versatile WordPress theme designed to help users create beautiful and highly functional websites. It offers a range of customization options and is optimized for speed and performance, making it an excellent choice for membership websites.
One of the standout features of Kadence is its compatibility with a variety of plugins, allowing you to extend the functionality of your site easily. The theme is also built with SEO best practices in mind, ensuring that your membership site can rank well in search engines.
Key Features of Kadence Theme
- Customizable Layouts: Choose from various layouts and design options to match your branding.
- Pre-built Starter Templates: Get started quickly with professionally designed templates tailored for different niches.
- Lightweight and Fast: Optimized for speed, ensuring a smooth user experience for your members.
- Responsive Design: Your site will look great on any device, enhancing user engagement.
Setting Up Your WordPress Installation
Before you can start building your membership website, you need to set up your WordPress installation. This involves choosing a hosting provider, installing WordPress, and configuring basic settings. Many hosting providers offer one-click installations for WordPress, making this process straightforward.
Once WordPress is installed, log in to your dashboard. From here, you can manage your website settings, install themes and plugins, and create content. It’s important to ensure that your WordPress version is up-to-date to take advantage of the latest features and security updates.
Basic Configuration Steps
- Choose a Hosting Provider: Select a reliable hosting service that supports WordPress installations.
- Install WordPress: Use the one-click installation feature if available, or follow the manual installation process.
- Set Up Permalinks: Go to Settings > Permalinks and choose a structure that is SEO-friendly.
- Install Essential Plugins: Begin by installing a few essential plugins, including a security plugin and a backup solution.
Installing the Kadence Theme
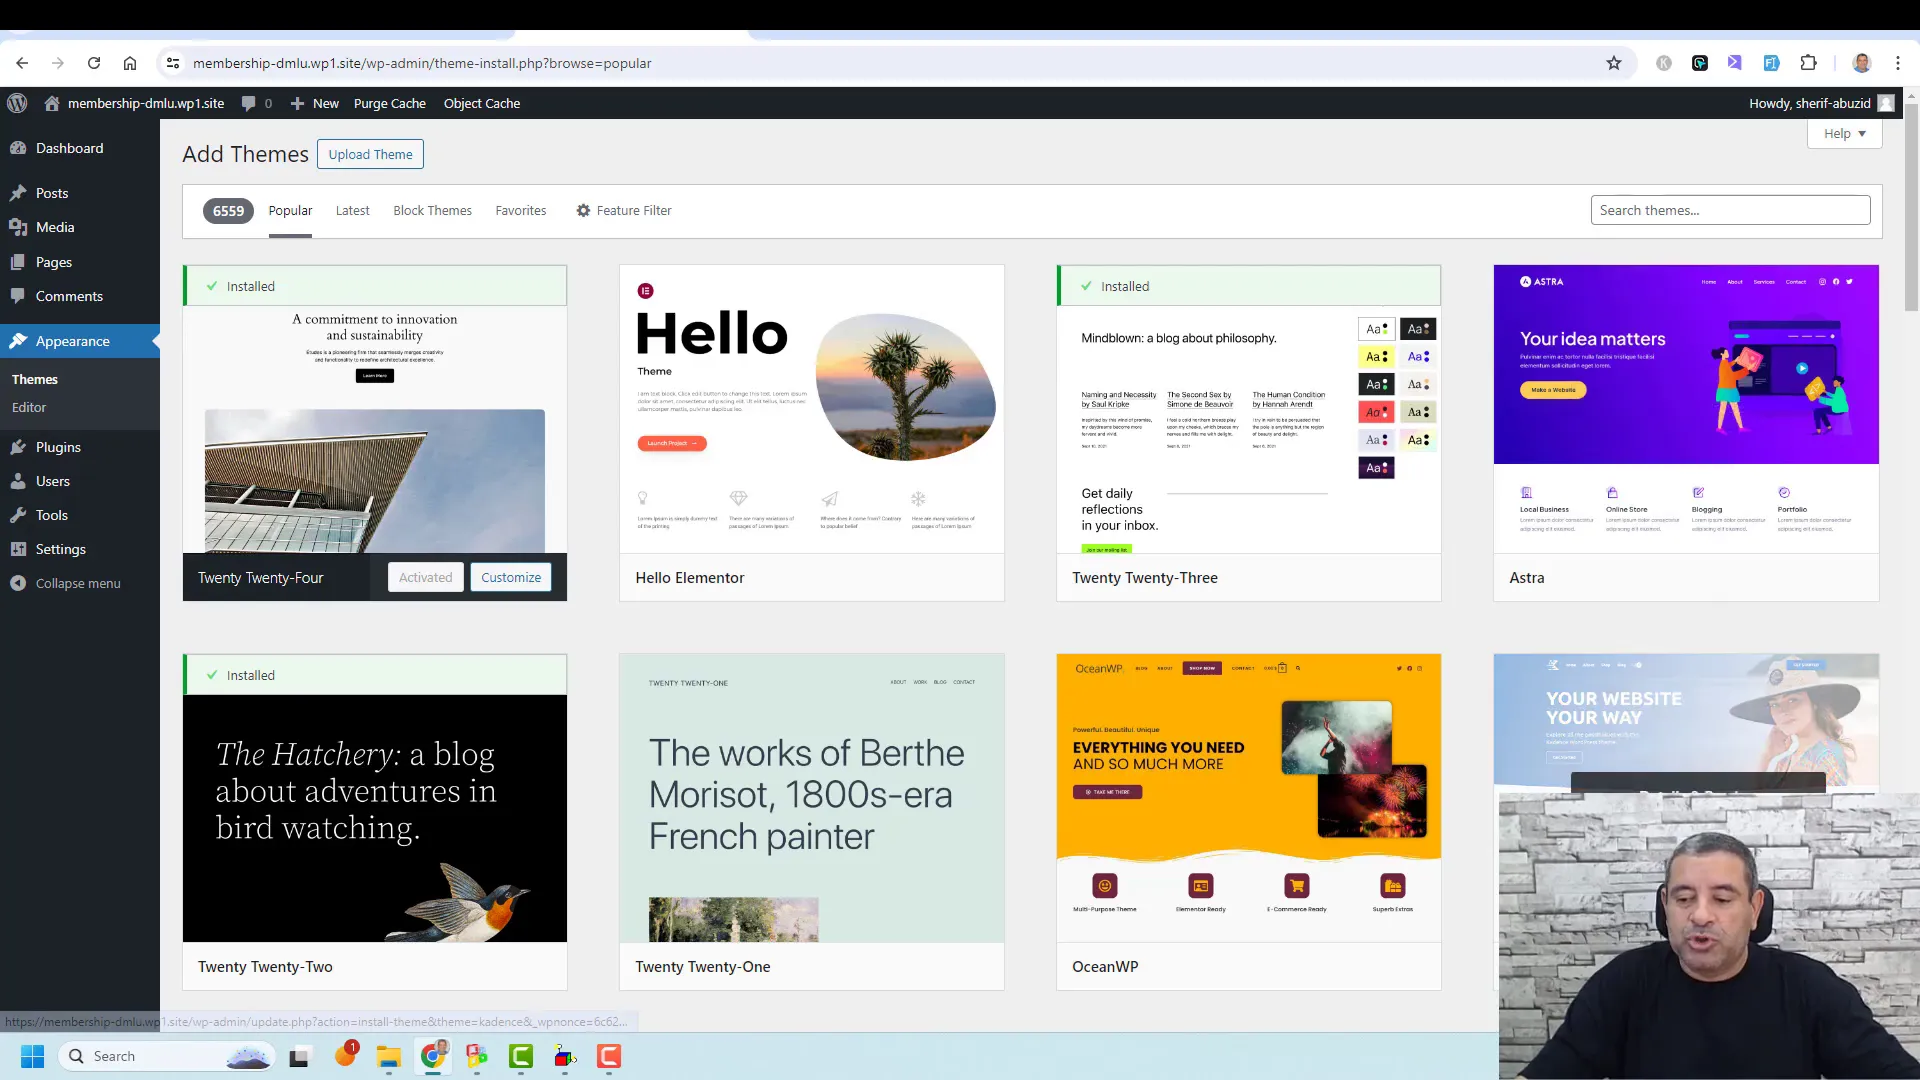
Installing the Kadence theme is a simple process that can be completed in just a few clicks. After logging into your WordPress dashboard, navigate to the Appearance section and click on Themes. From there, you can add a new theme.
Search for “Kadence” in the theme repository, and once you find it, click the Install button. After the installation is complete, activate the theme to make it your active design.
To ensure optimal performance, it’s a good idea to delete any unused themes, keeping your installation clean and secure.
Installing the Kadence AI Starter Templates Plugin
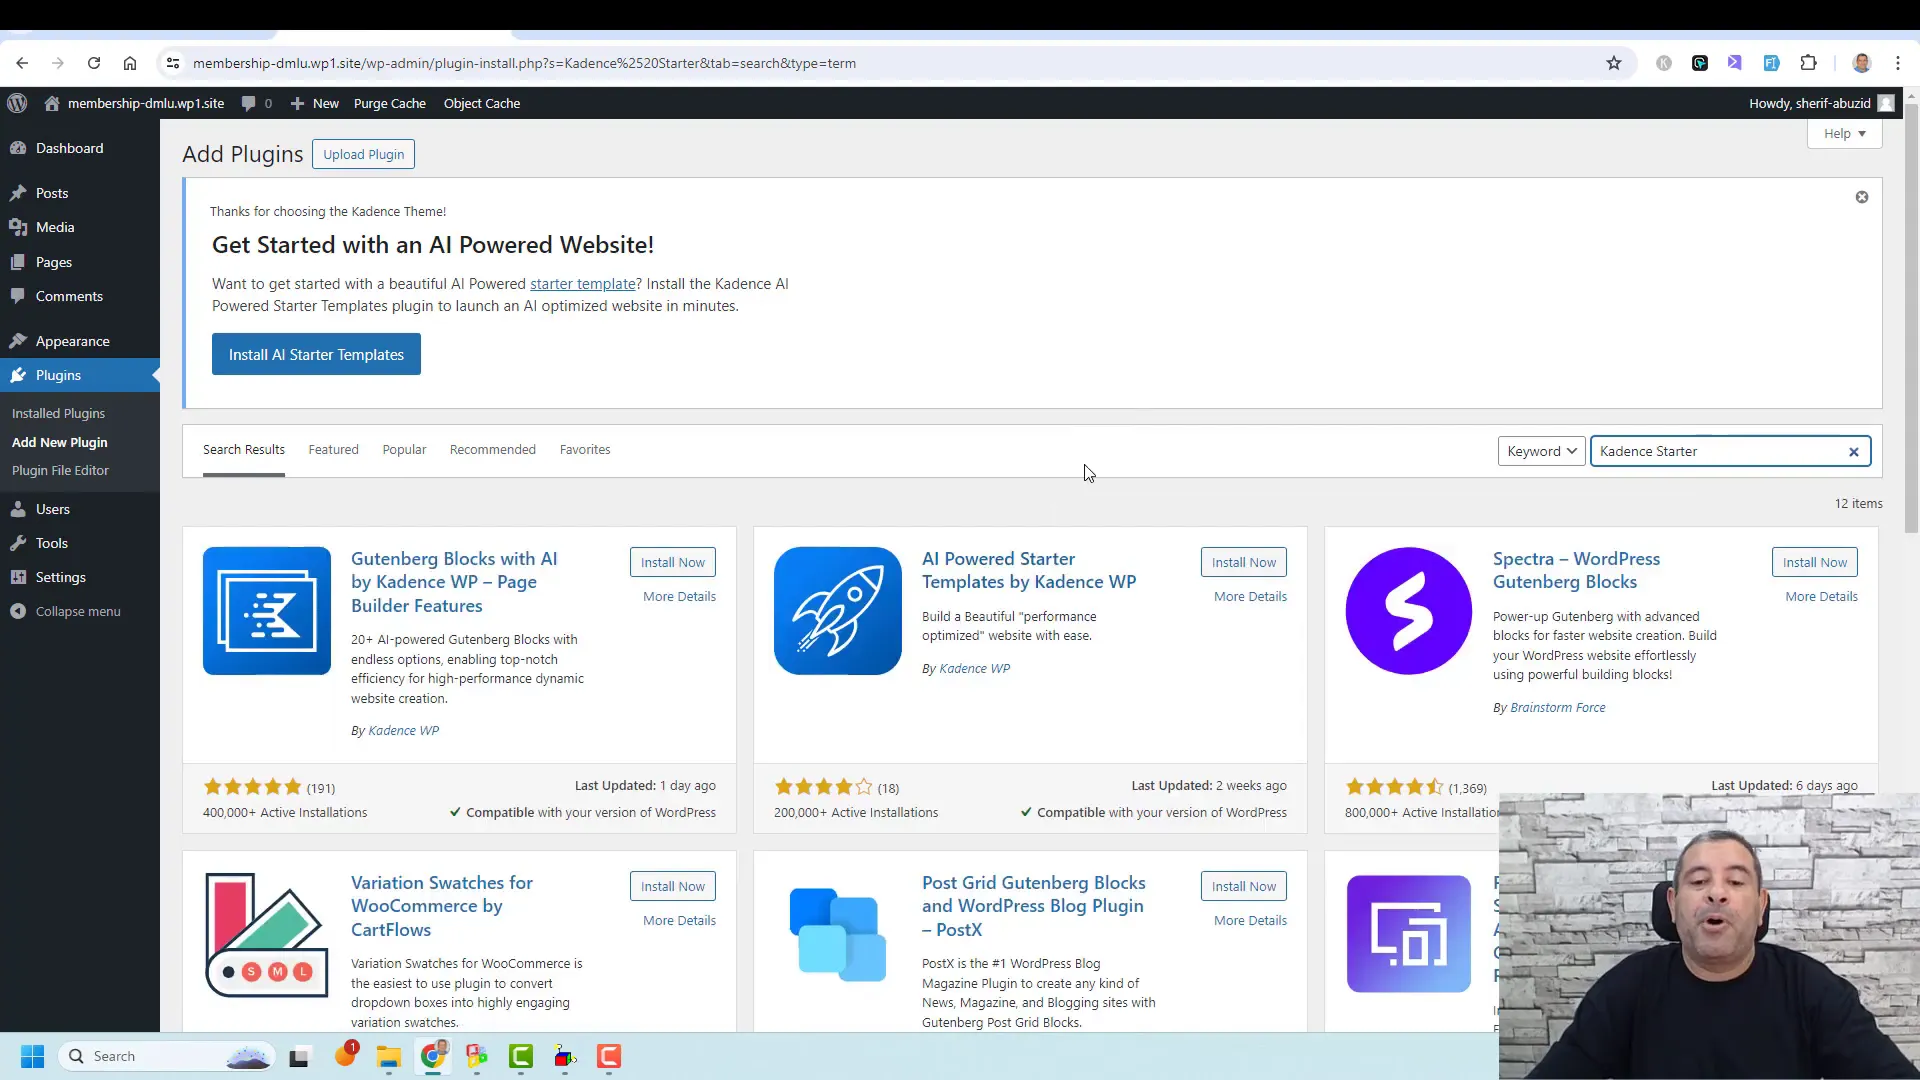
The Kadence AI Starter Templates Plugin is a game-changer for quickly setting up your membership website. This plugin allows you to import pre-designed templates that you can customize to fit your brand and content needs.
To install this plugin, navigate to the Plugins section in your WordPress dashboard and click on Add New. Search for “Kadence AI Starter Templates” and click Install. After installation, activate the plugin to start using its features.
Additional Plugin Installation
Alongside the Kadence AI Starter Templates Plugin, consider installing the Kadence Blocks plugin. This plugin enhances your design capabilities, allowing you to build custom layouts without needing to code.
To install Kadence Blocks, follow the same process: search for the plugin in the Add New section, install, and activate it. These tools will empower you to create stunning pages effortlessly.
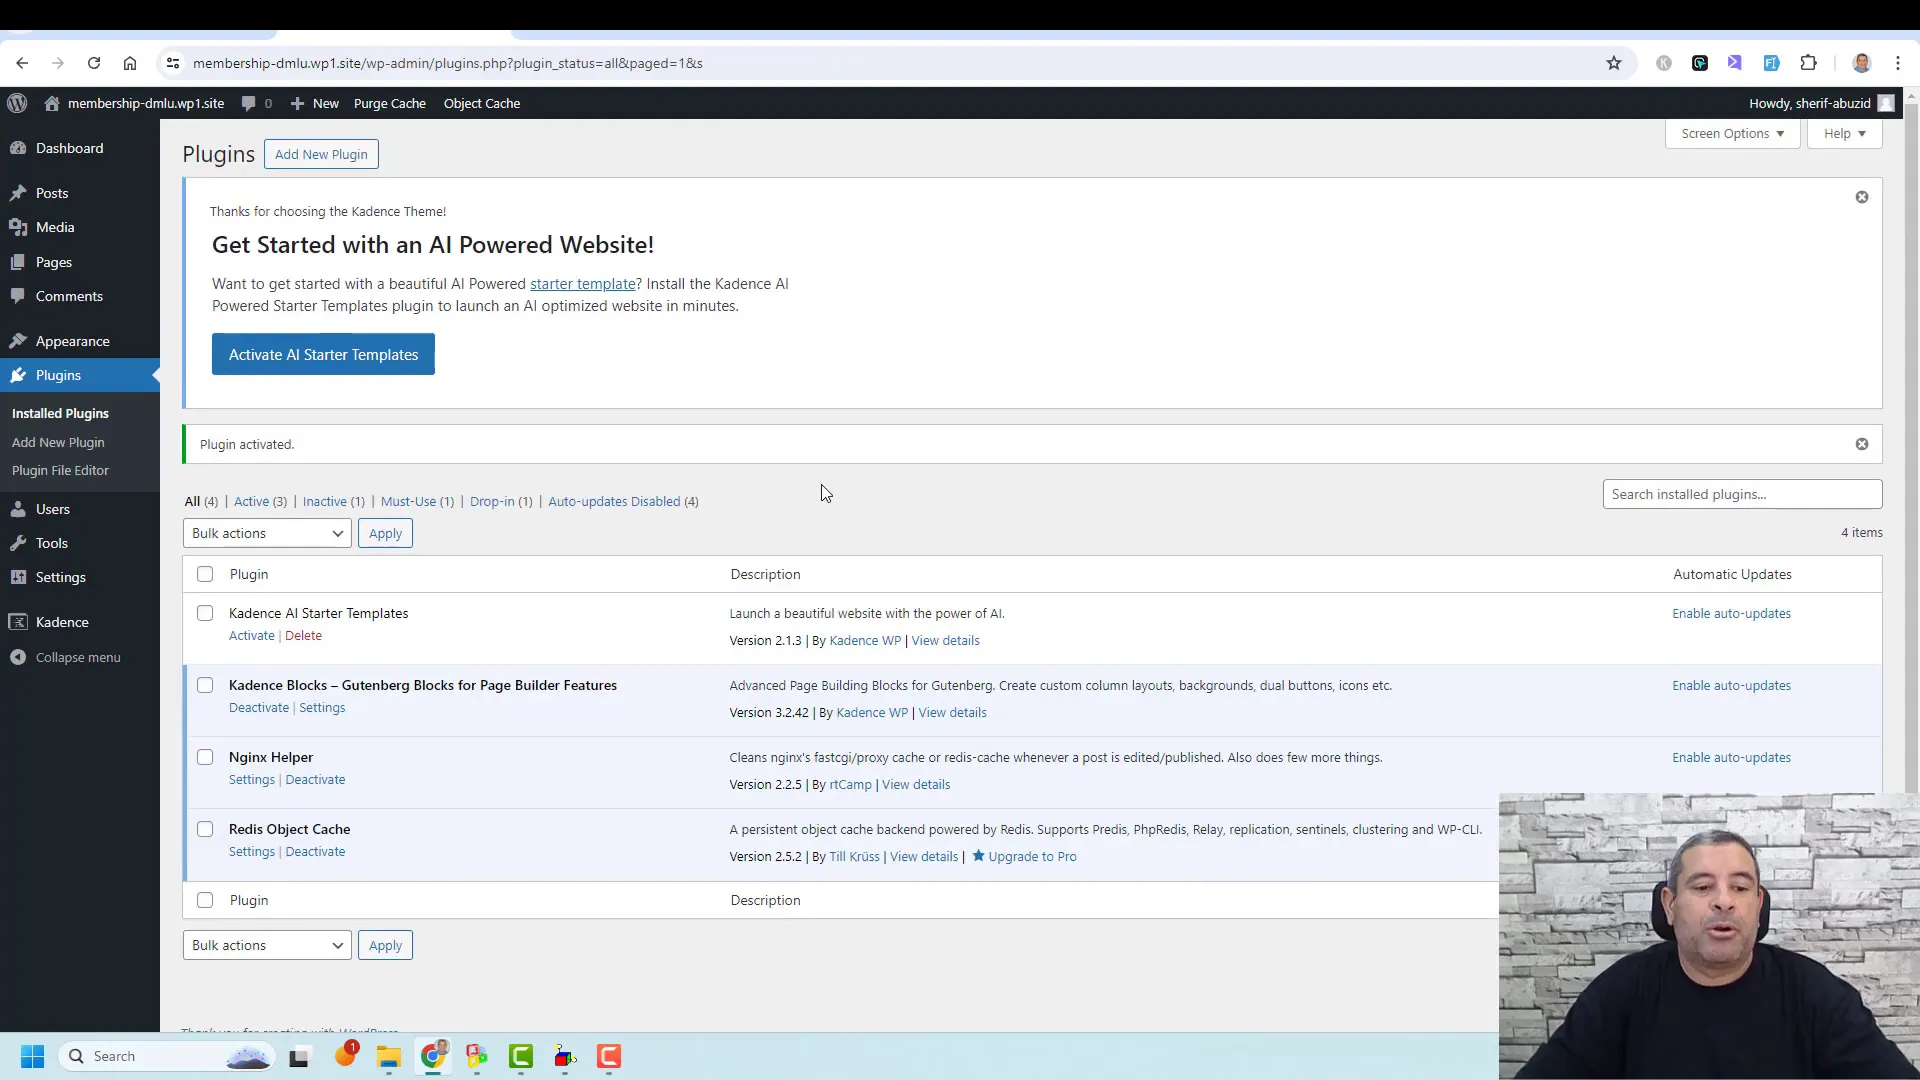
Exploring Starter Templates
Once the Kadence AI Starter Templates Plugin is activated, you can access a library of beautifully designed templates. These templates cater to various niches, including online courses, business websites, and more. You can easily filter the templates based on your specific needs.
The AI Starter Templates option allows you to customize the design based on prompts you provide, making it a unique feature for those looking to create niche-specific content. Alternatively, you can choose from classic starter templates that are already well-designed and ready to go.
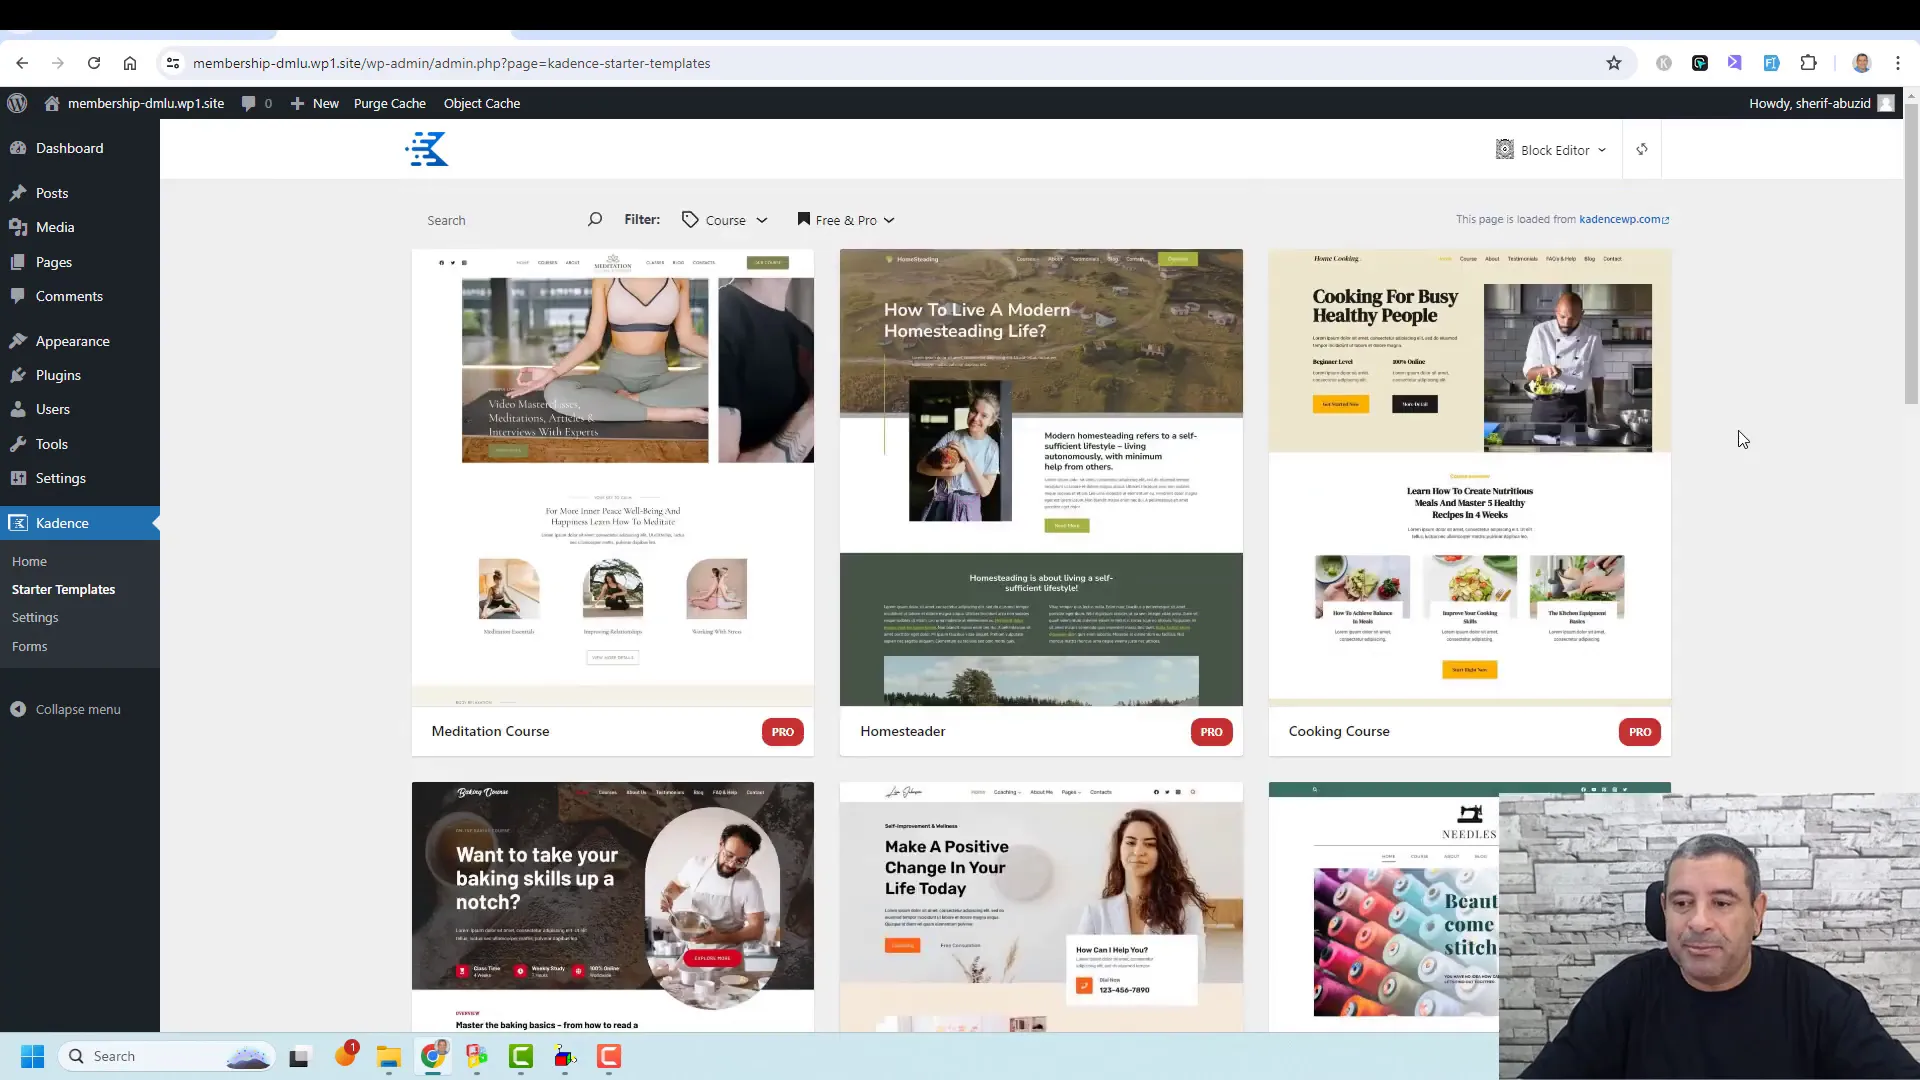
Selecting and Installing a Template
- Access the Template Library: Click on the Cadence option in your dashboard to view available templates.
- Choose a Template: Browse through the categories and select a template that fits your vision.
- Install the Template: Click the Install button to import the chosen template into your site.
- Customize Your Template: Use the Kadence Blocks plugin to modify the layout, text, and images to suit your brand.
Choosing and Installing a Starter Template
When it comes to setting up your membership website, choosing the right starter template is crucial. Kadence offers both free and premium templates that are visually appealing and designed for various niches. You can easily filter through the templates to find one that suits your needs.
To install a starter template, navigate to the Cadence section in your WordPress dashboard. Here, you can browse through the available templates. If you’re on a budget, you can opt for one of the free templates, which still offer great design and functionality. However, if you’re looking for more advanced features, consider purchasing a premium template; the investment will pay off in terms of design quality and support.
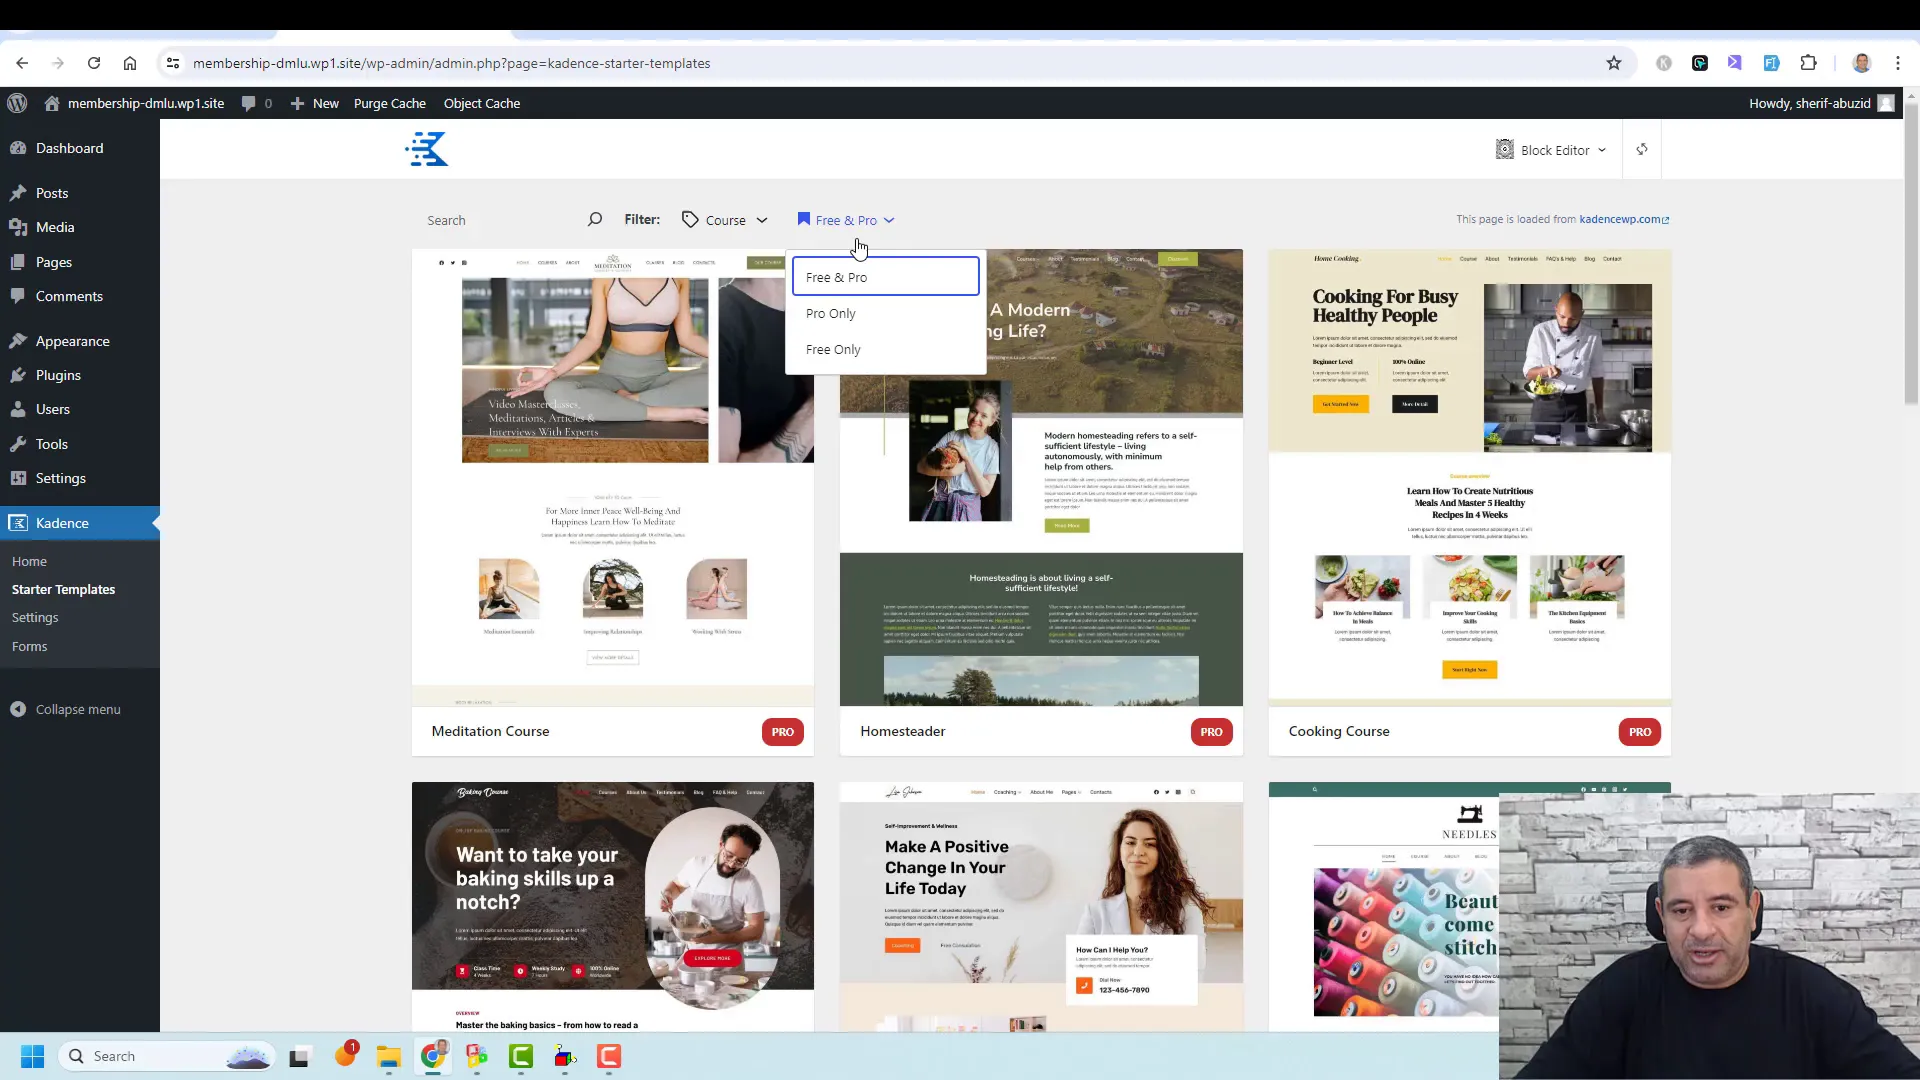
Steps to Install Your Chosen Template
- Access the Template Library: In your WordPress dashboard, go to the Cadence section and click on Starter Templates.
- Filter Templates: Use the filtering options to display either free or premium templates based on your preference.
- Select a Template: Click on the template you want to preview its details and design.
- Install Template: Click the Install button to import the template into your site.
- Activate the Template: Once installed, activate the template to make it your active design.
Customizing Your Starter Template
After installing your chosen starter template, it’s time to customize it to match your brand and content. The Kadence theme offers a wide range of customization options that allow you to modify colors, fonts, layouts, and more.
You can easily access the customization options through the WordPress Customizer. This tool gives you a live preview of changes, ensuring you can see how your adjustments will look before saving them.
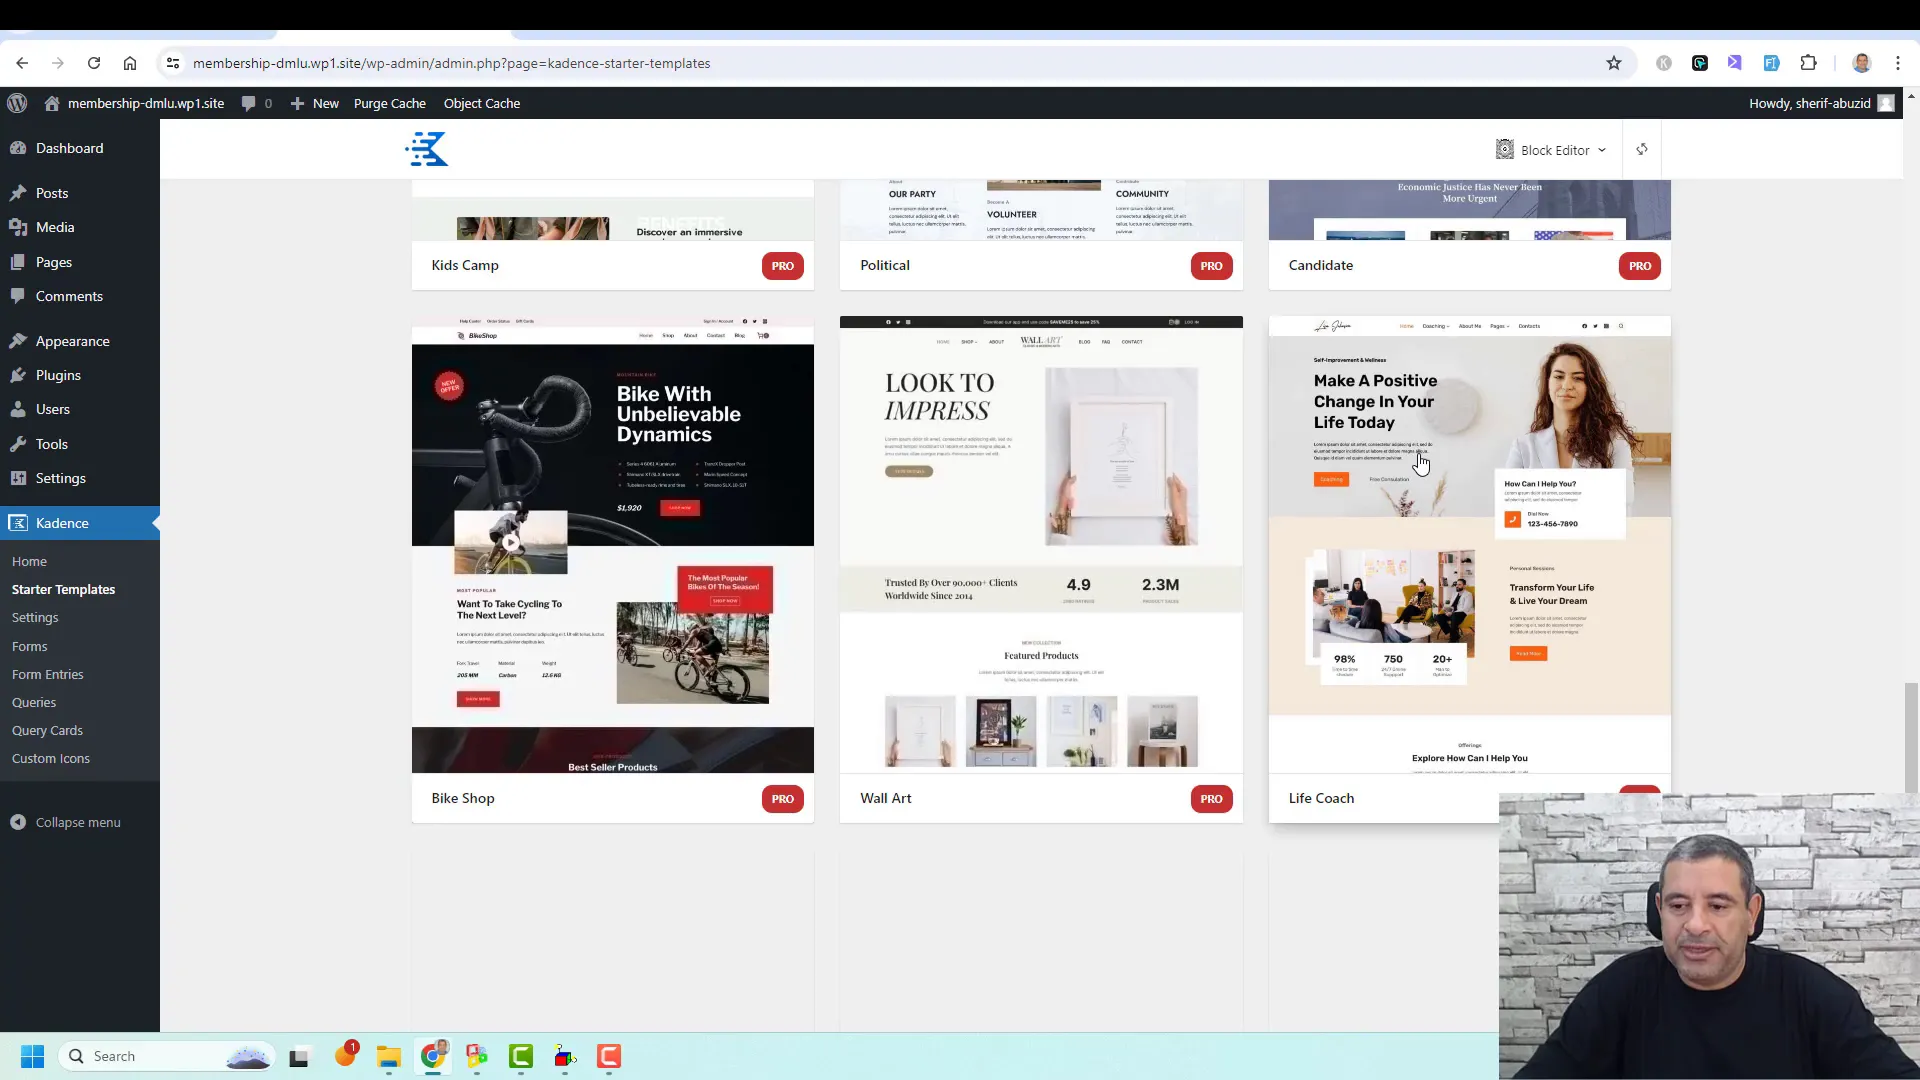
Key Customization Areas
- Colors: Adjust the color palette to align with your branding. You can change primary colors, background colors, and more.
- Fonts: Choose fonts that reflect your brand’s personality. Kadence provides various font options to select from.
- Layout: Modify the layout of your pages by rearranging sections, adding new elements, or removing unnecessary ones.
- Images: Replace placeholder images with your own. Ensure your images are high-quality and relevant to your content.
Using the Customizer for Global Settings
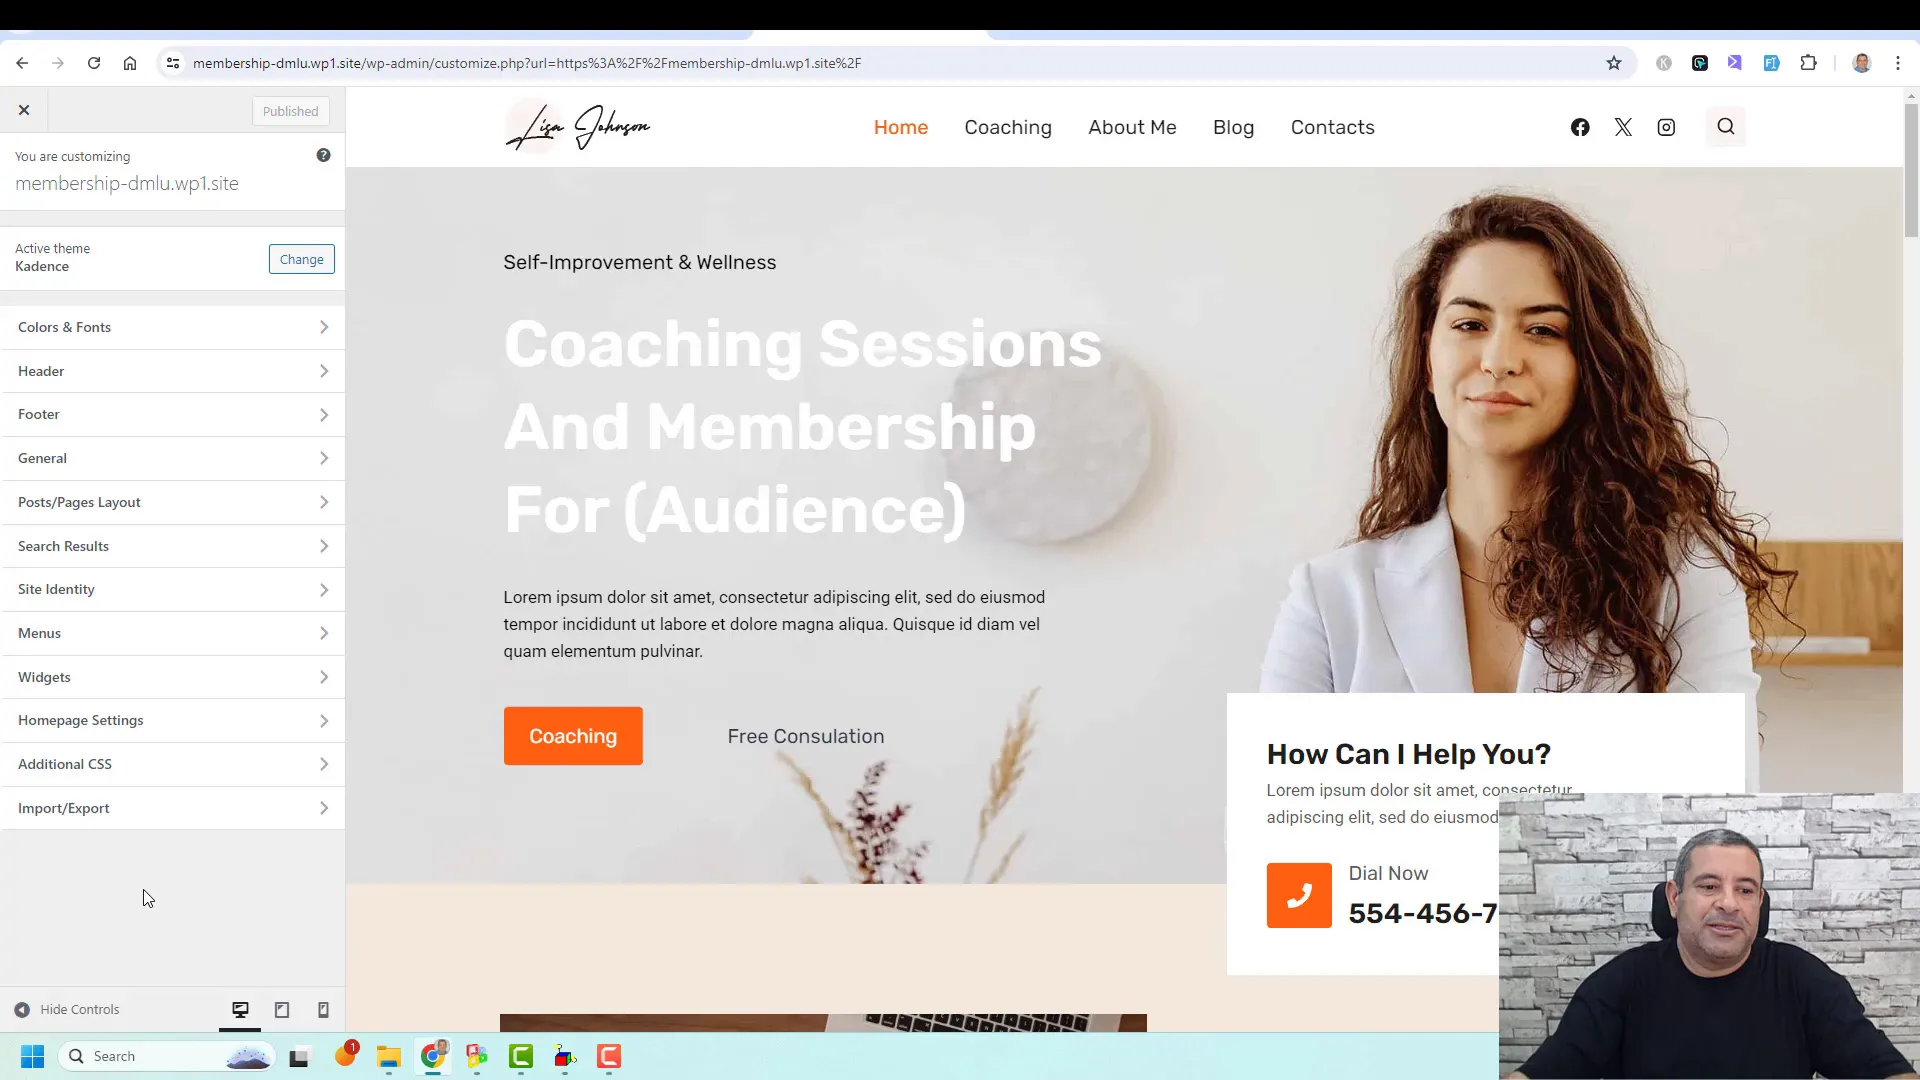
The Customizer is a powerful tool that allows you to make global changes to your website. This means you can set styles that will apply across all pages, saving you time and ensuring consistency in your design.
To access the Customizer, go to Appearance > Customize in your WordPress dashboard. Here, you can manage settings for your header, footer, colors, typography, and more.
Important Customizer Features
- Header and Footer Settings: Customize the appearance of your website’s header and footer, including layout, colors, and content.
- Typography: Set global font styles for headings, body text, and buttons to maintain a cohesive look.
- Button Styles: Define the default styles for buttons throughout your site, including colors and hover effects.
- Responsive Settings: Make adjustments for mobile and tablet views to ensure your website looks great on all devices.
Part 2 -A Comprehensive Review of Wish List Members for WordPress
In this part, we dive into the essential features of restricting content with memberships using the Wish List Member plugin for WordPress. This guide will help you understand how to create membership levels, protect content, and enhance user experience on your membership website.
Why Choose Wish List Member?
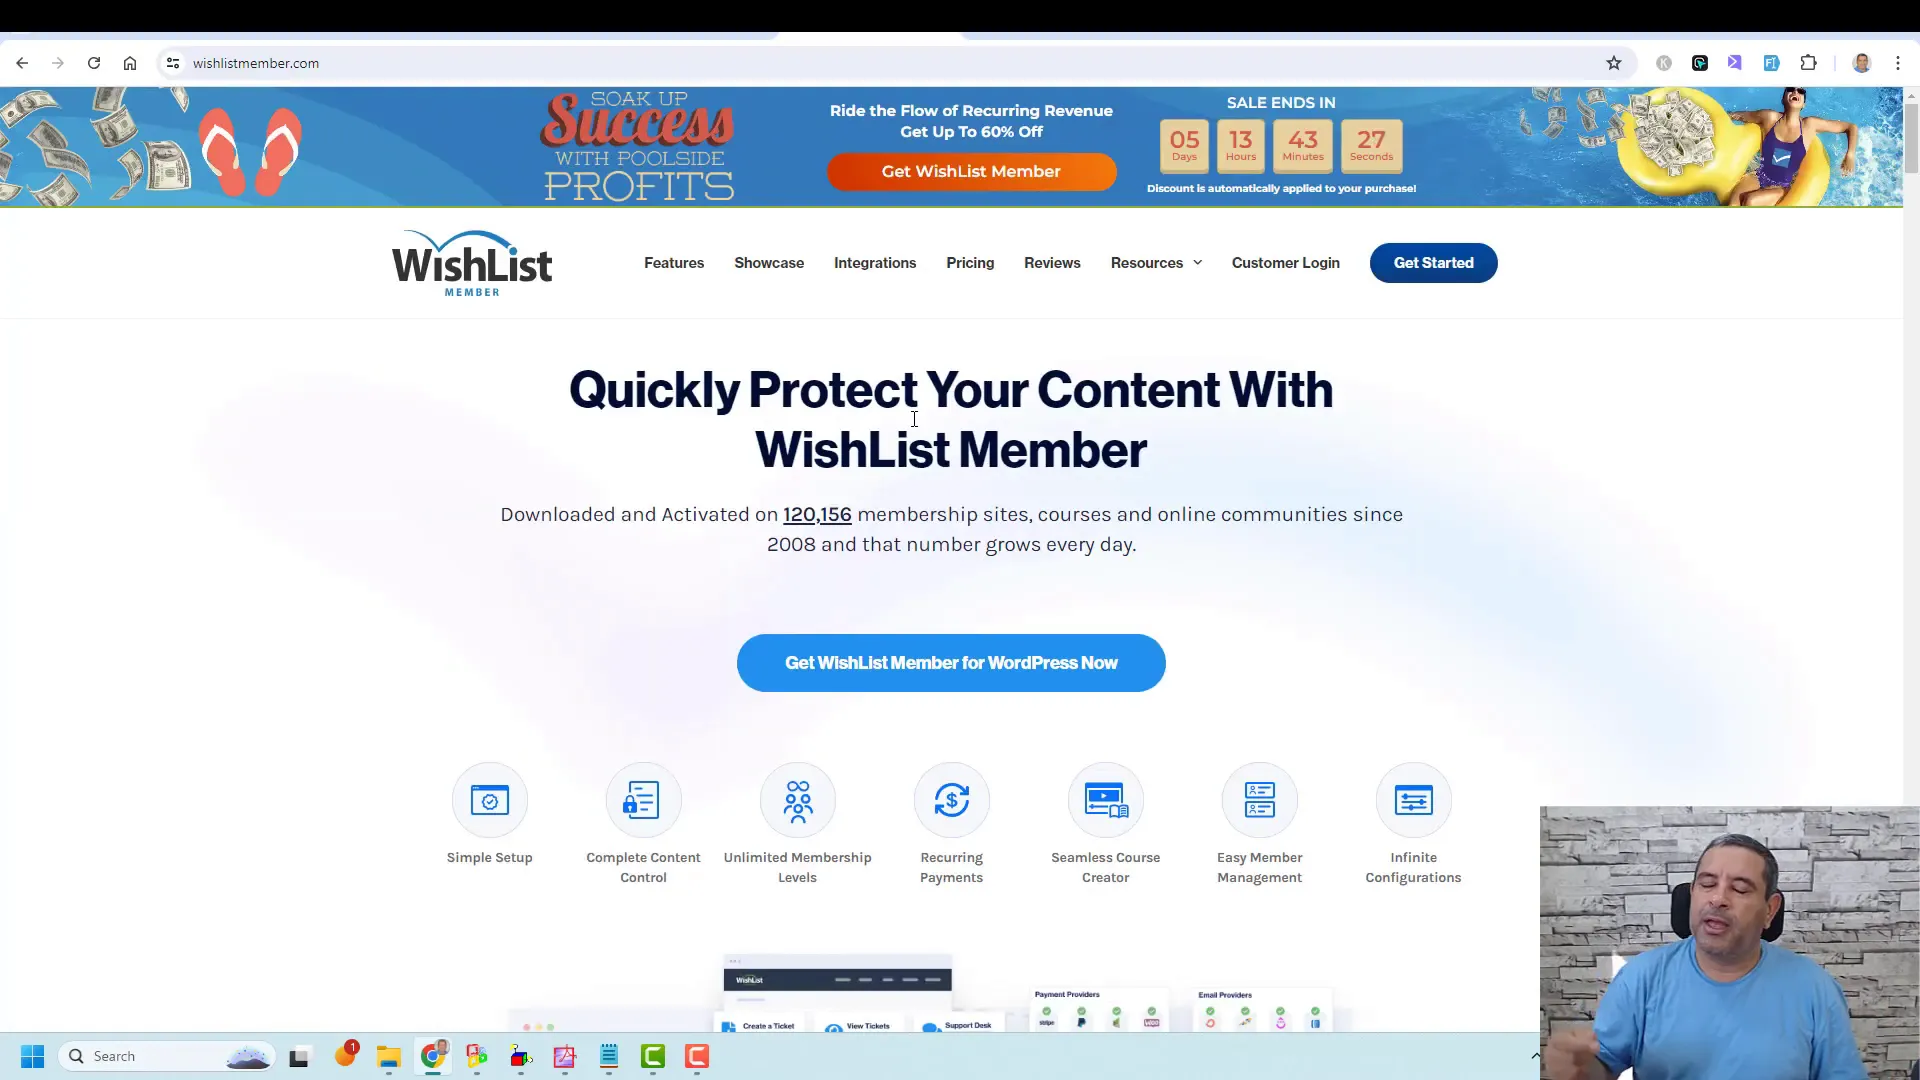
When it comes to building a membership website, the choice of plugin is crucial. Wish List Member stands out due to its comprehensive features and user-friendly interface. It allows you to create multiple membership levels, each with unique access rights and content restrictions.
Another reason to choose Wish List Member is its seamless integration with various payment gateways and email marketing services. This flexibility simplifies the process of managing subscriptions and communicating with your members. With direct integrations available, you won’t need additional plugins to connect your membership site with services like PayPal or ActiveCampaign.
Integrations and Compatibility
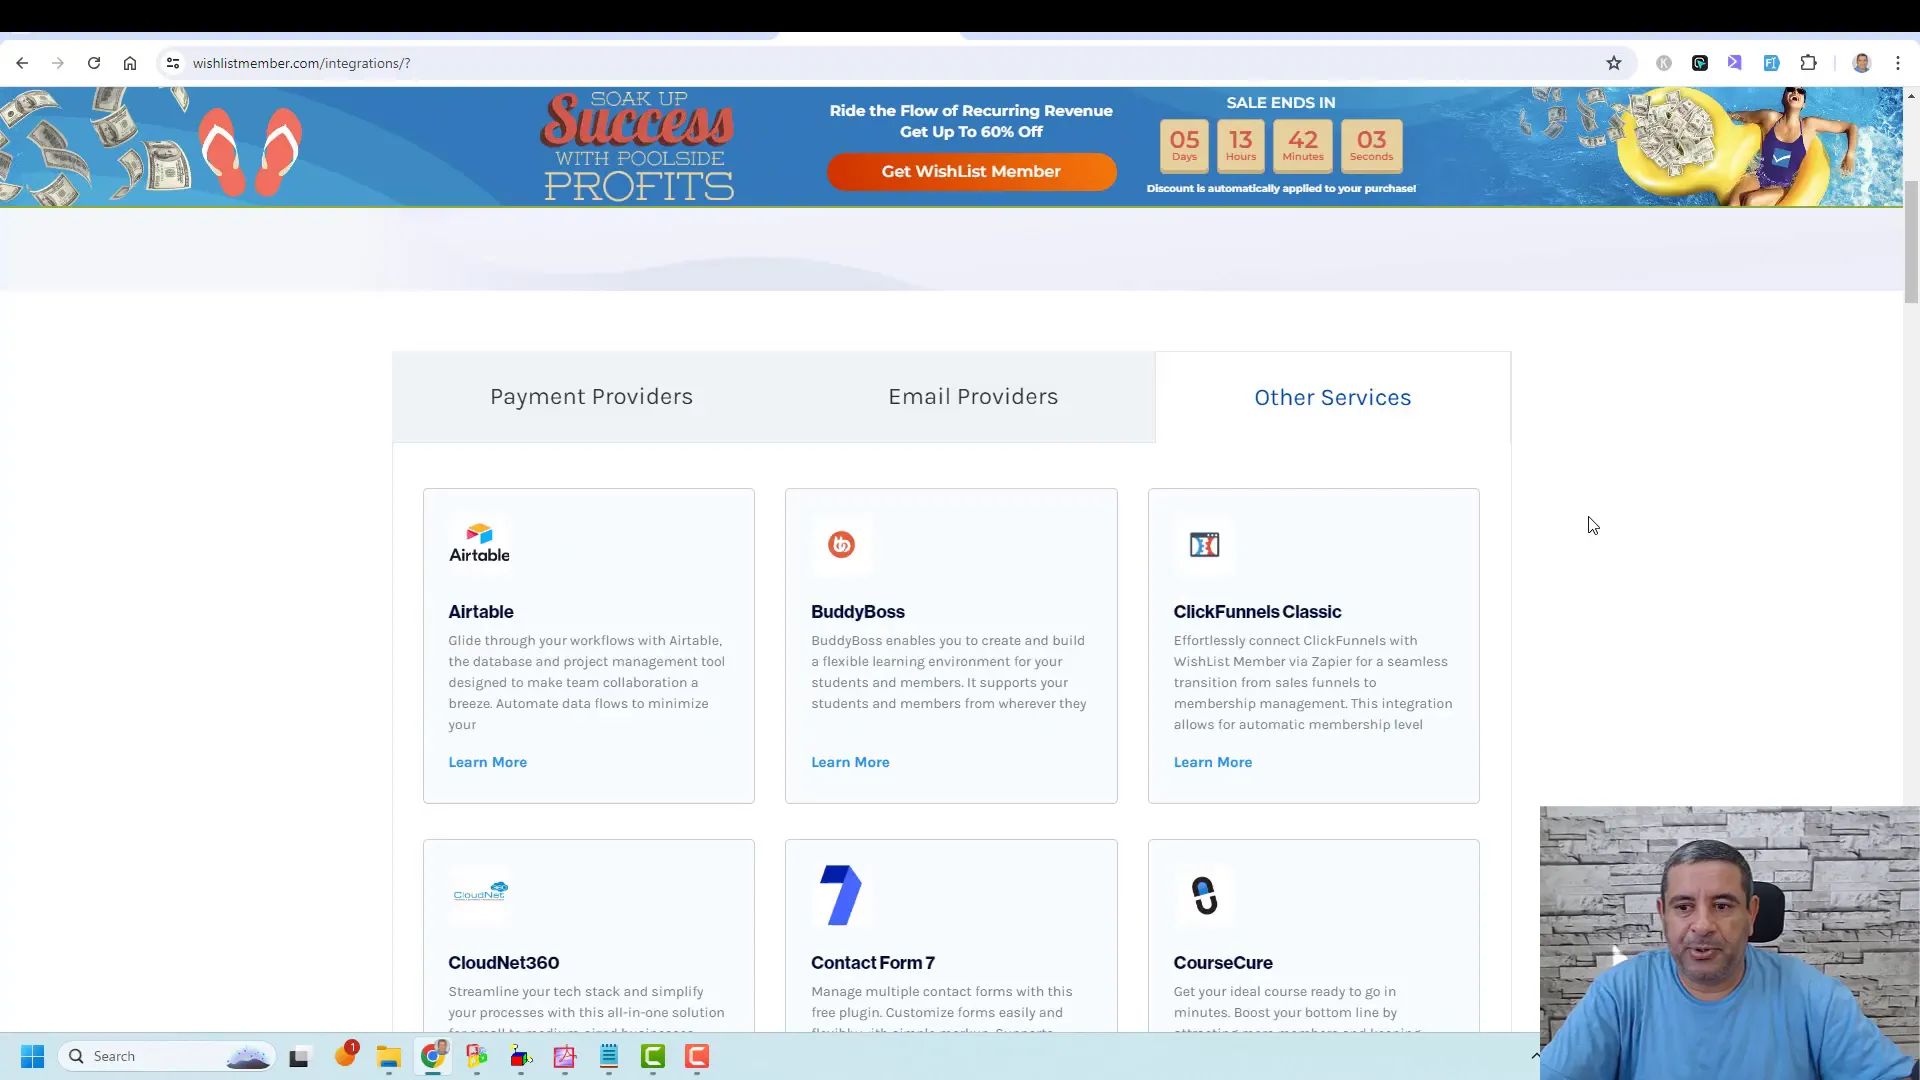
Wish List Member is compatible with numerous platforms and services. Its extensive integration list includes popular payment providers such as PayPal, Stripe, and Authorize.net. This compatibility ensures that you can easily set up payment processing for your membership site.
Additionally, Wish List Member integrates with various email marketing services, including AWeber, Mailchimp, and ConvertKit. This feature allows you to automate your marketing efforts and maintain effective communication with your members.
- Payment Gateways
- PayPal
- Stripe
- Authorize.net
- Email Marketing Services
- AWeber
- Mailchimp
- ConvertKit
Setting Up Wish List Member
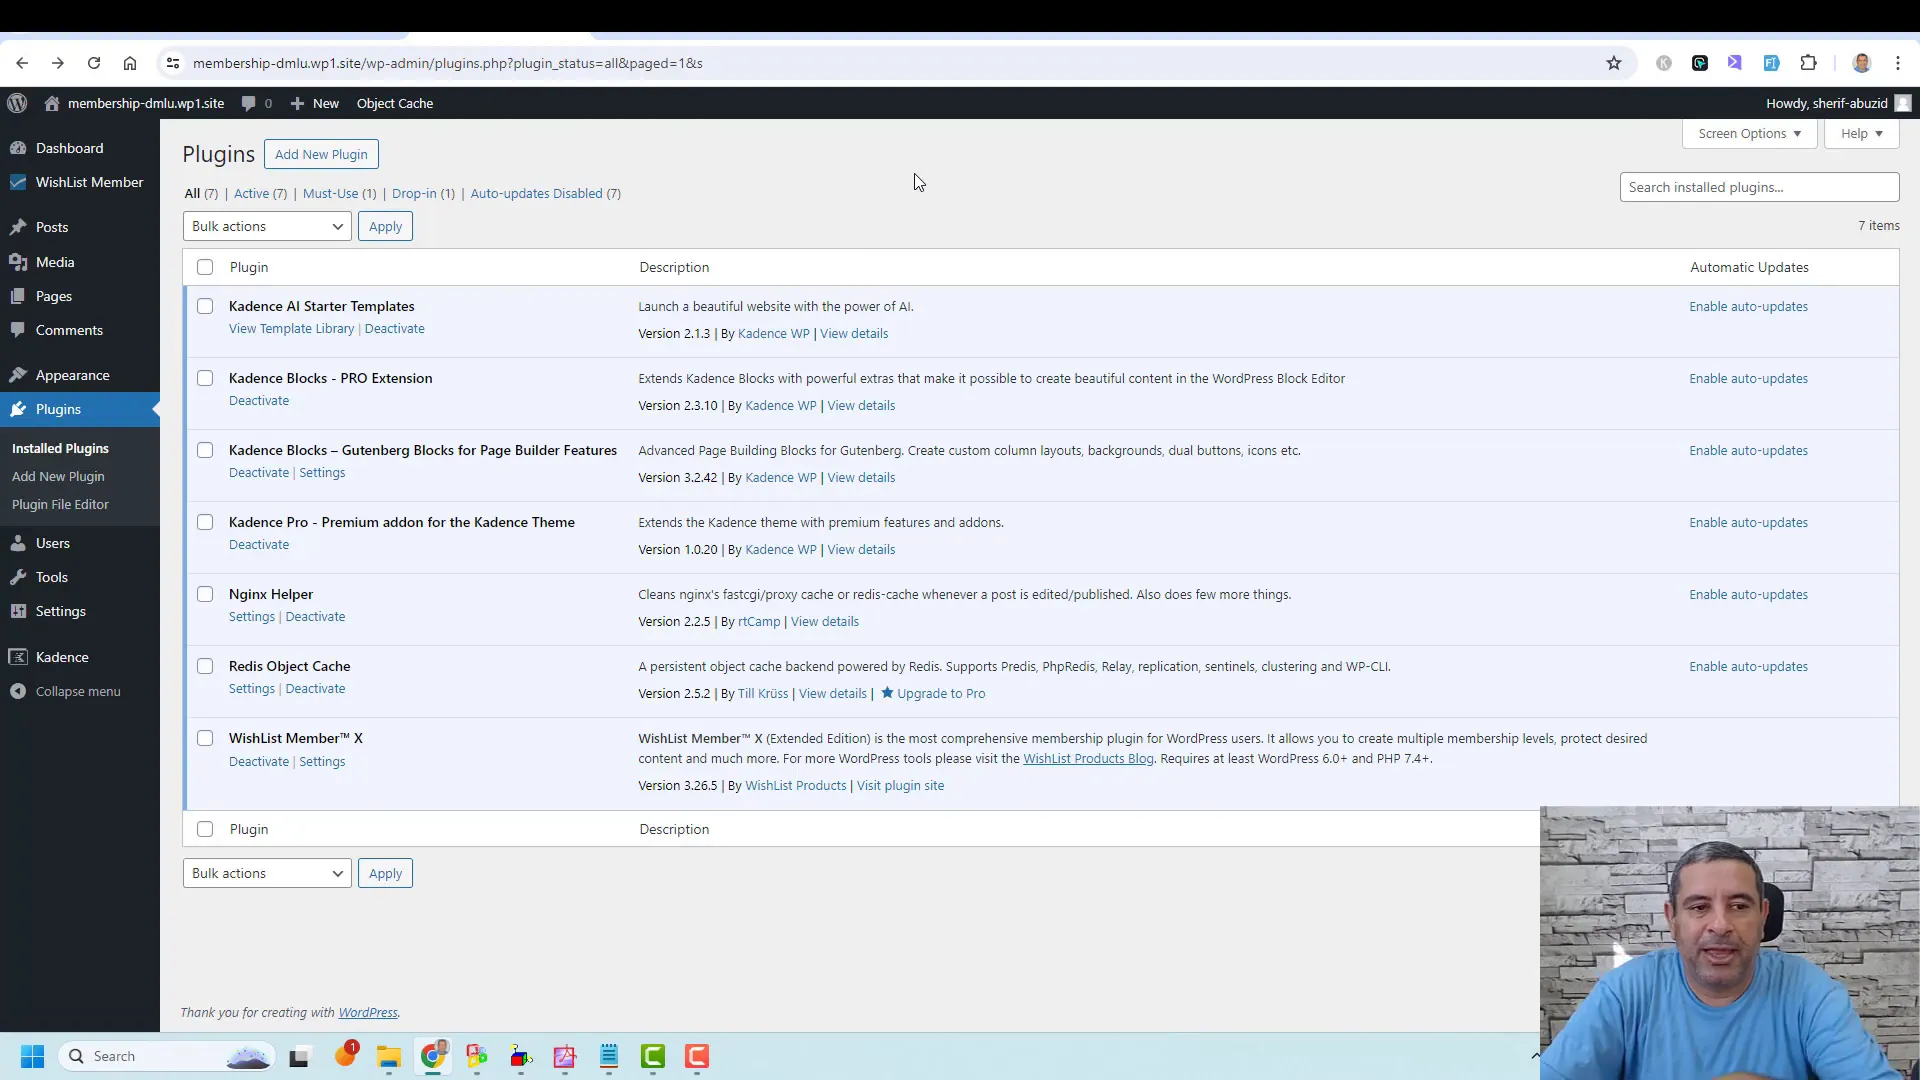
Setting up a Wish List Member is straightforward. After purchasing the plugin, you will receive a license key and download link. You can install it like any other WordPress plugin. Once activated, you will find a new menu item labeled ‘Wish List Member’ on your dashboard.
The setup wizard guides you through the initial configuration. You’ll need to enter your license key, create your first membership level, and select your payment and email marketing providers. This user-friendly approach makes it accessible for beginners.
Creating Membership Levels
Creating membership levels is a pivotal step in managing your membership site. Wish List Member allows you to define multiple levels, each with distinct access rights. You can create free or paid levels, offering varied content and benefits to members.
When defining your membership levels, you can set expiration options. These include ongoing memberships, fixed-term access, or specific expiration dates. This flexibility lets you tailor your offerings to your audience’s needs.
- Access Types
- Ongoing Memberships
- Fixed-Term Access
- Specific Expiration Dates
- Registration Options
- New Members Only
- Existing and New Members
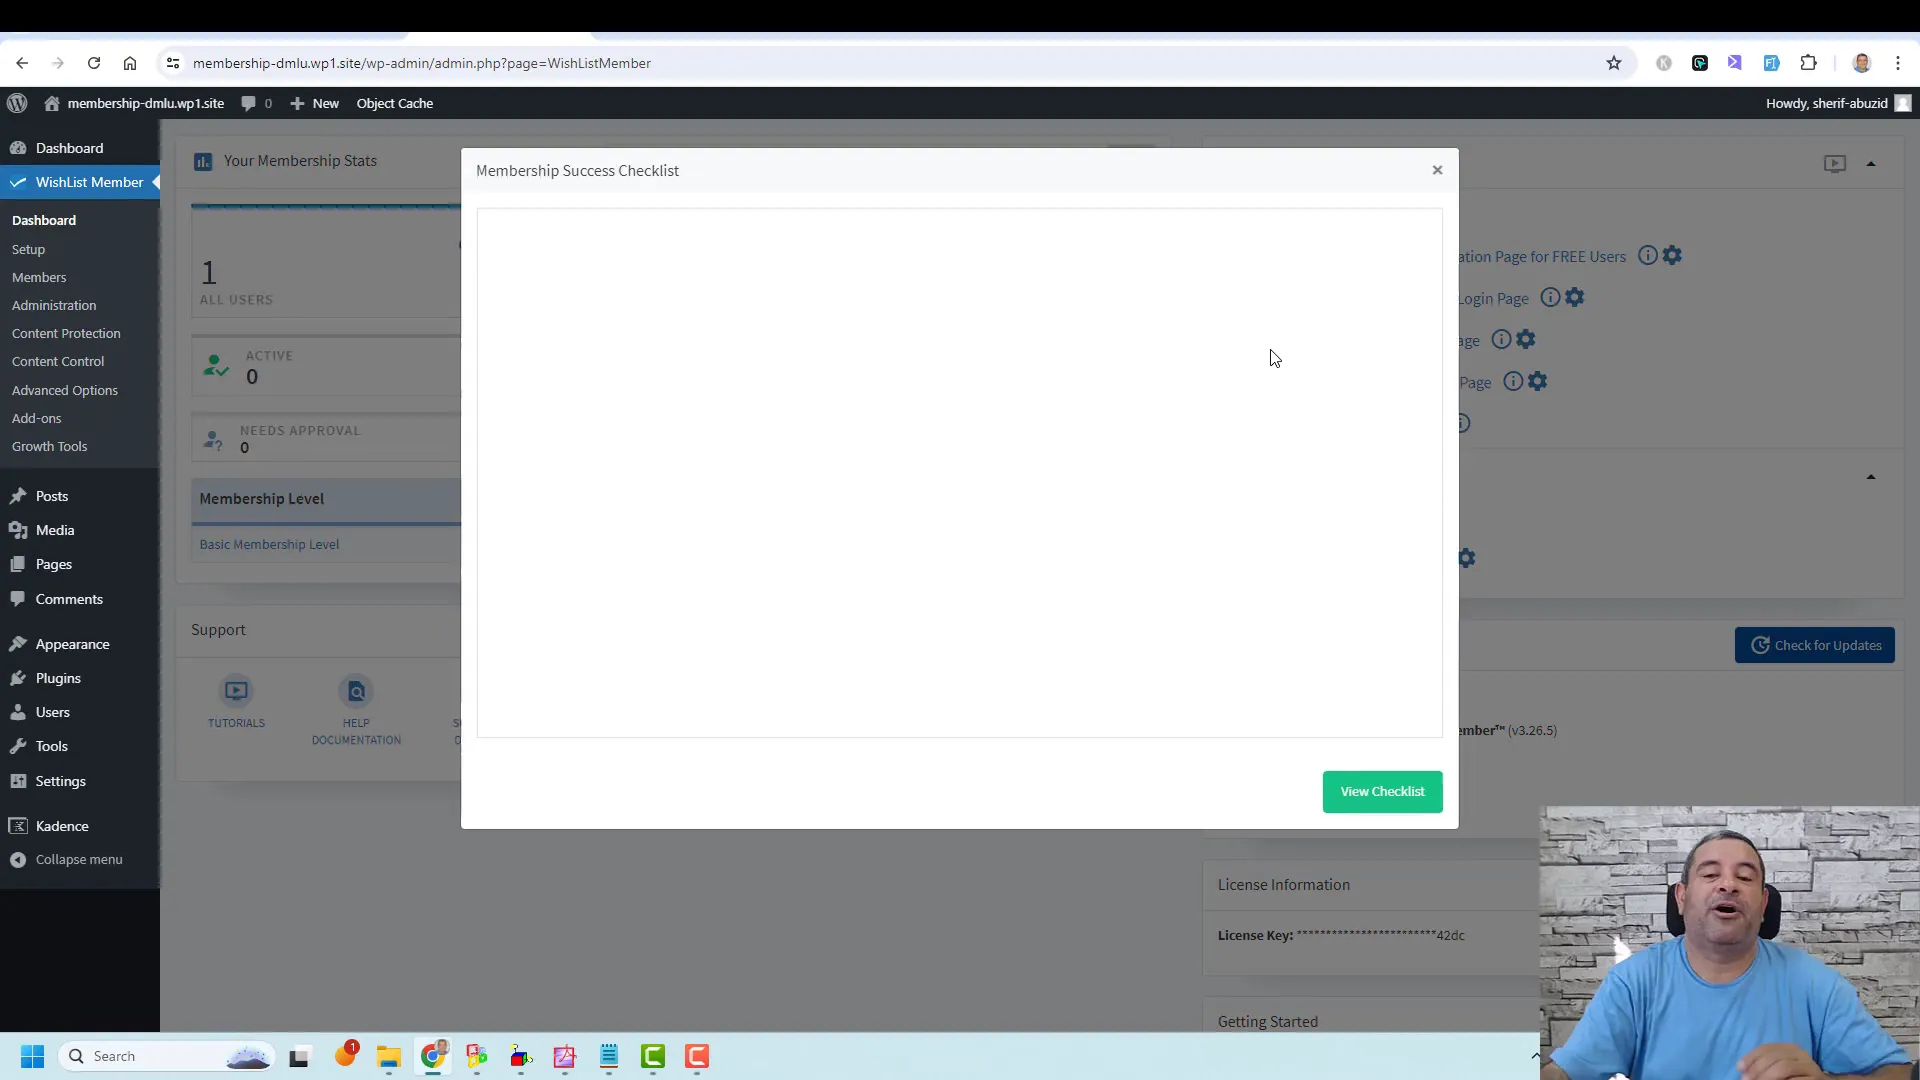
Content Protection Settings
Content protection is at the heart of any membership site. Wish List Member provides robust options for restricting access to specific posts, pages, or categories based on membership level. This ensures that only paying members can view premium content.
To set up content protection, navigate to the content protection settings within the plugin. Here, you can select which categories or individual posts should be restricted. This feature allows for precise control over what members can access, enhancing the value of their subscriptions.
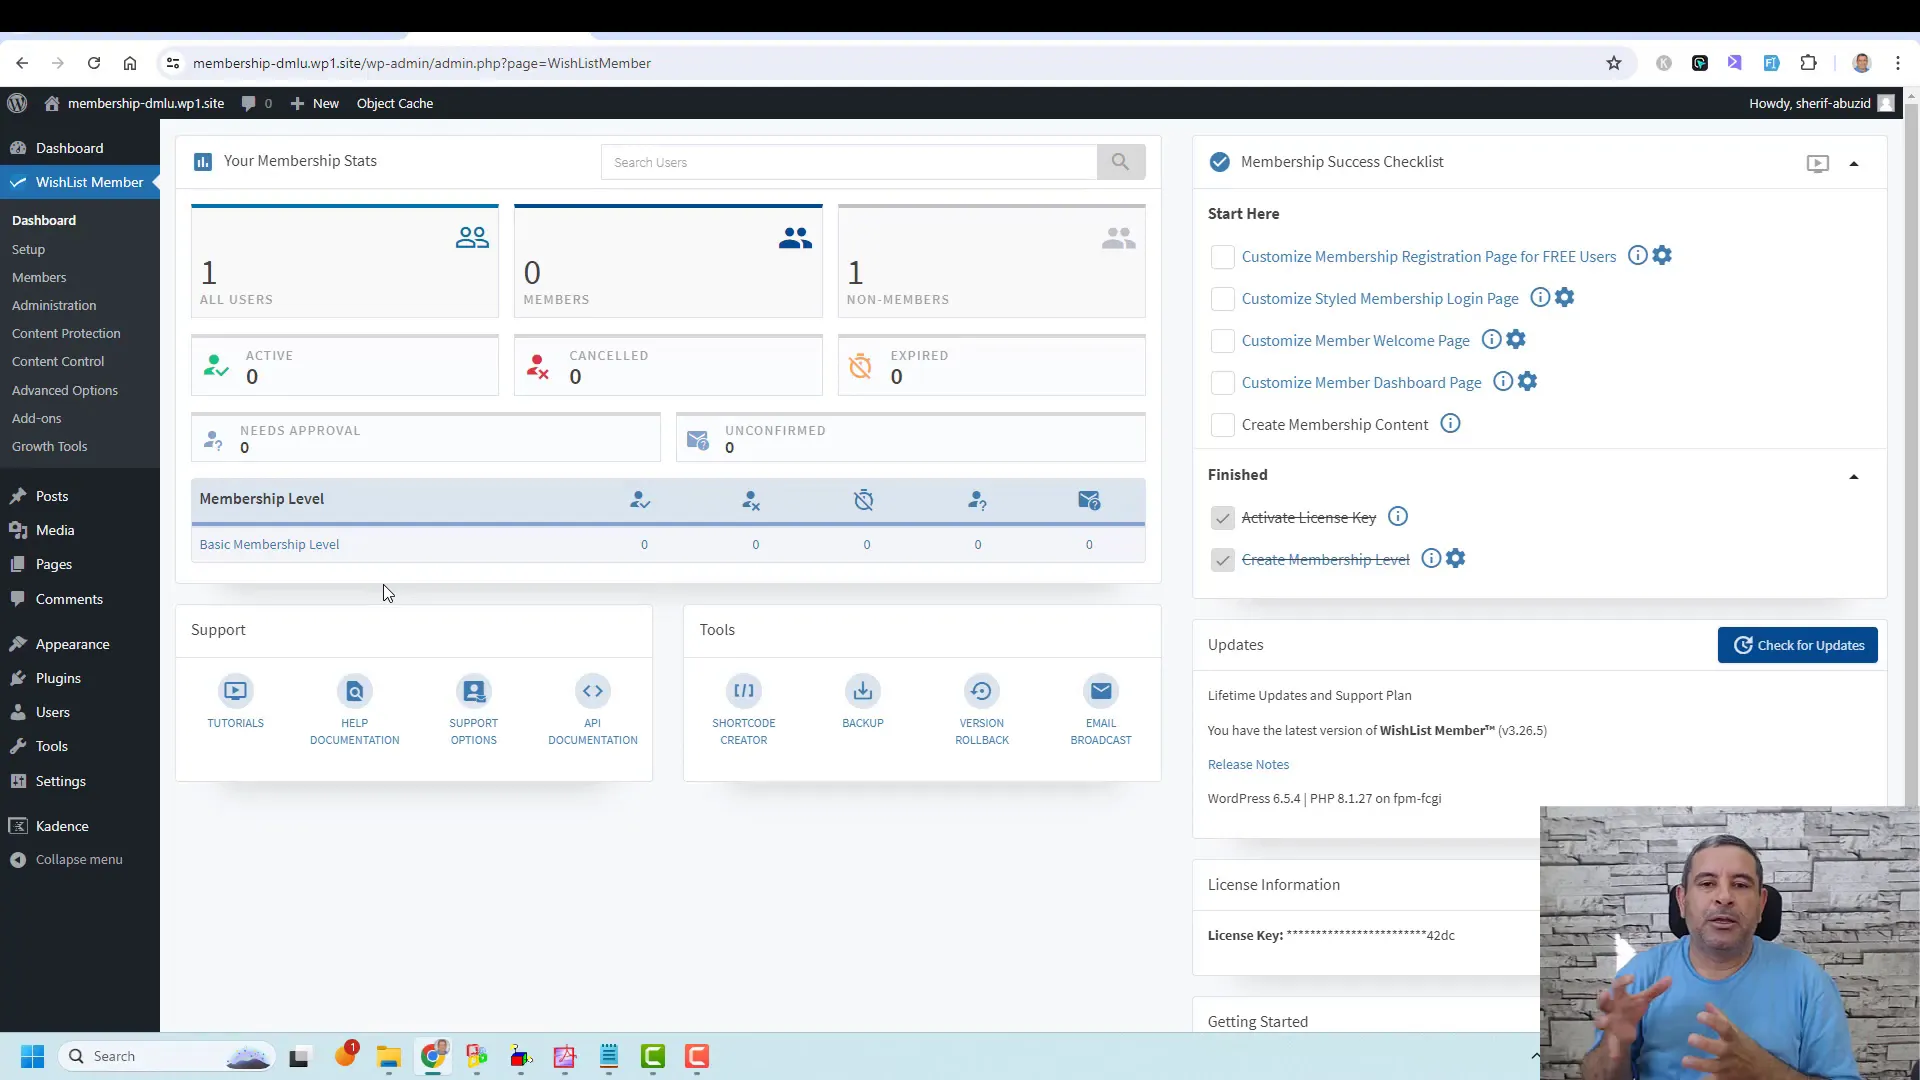
Managing Membership Settings
Managing your membership settings is crucial for ensuring a smooth experience for both you and your members. Within Wish List Member, you can customize notifications, manage registration settings, and set up post-registration redirects.
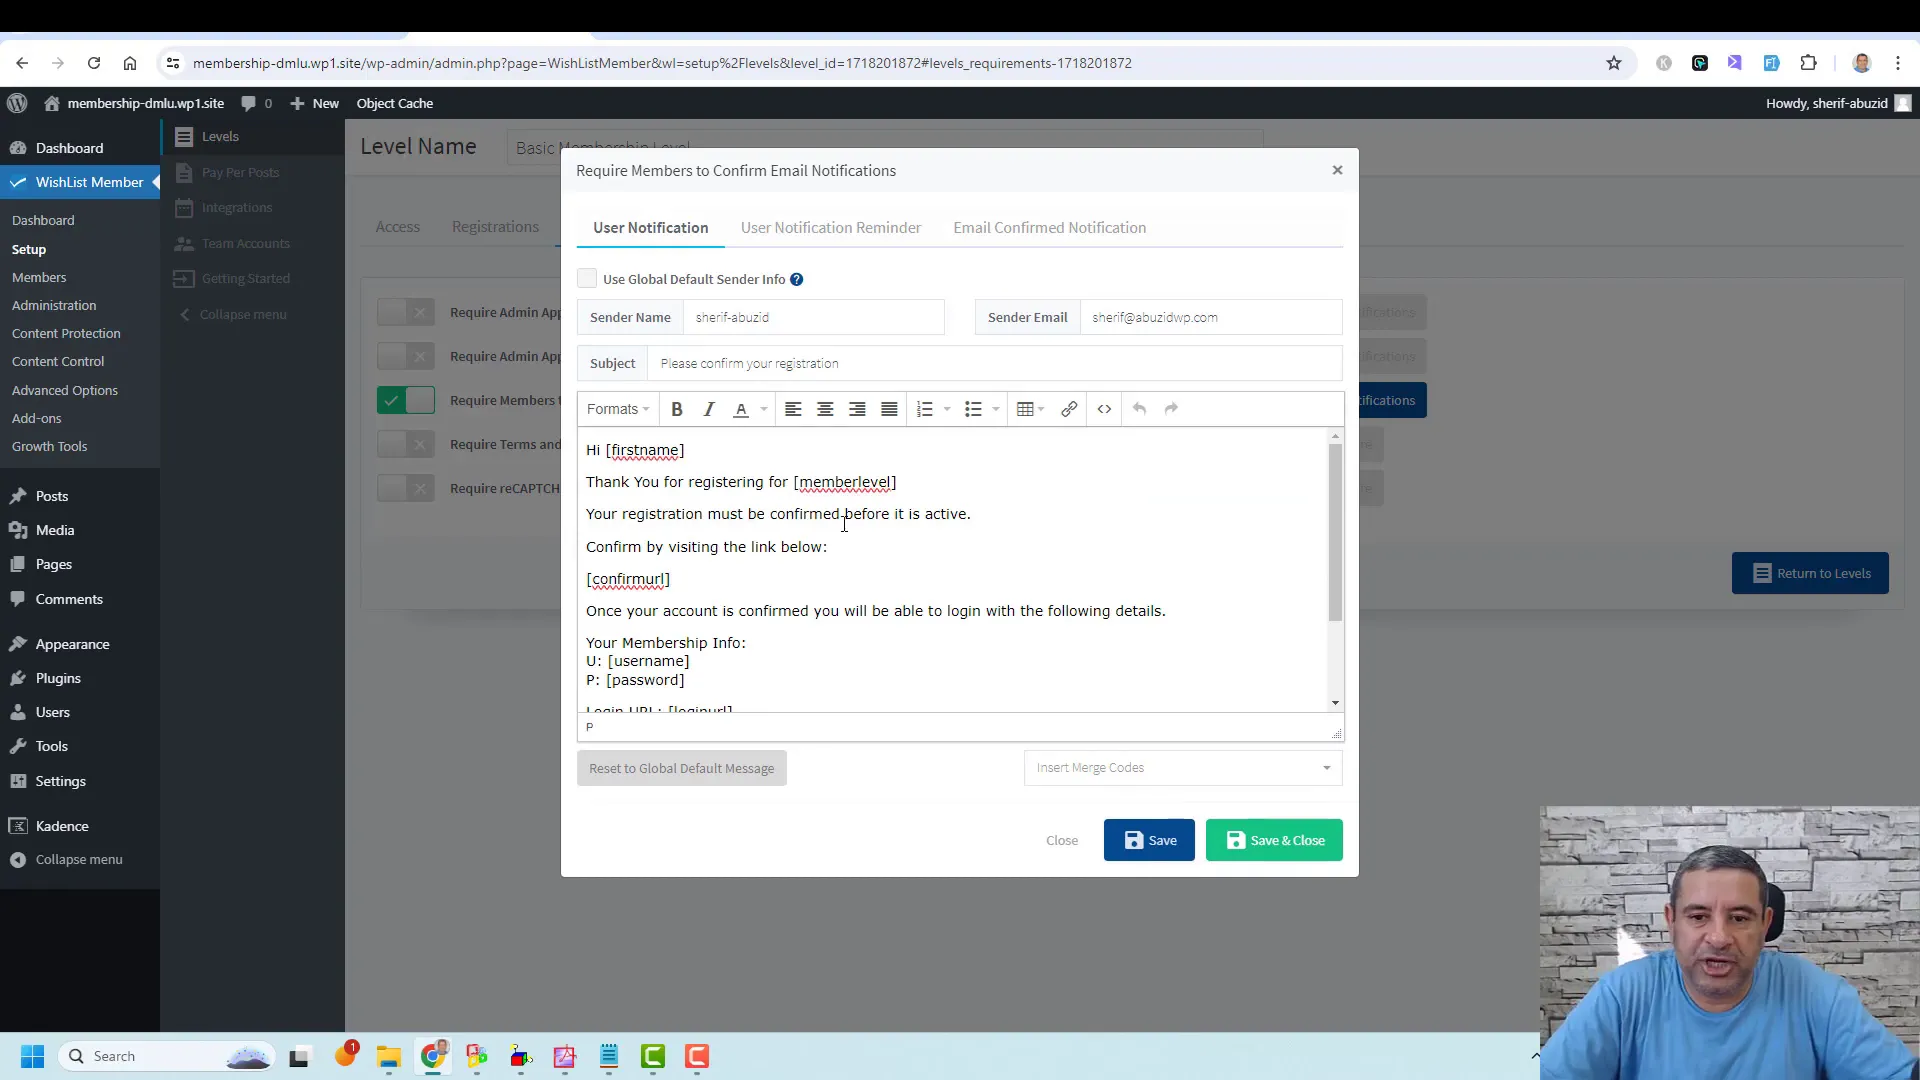
To access these settings, navigate to the Wish List Member dashboard. Here, you can edit notifications that are sent to members upon registration or updates. Customizing these notifications can enhance member engagement and provide essential information right from the start.
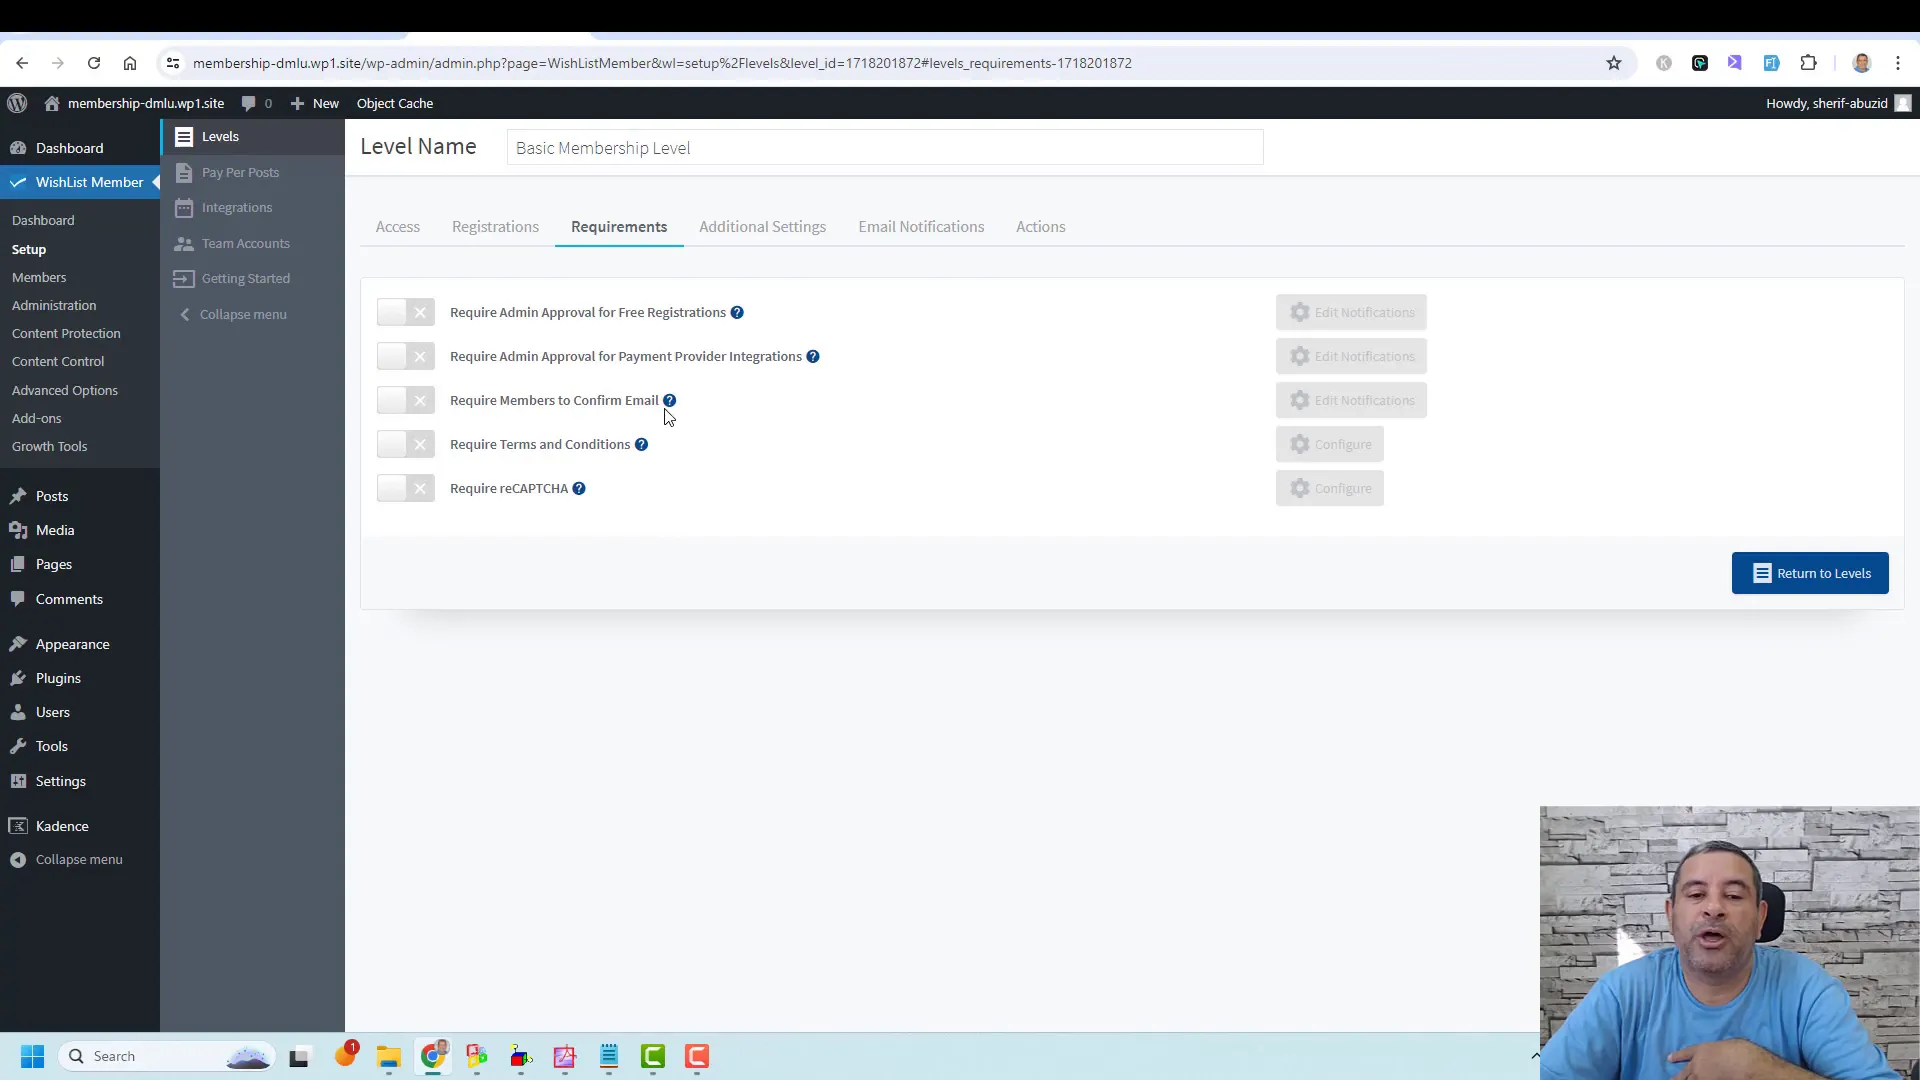
Customizing Notifications
Notifications can be tailored to fit your brand’s voice. You can modify the content, style, and even the timing of these messages. This personal touch can make your members feel more connected and valued.
Additionally, you can decide whether to notify admins about new registrations. This option can help you keep track of new members without overwhelming your inbox.
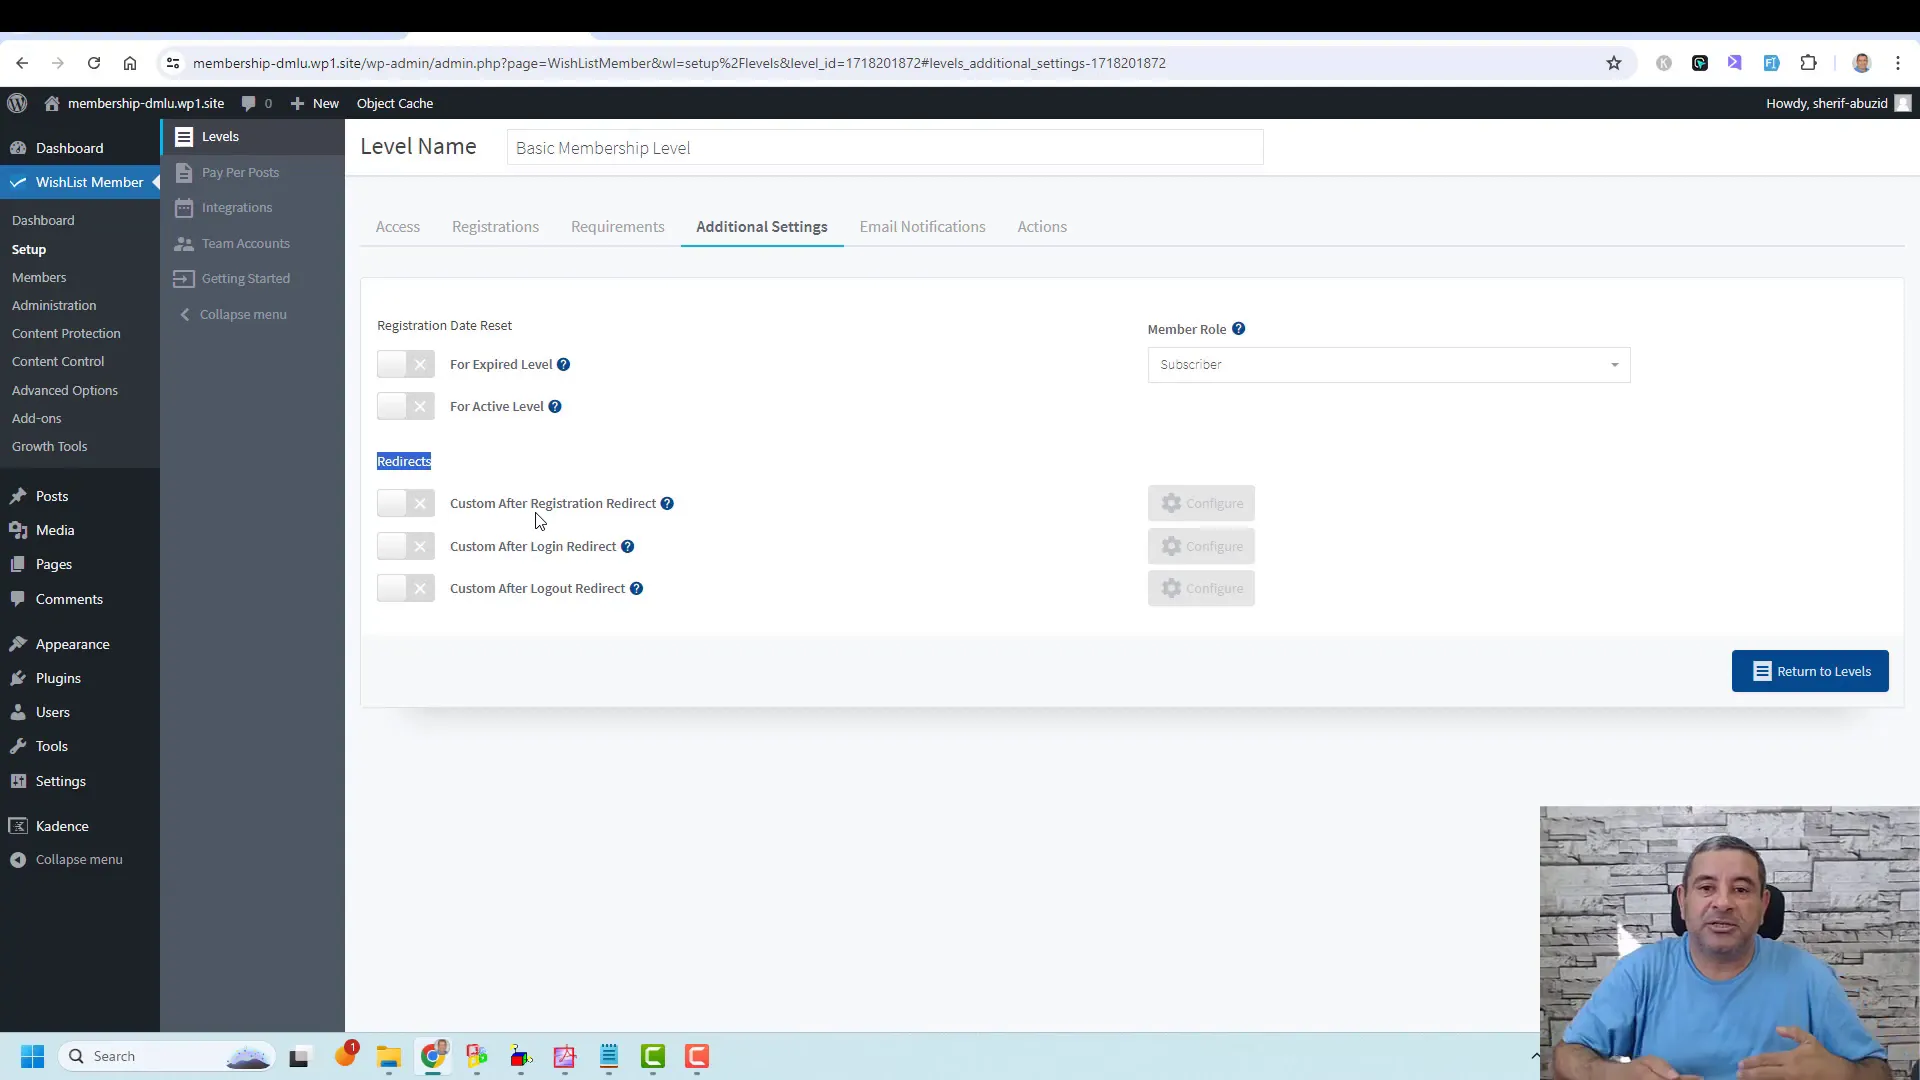
Setting Up Redirects
Redirecting members after registration is a great way to enhance their experience. You can direct new members to a welcome page, an introductory video, or any content that you deem necessary for their onboarding.
To set this up, go to the redirection settings in the membership level configuration. You can choose to redirect users to specific pages or display a custom message upon registration. This feature ensures that new members are not left wondering where to go next.
Creating Protected Content
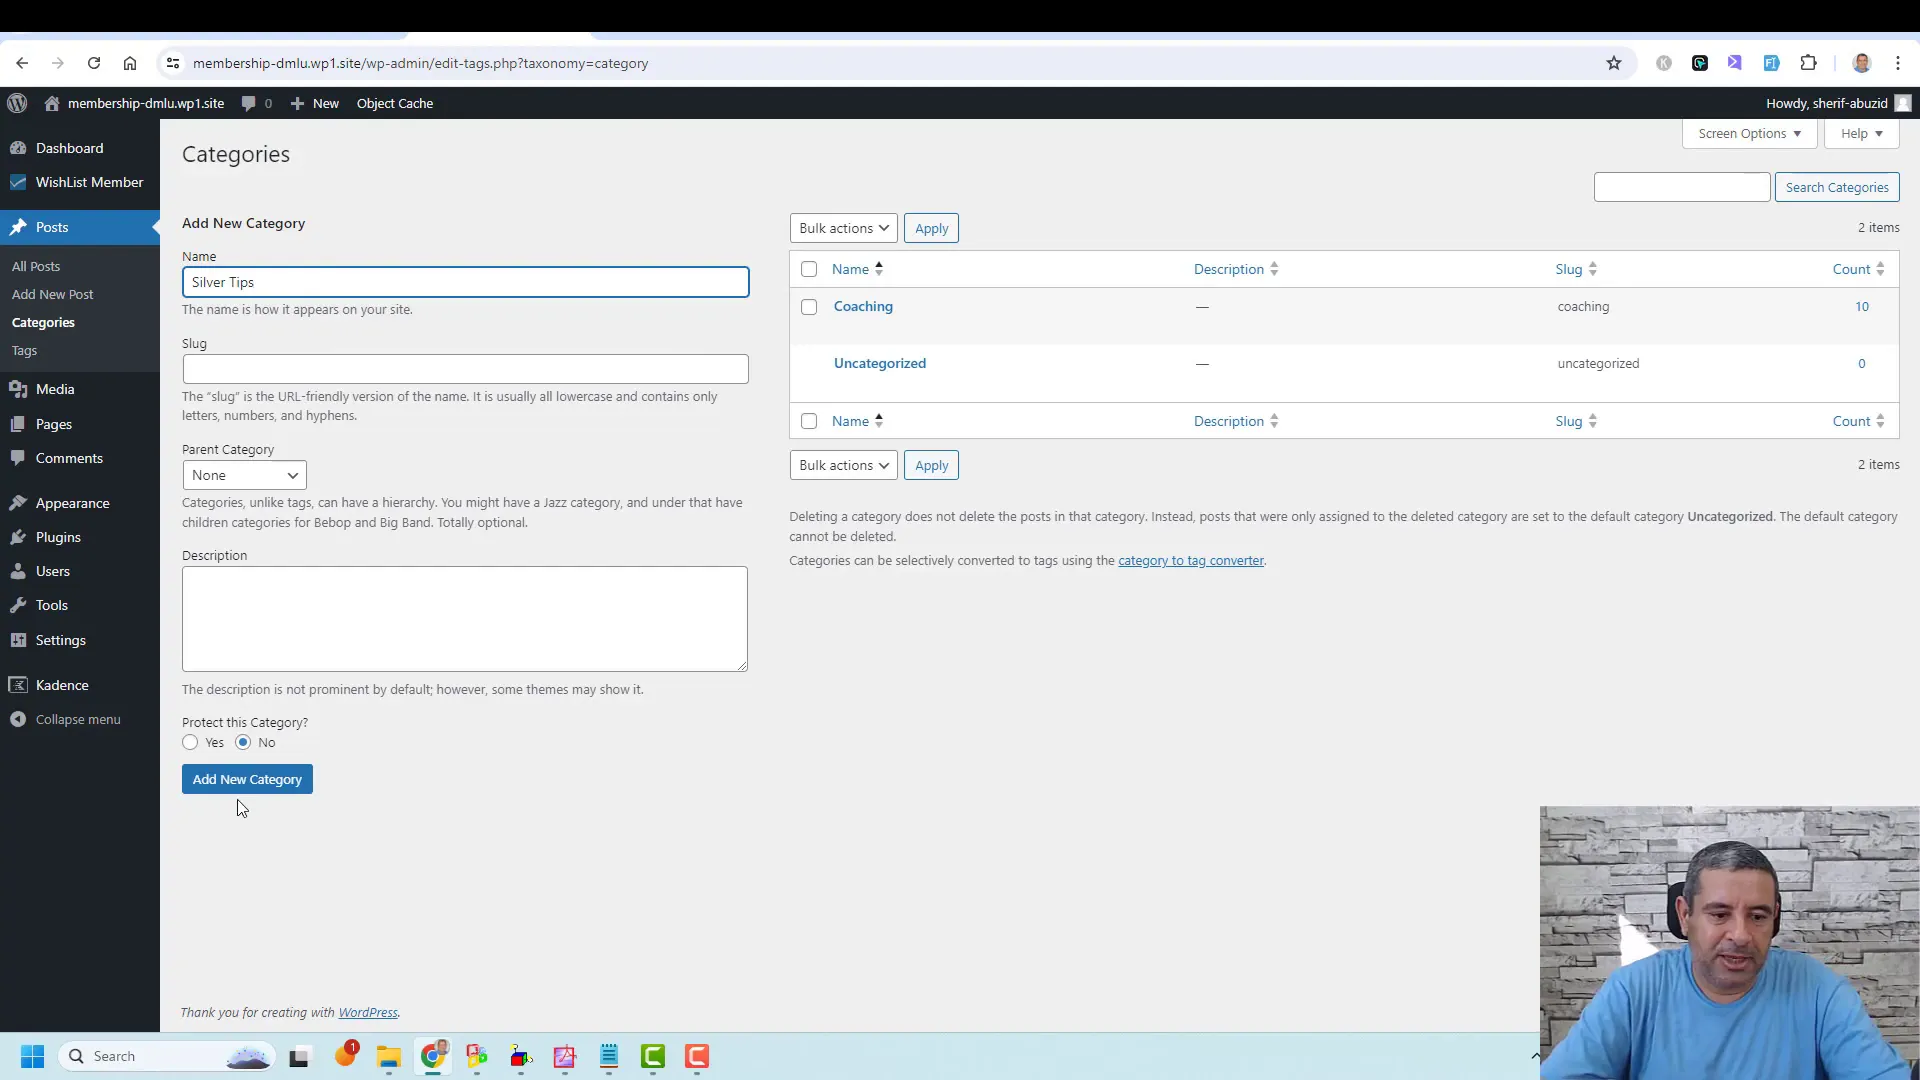
Creating protected content is a fundamental aspect of restricting content with memberships. Wish List Member allows you to designate which posts, pages, or categories are accessible to specific membership levels.
To protect content, you need to create a category for your specific membership level. For example, if you have a Silver Membership, you can create a “Silver Tips” category that only members of that level can access.
Implementing Content Protection
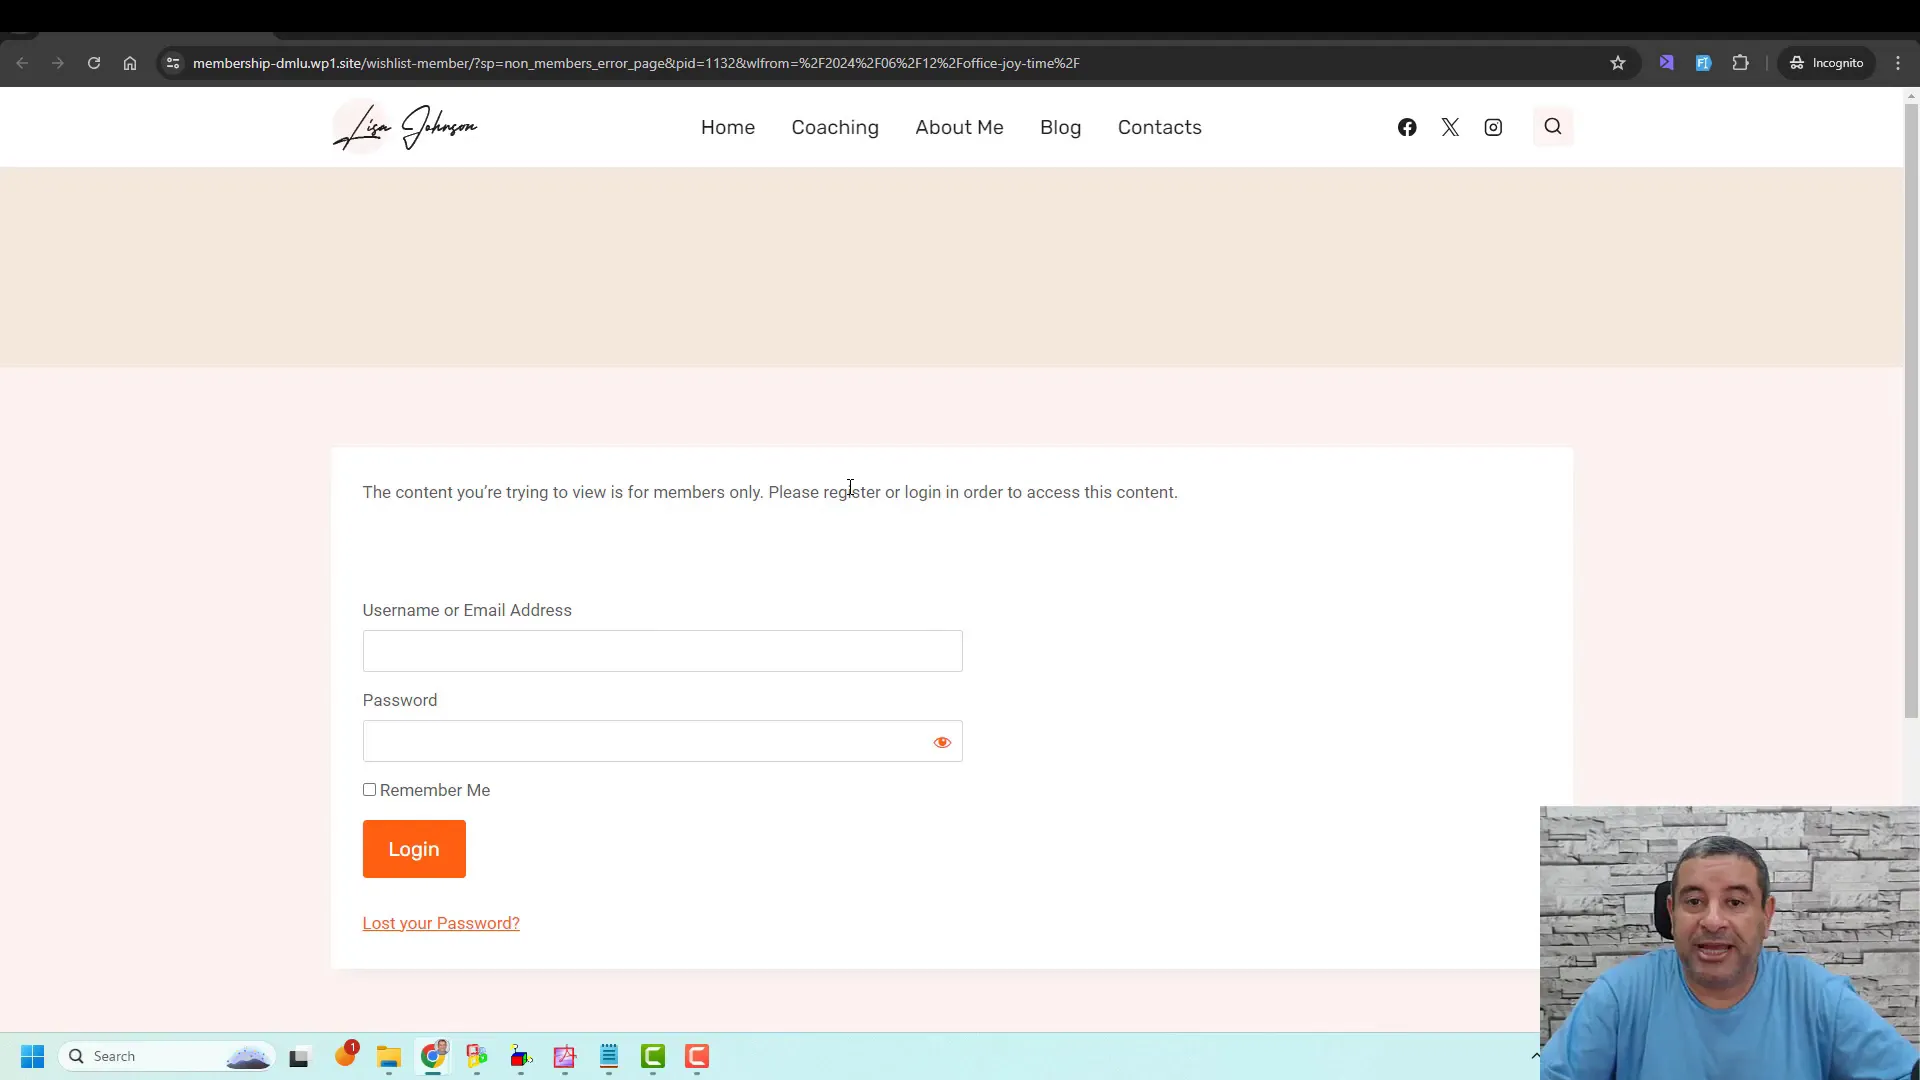
After creating the category, you can assign it to specific posts. This ensures that any content added to this category will automatically inherit the protection settings. Members with the appropriate level will have access, while others will see a message indicating that the content is restricted.
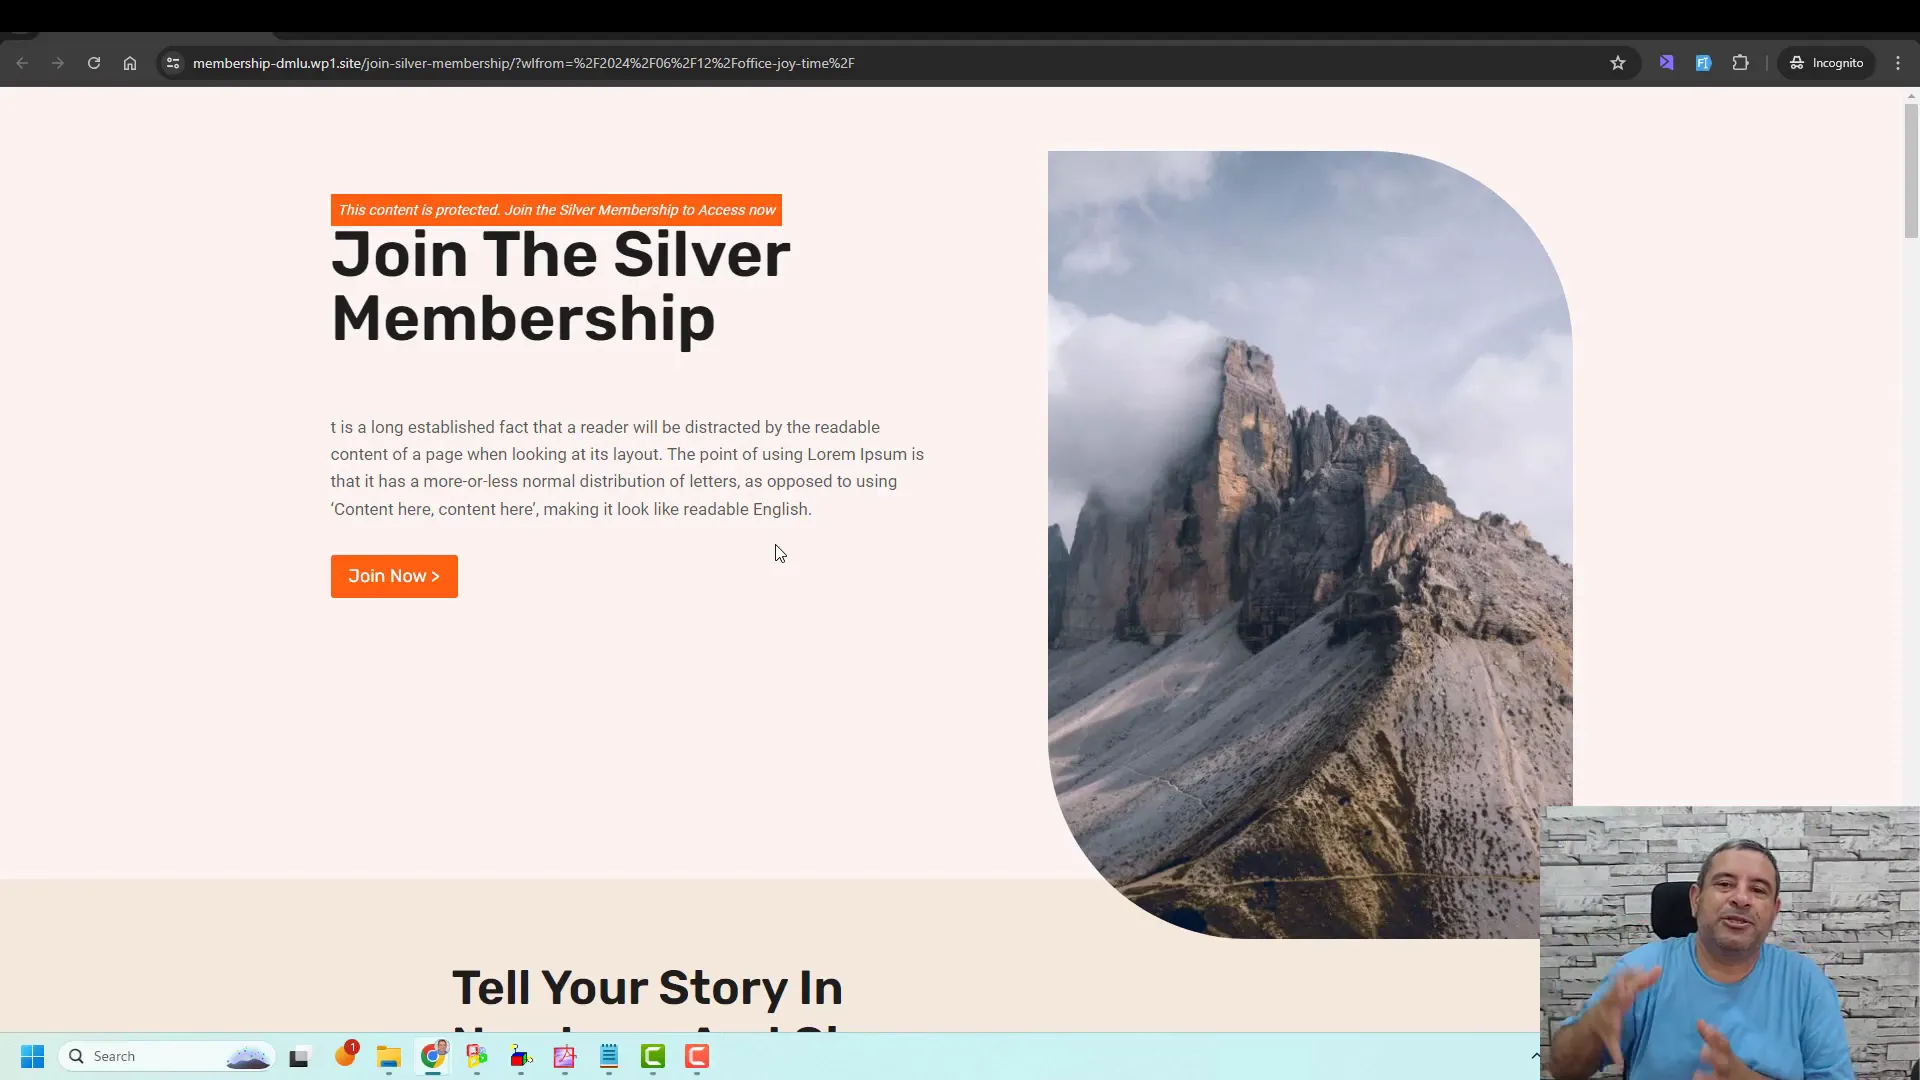
For instance, if a user without Silver Membership tries to access a post in the “Silver Tips” category, they will be redirected to a sales page encouraging them to join the membership.
Redirecting Non-Members to Sales Pages
Redirecting non-members to sales pages is a powerful strategy to convert visitors into paying members. This feature allows you to turn potential access denials into opportunities for sales.
When setting up your protected content, you can specify what happens when a non-member attempts to access restricted material. By redirecting them to a dedicated sales page, you can effectively communicate the benefits of membership and encourage sign-ups.
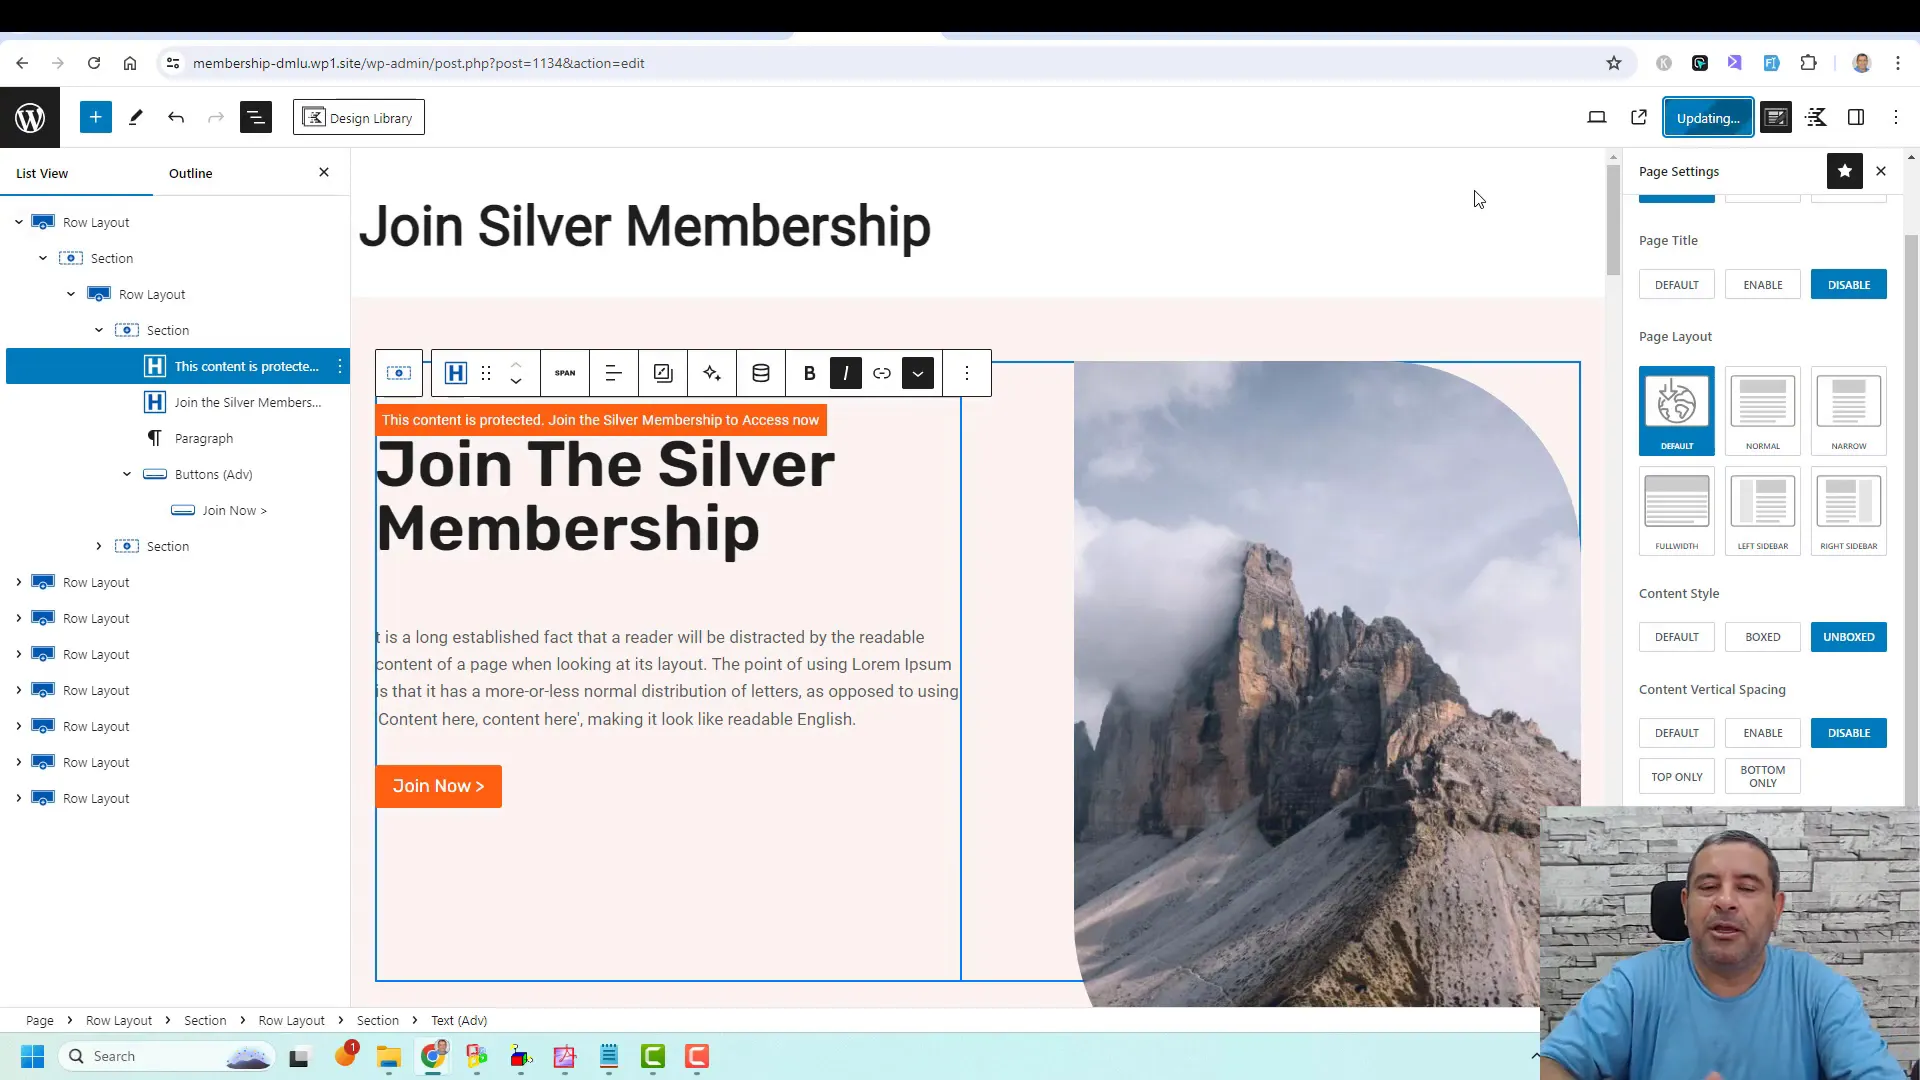
Creating Effective Sales Pages
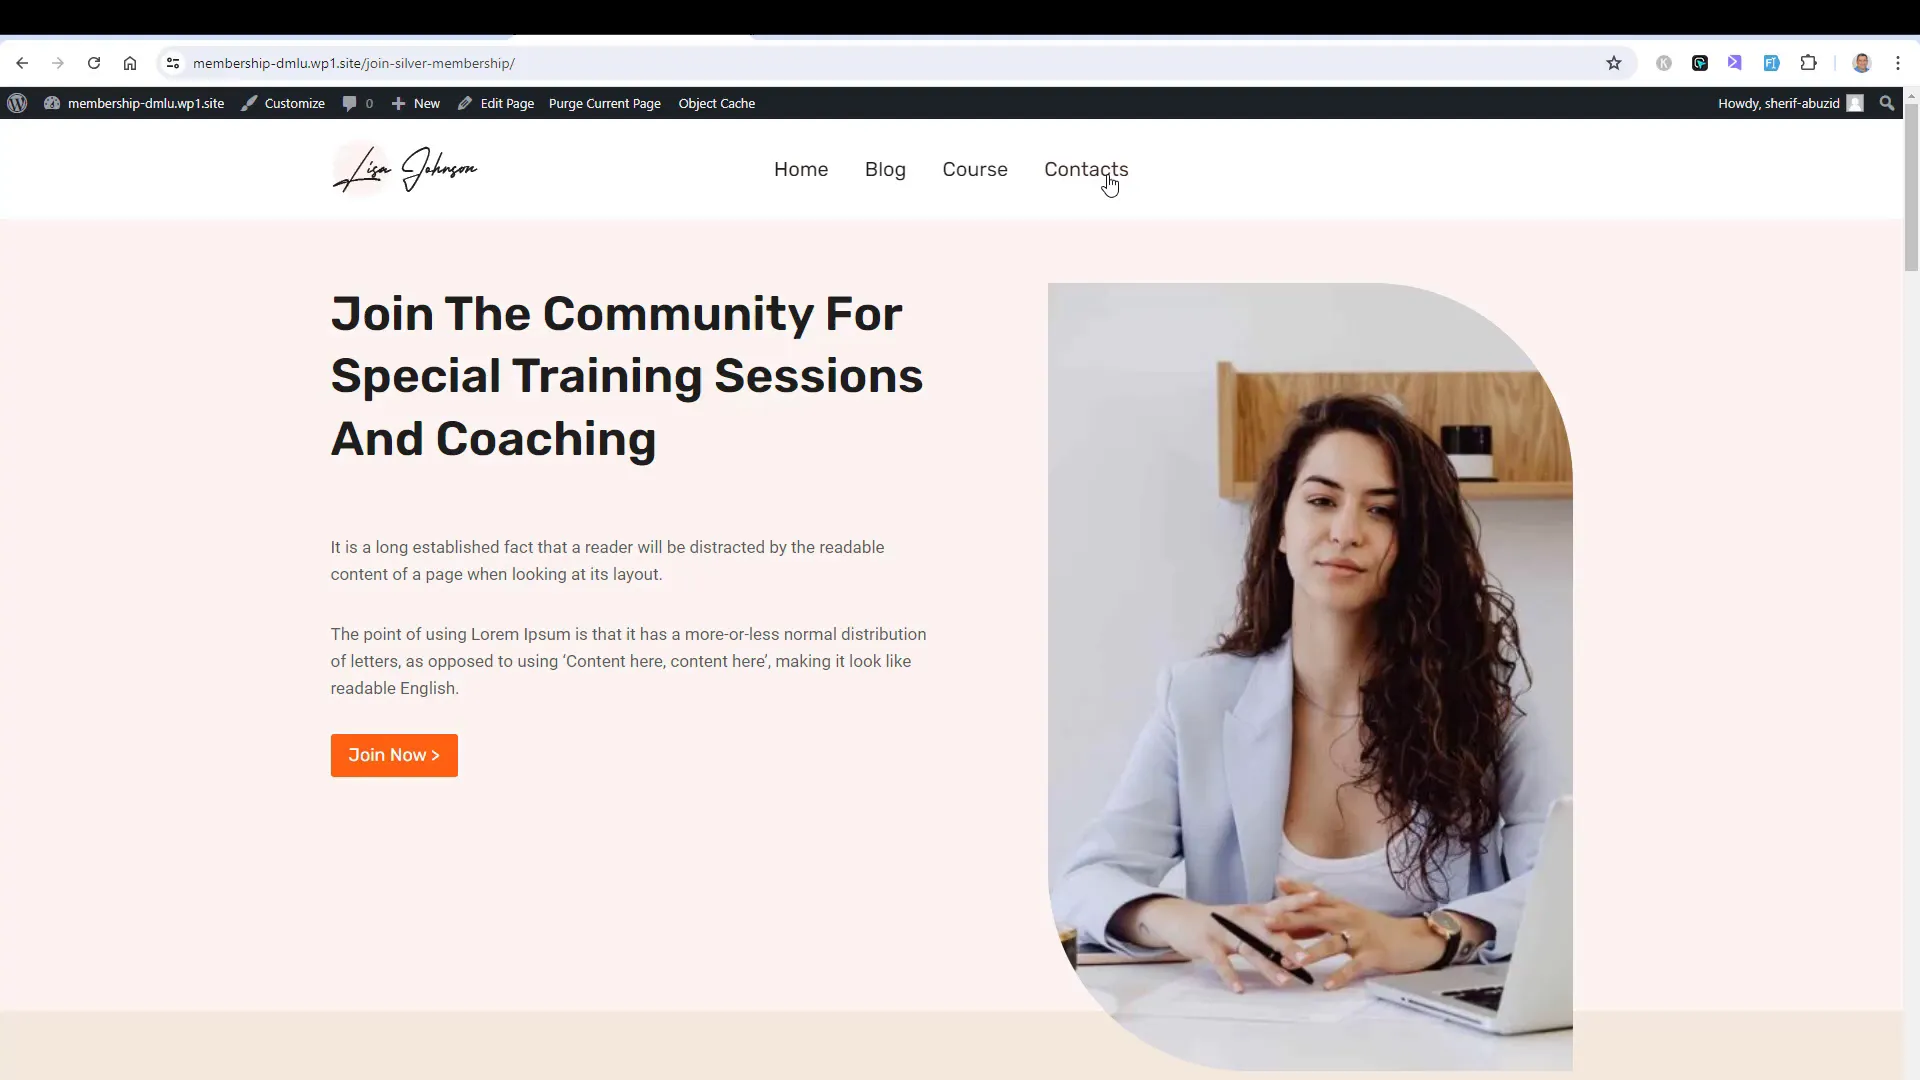
Your sales page should clearly outline the benefits of joining your membership. Include testimonials, detailed descriptions of what members will receive, and a strong call to action. Using attractive design elements can also help capture attention and drive conversions.
Once your sales page is set up, link it within the redirection settings of your protected content. This way, any user without access will be seamlessly guided to the page where they can register for the membership level.
Adding Free Membership Level
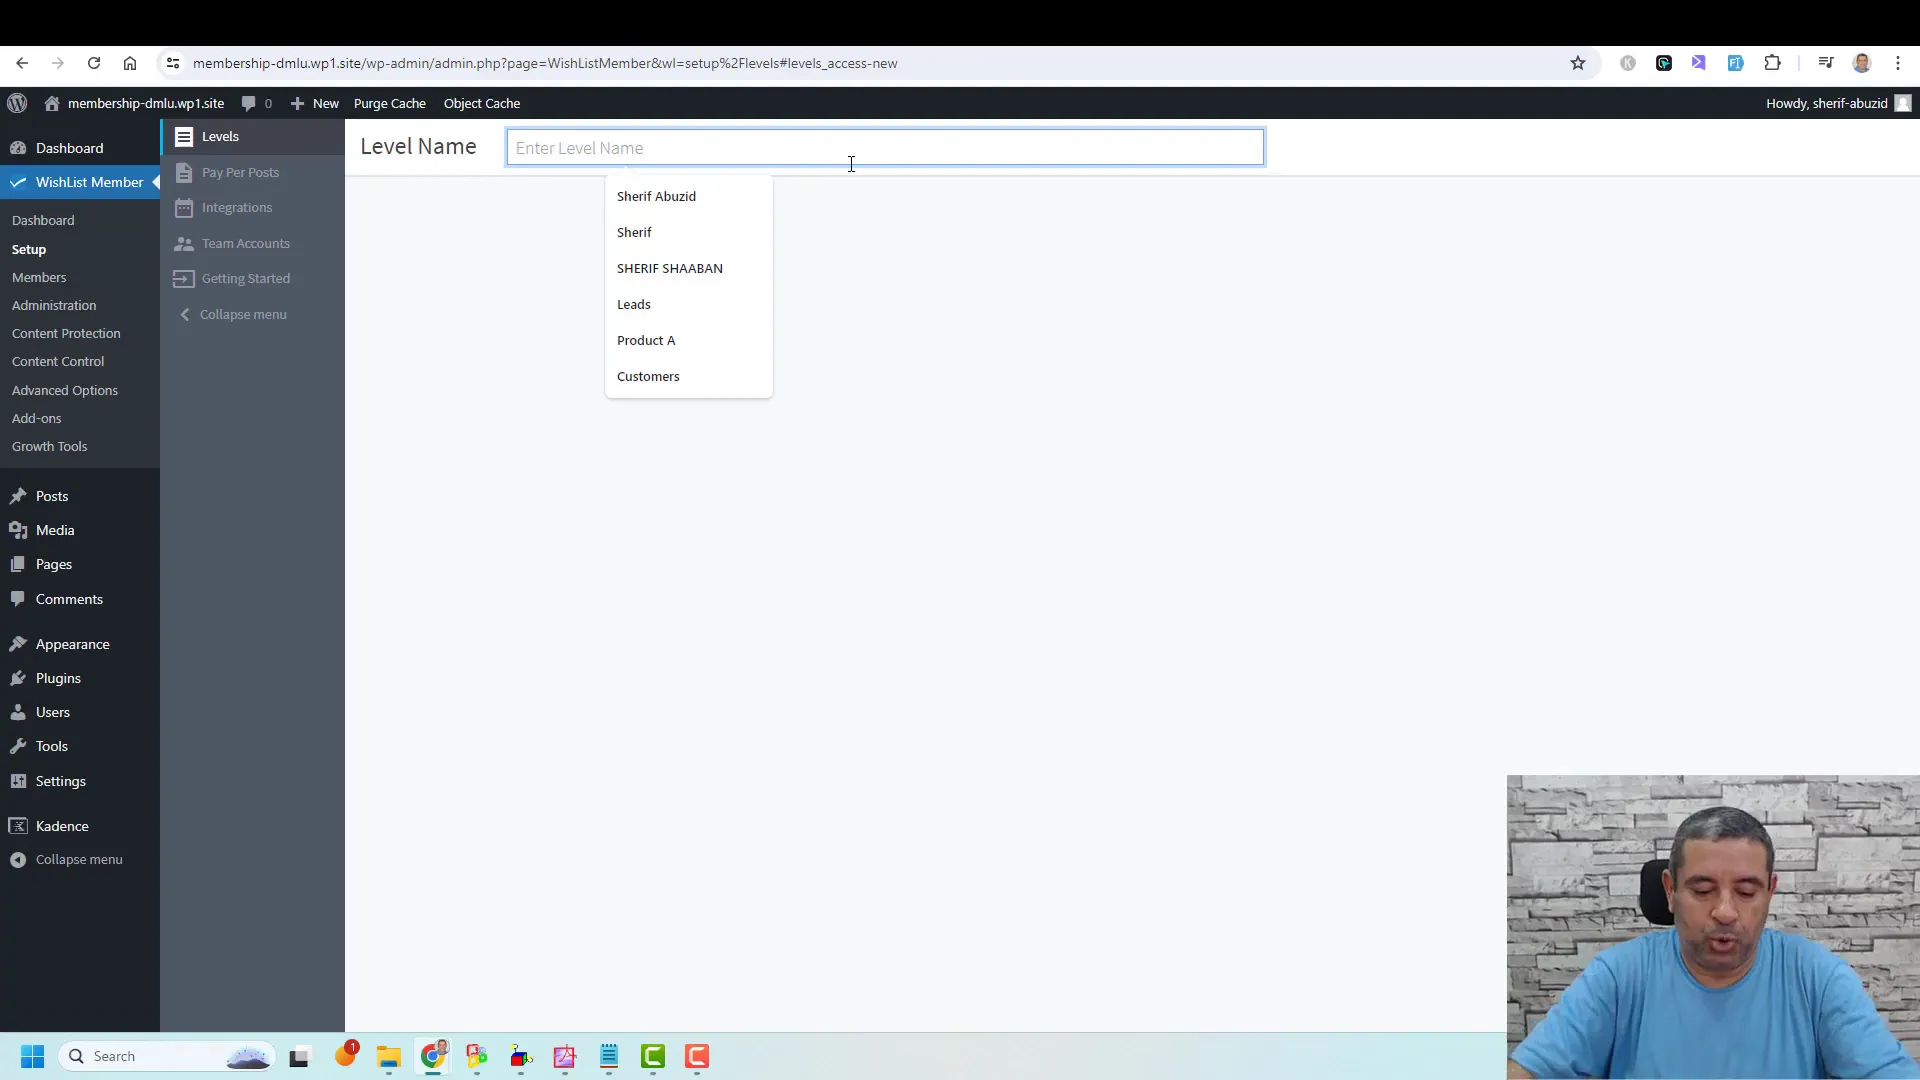
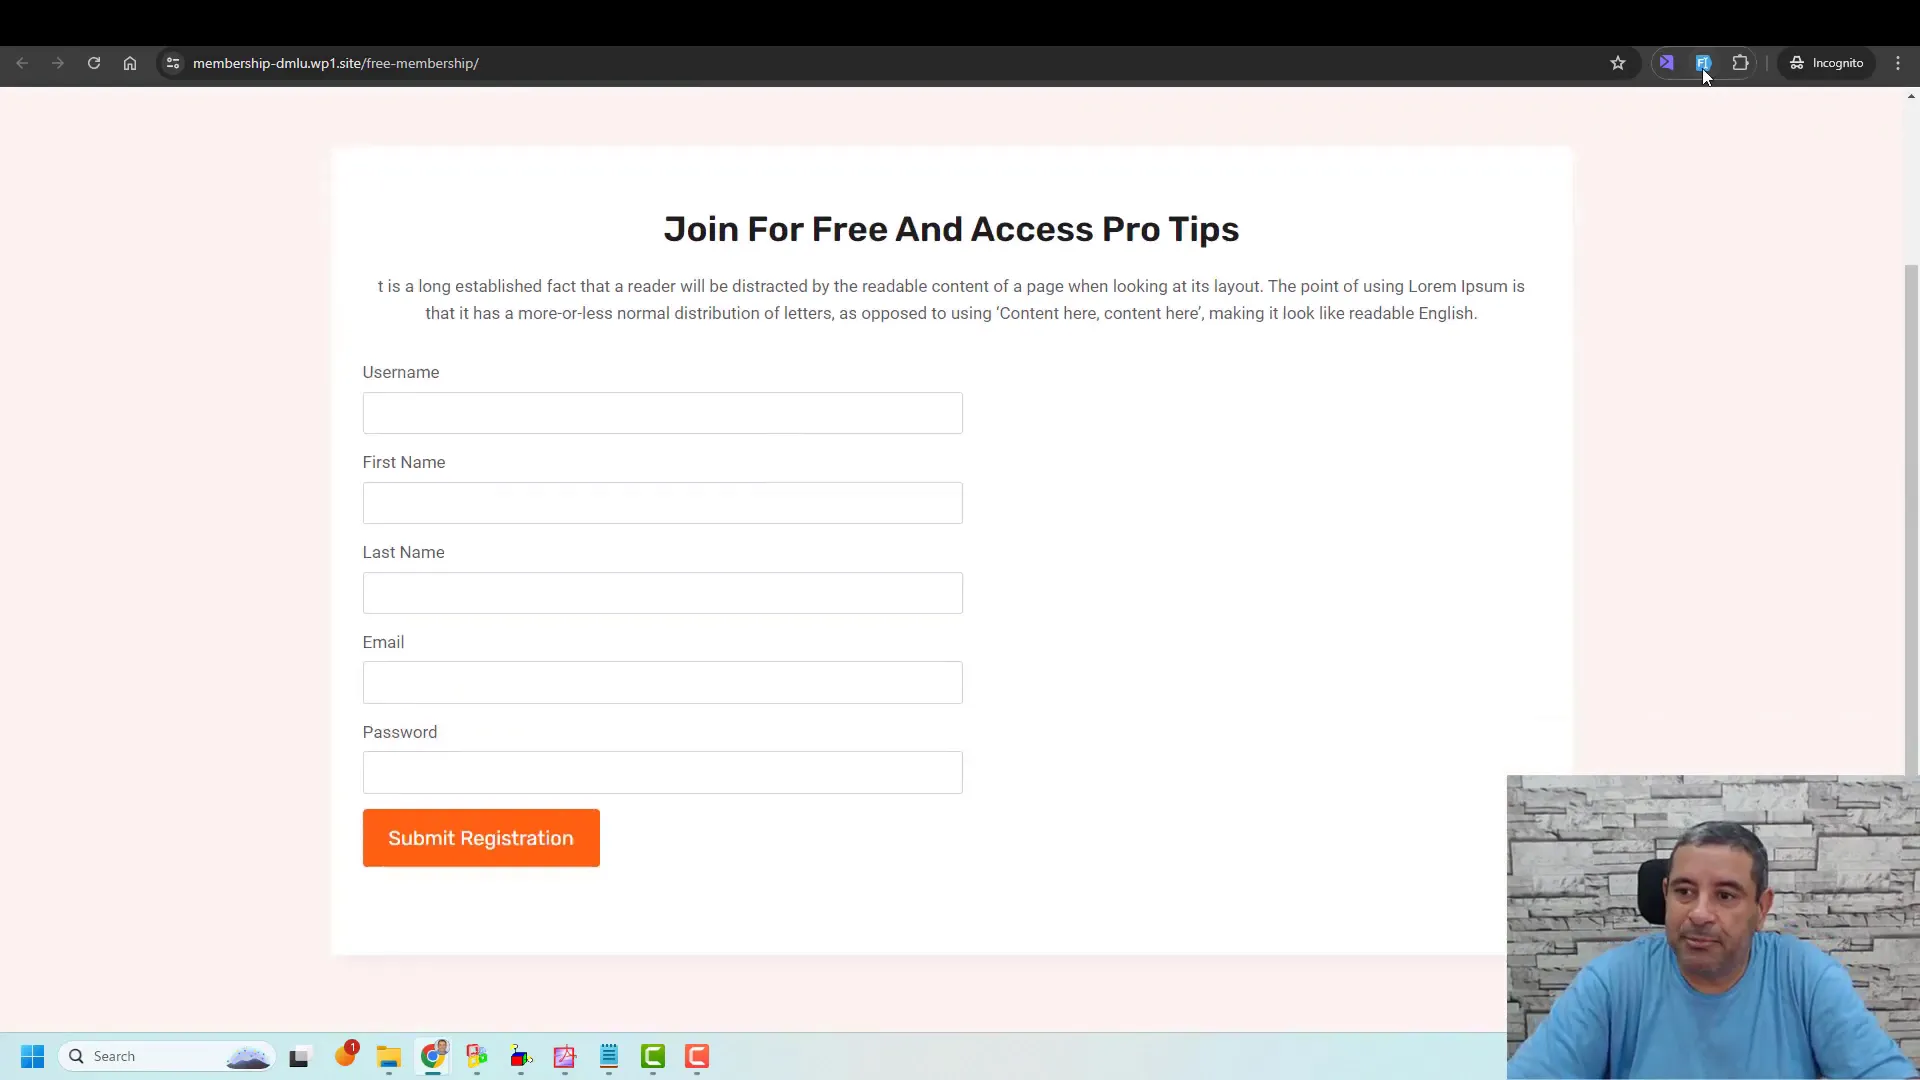
Creating a free membership level is an excellent way to grow your community. This allows new users to join without any financial commitment, providing them with an opportunity to explore your content and services.
To add a free membership level, navigate to the membership levels section in Wish List Member and create a new level titled “Free Membership.” Customize the registration form to collect essential information without requiring payment details.
Benefits of a Free Membership
Free memberships can serve as a gateway to upselling paid memberships. By providing valuable content to free members, you can nurture their interest and encourage them to upgrade to a paid level in the future.
Additionally, free members can help spread the word about your offerings, attracting more potential members to your site. This strategy enhances your community and increases the chances of converting free members into paying customers later on.
Restricting content with memberships using Wish List Member can transform your WordPress site into a thriving community. By effectively managing membership settings, creating protected content, and implementing strategic redirects, you can enhance user experience and increase conversions.
We recommend regularly reviewing your membership levels and content offerings to ensure they meet your audience’s needs. Engaging with your community through newsletters, forums, or social media can also help maintain interest and encourage renewals.
Part 3 -Setting Up PayPal to Sell Memberships: A Comprehensive Guide
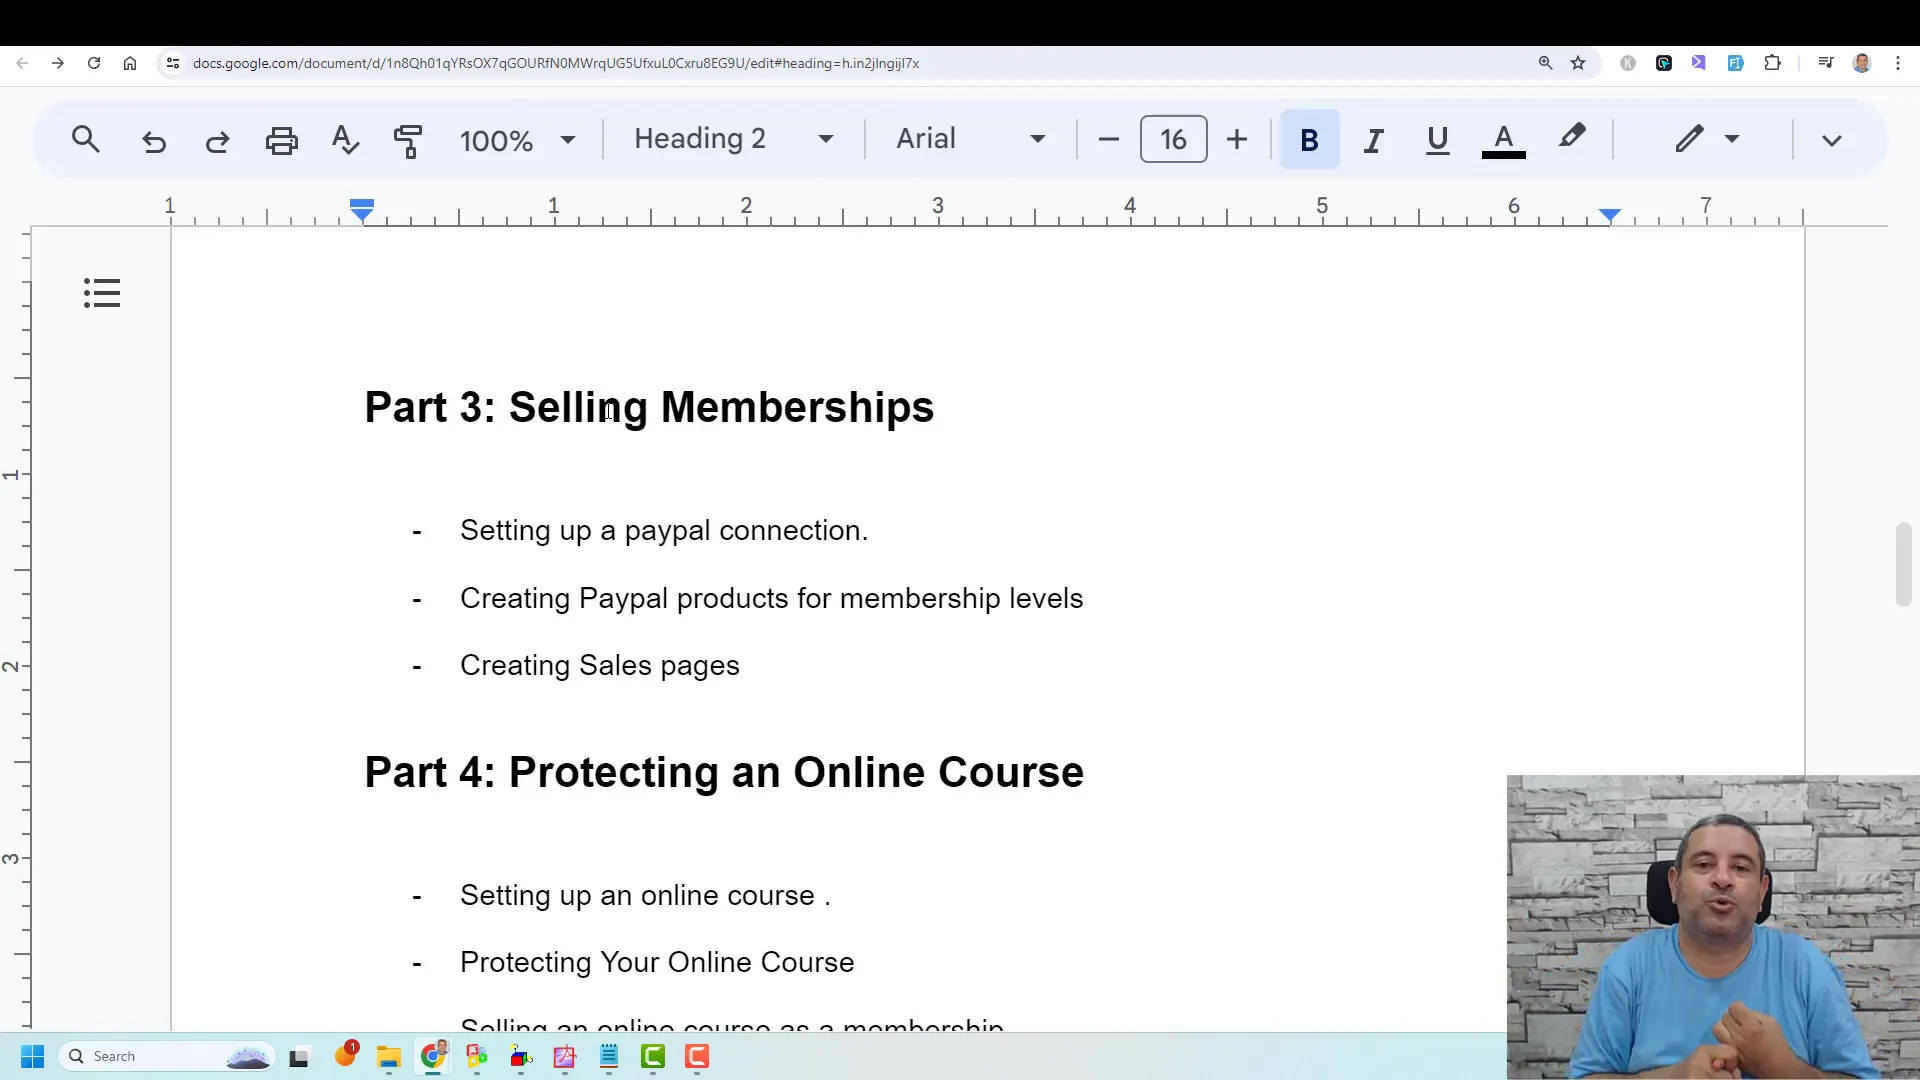
In this part, we will explore the essential steps for Setting Up PayPal to Sell Memberships on your WordPress website. This integration not only streamlines your payment process but also enhances user experience, making it easier for your members to join and access your content.
Overview of Previous Parts
In the earlier sections of this training series, we laid the groundwork for creating a membership website:
- Part 1: Setting up a starter website using the Cadence theme and Cadence blocks.
- Part 2: Establishing membership levels with Wish List Member, including Silver, Gold, and Free membership options.
These foundational steps are essential for creating a robust membership site that can effectively engage and serve your audience.
What You Will Learn in This Part
In this part of the guide, we will cover the following key topics:
- Creating a landing page for memberships.
- Integrating PayPal with Wish List Member.
- Configuring PayPal settings for optimal performance.
- Creating membership products to facilitate sales.
Creating a Landing Page for Memberships
The landing page is where potential members will learn about your offerings and make the decision to join. It should be clear, engaging, and informative. Follow these steps to create an effective landing page:
- Choose a Template: Use a page builder or theme that allows customization to create a visually appealing page.
- Add Compelling Content: Clearly outline the benefits of joining your membership, including what exclusive content members will receive.
- Incorporate Call-to-Actions (CTAs): Use buttons like “Join Now” that lead directly to the payment process.

Integrating PayPal with Wish List Member
To accept payments through PayPal, integration with Wish List Member is essential. This process involves a few straightforward steps:
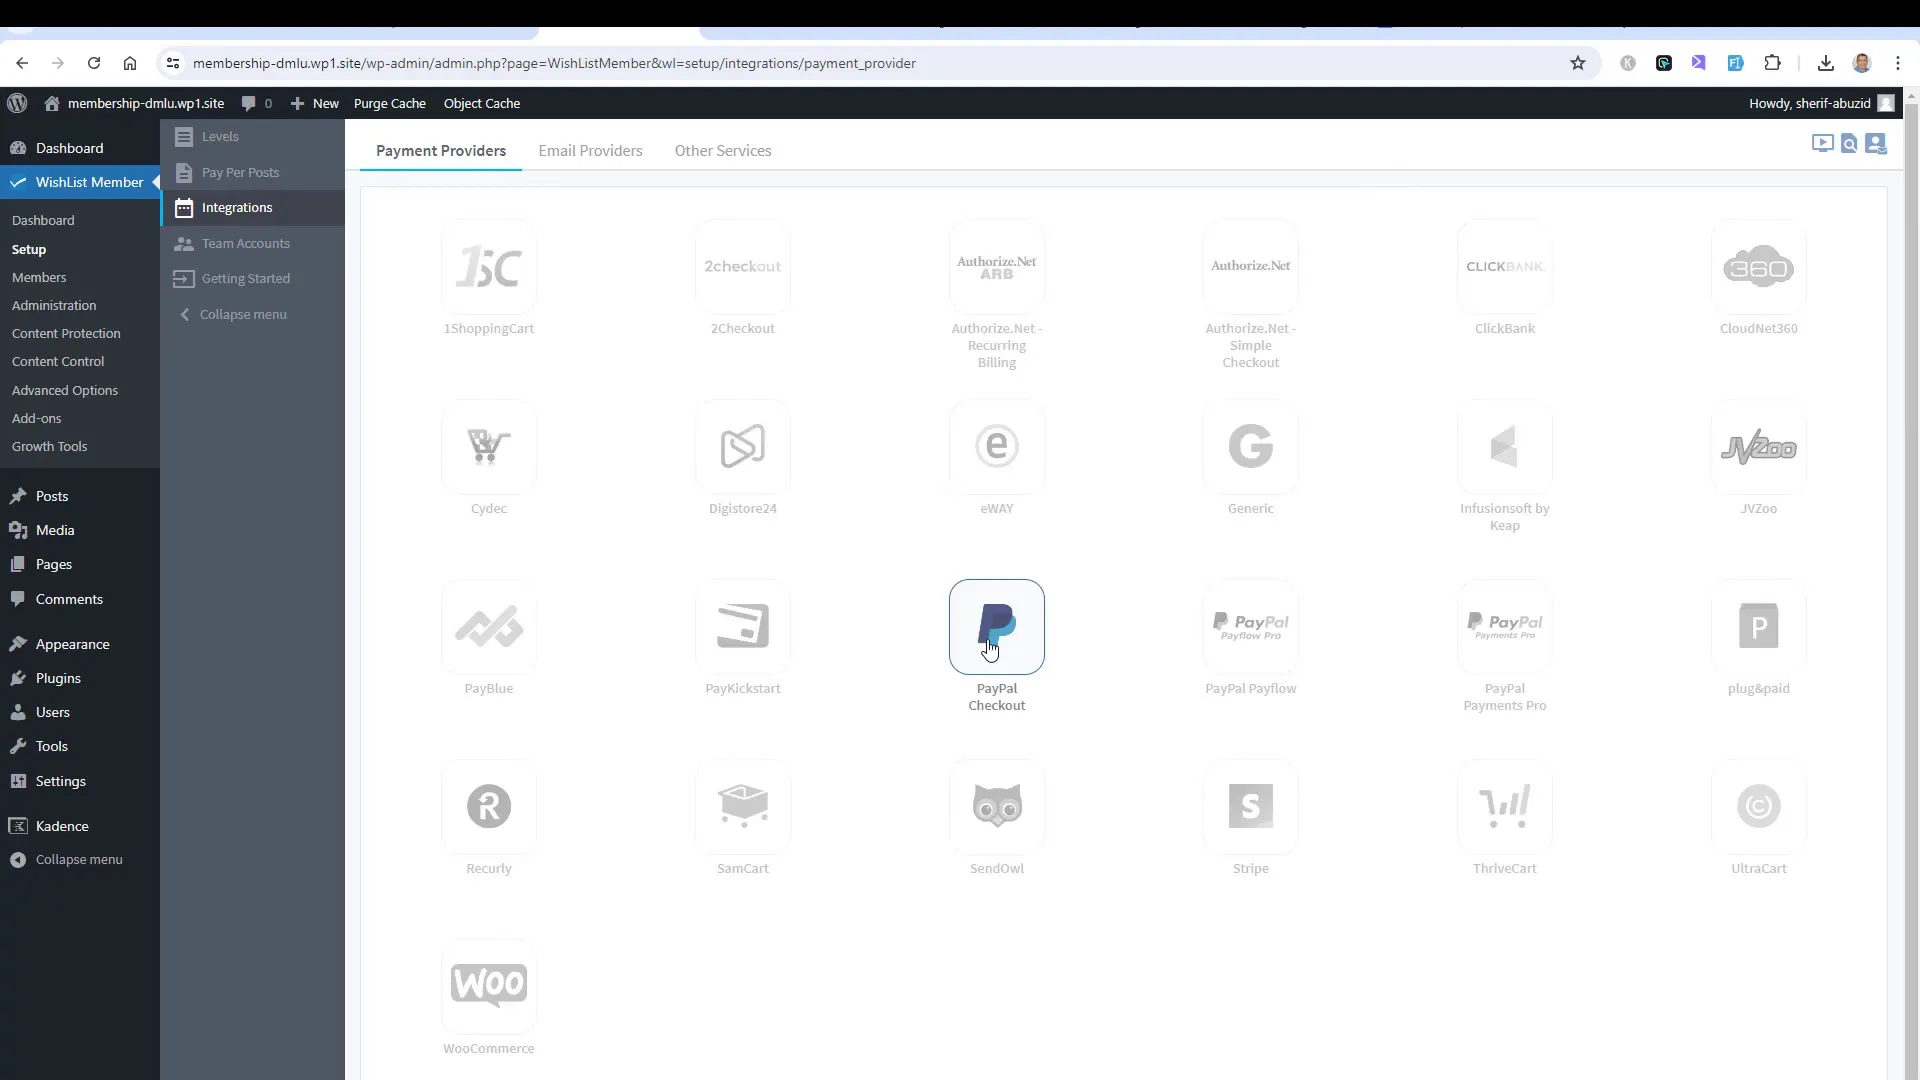
- Access Wish List Member Settings: Navigate to the Wish List Member dashboard and select the ‘Setup’ tab.
- Select Integrations: Choose PayPal Checkout as your payment gateway from the list of available options.
- Activate PayPal: Click to activate PayPal, which will allow you to configure the necessary settings.
Configuring PayPal Settings
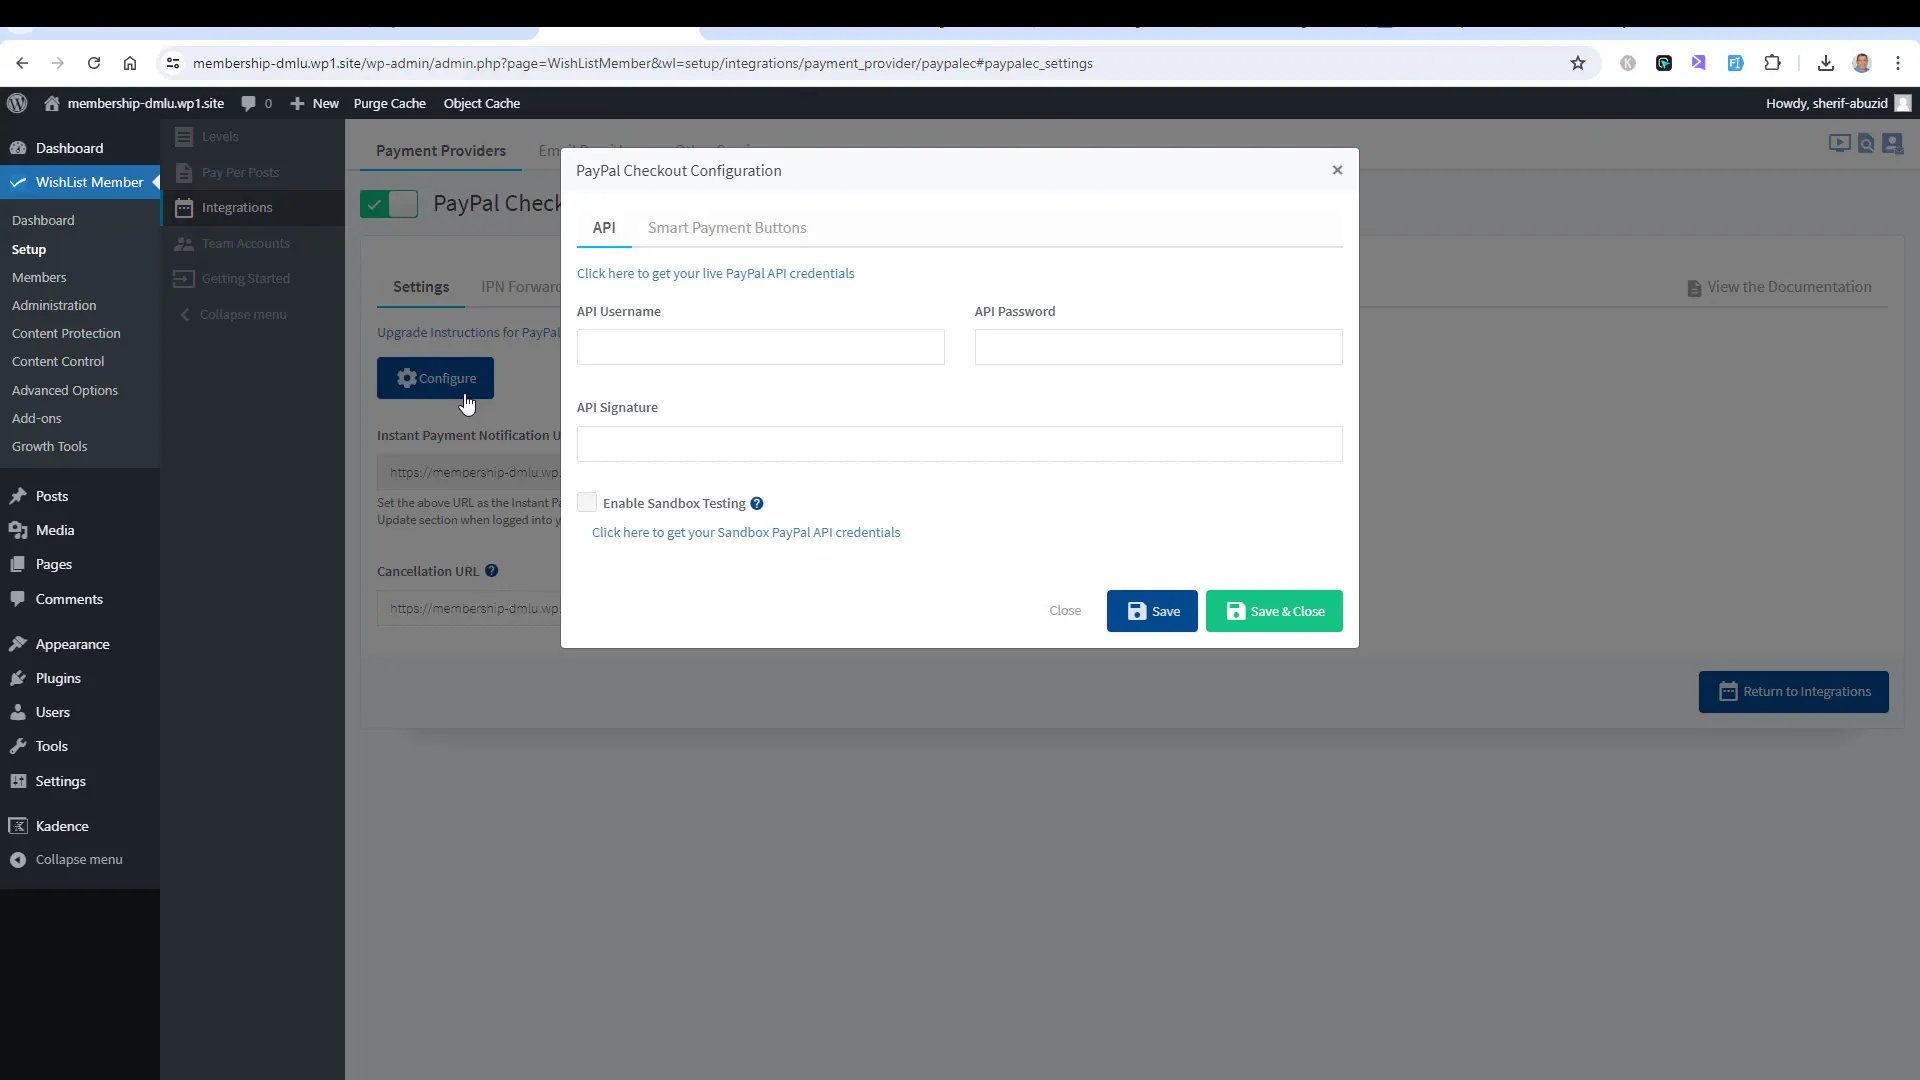
Correct configuration of your PayPal settings is crucial for ensuring smooth transactions. Here’s how to do it:
- API Credentials: You will need to input your PayPal API username, password, and signature in the settings.
- Sandbox Testing: Use PayPal’s sandbox environment for testing transactions before going live.
- Save Your Settings: After entering your API details, make sure to save the changes.
Creating Membership Products
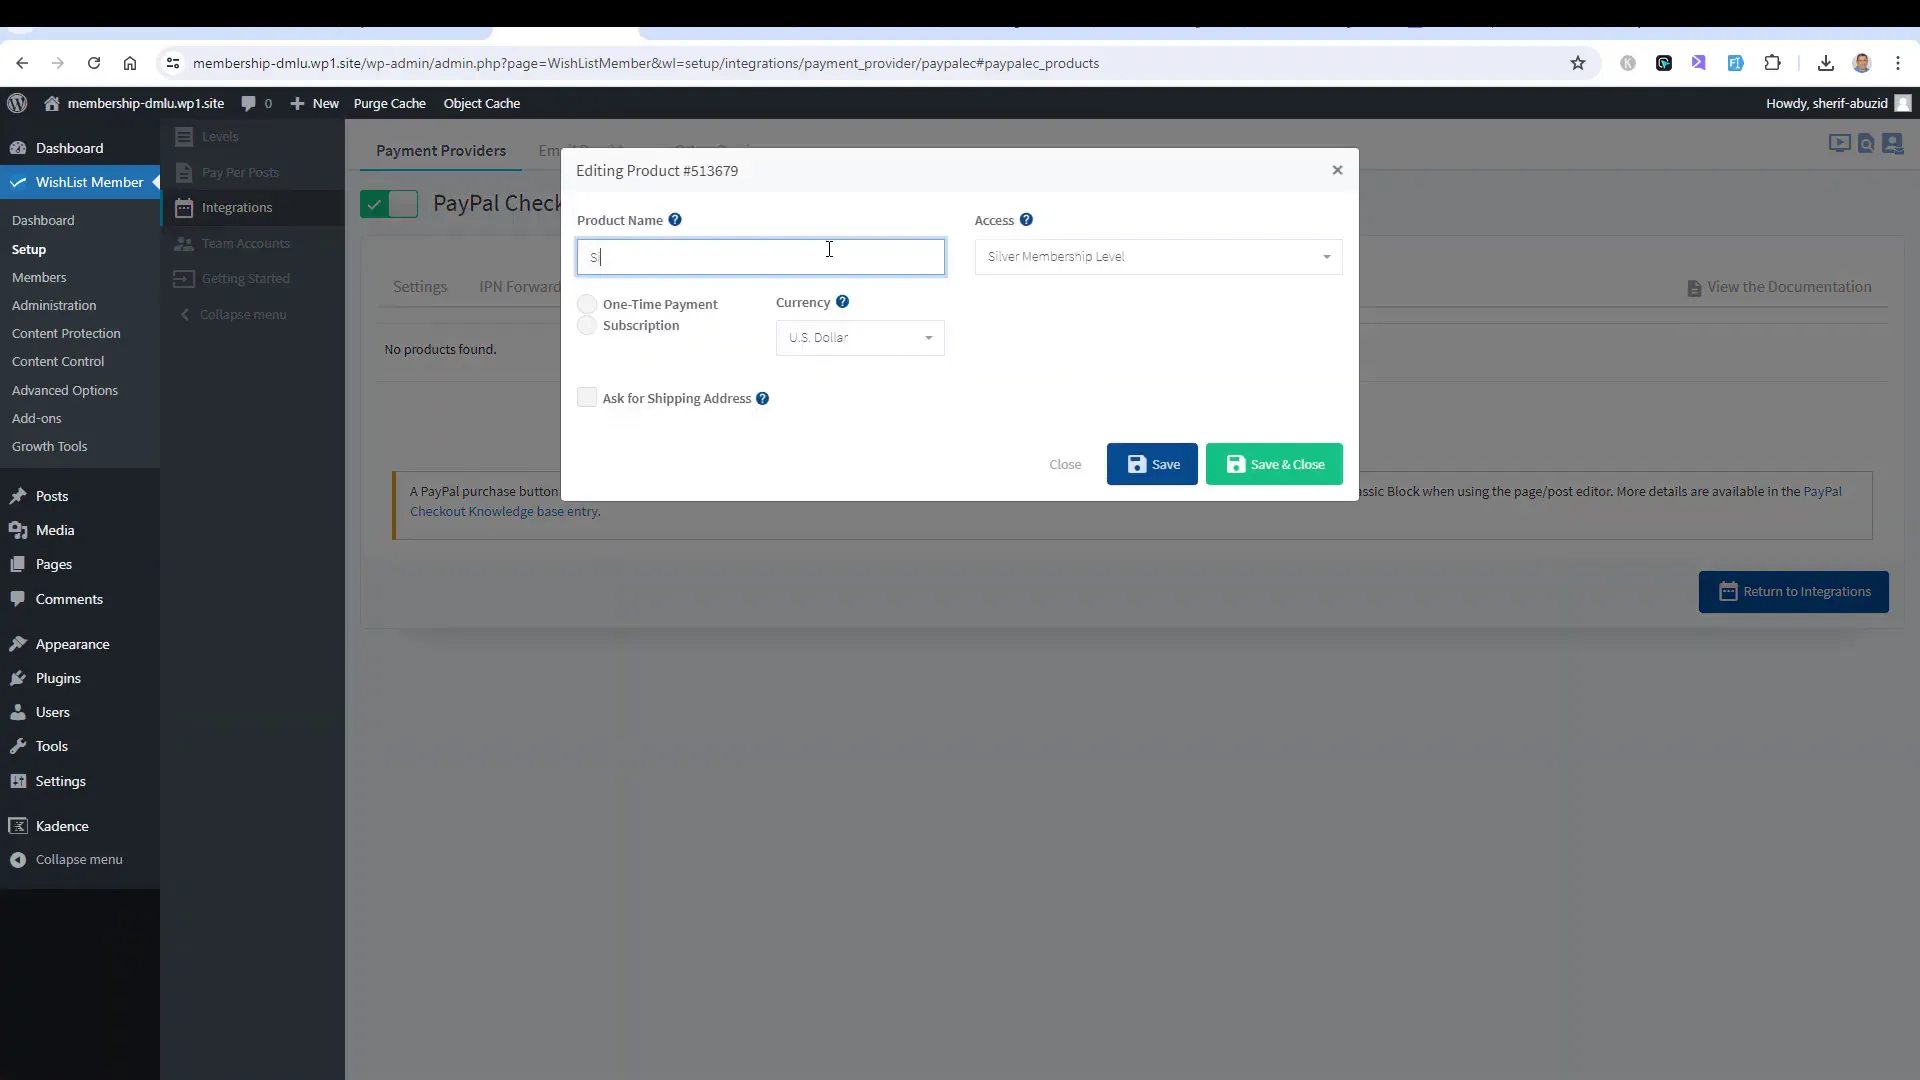
After setting up PayPal, the next step is to create products for your membership levels. This process is essential for managing subscriptions effectively:
- Add a New Product: In the Wish List Member dashboard, click on ‘Products’ and then ‘Add New Product’.
- Name Your Product: For instance, name it ‘Silver Membership’ and assign it to the relevant membership level.
- Set Pricing: Decide on a pricing structure, whether it’s a one-time fee or a recurring subscription.
Ensure to provide options for trial periods or different billing cycles, allowing flexibility for potential members. This strategy can enhance sign-up rates by lowering the initial barrier to entry.
Testing the Payment Process
Once you have integrated PayPal and set up your membership products, it’s crucial to test the payment process. This step ensures that everything functions correctly before you launch your website to the public.
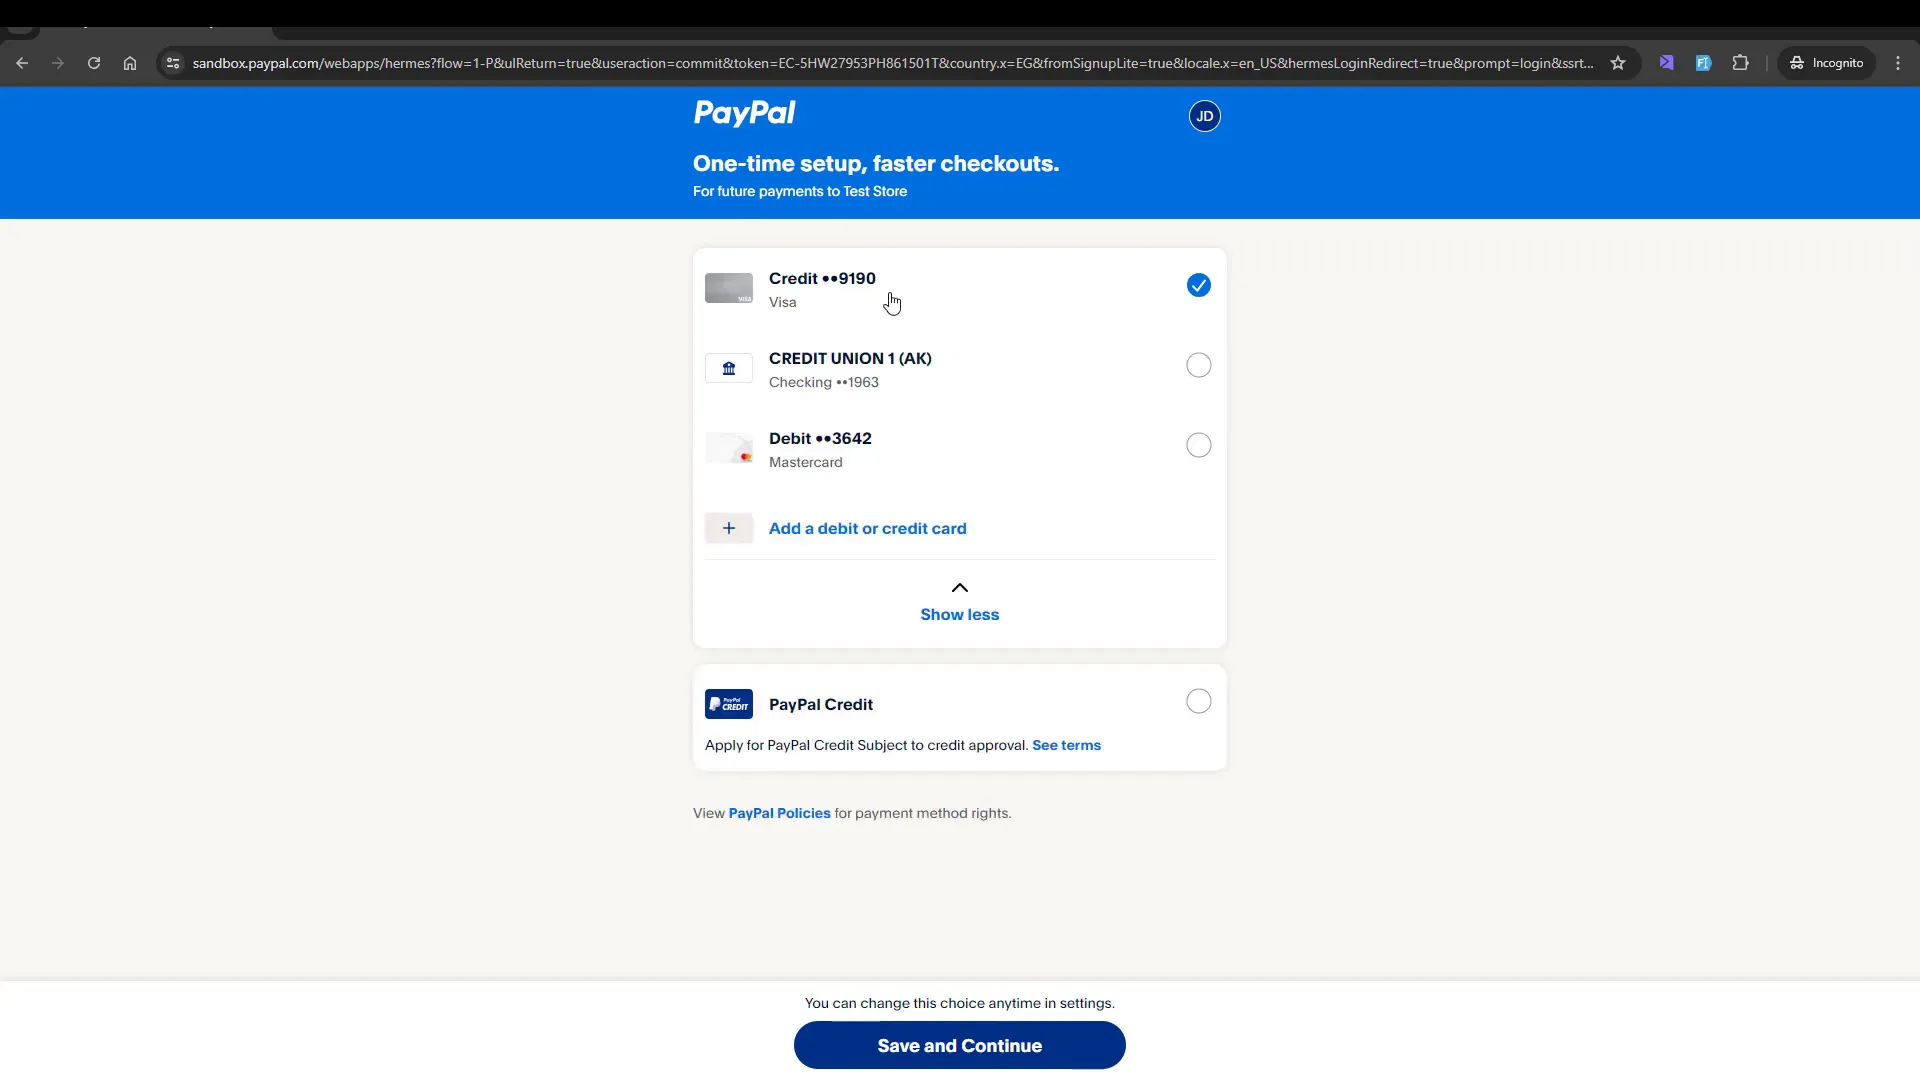
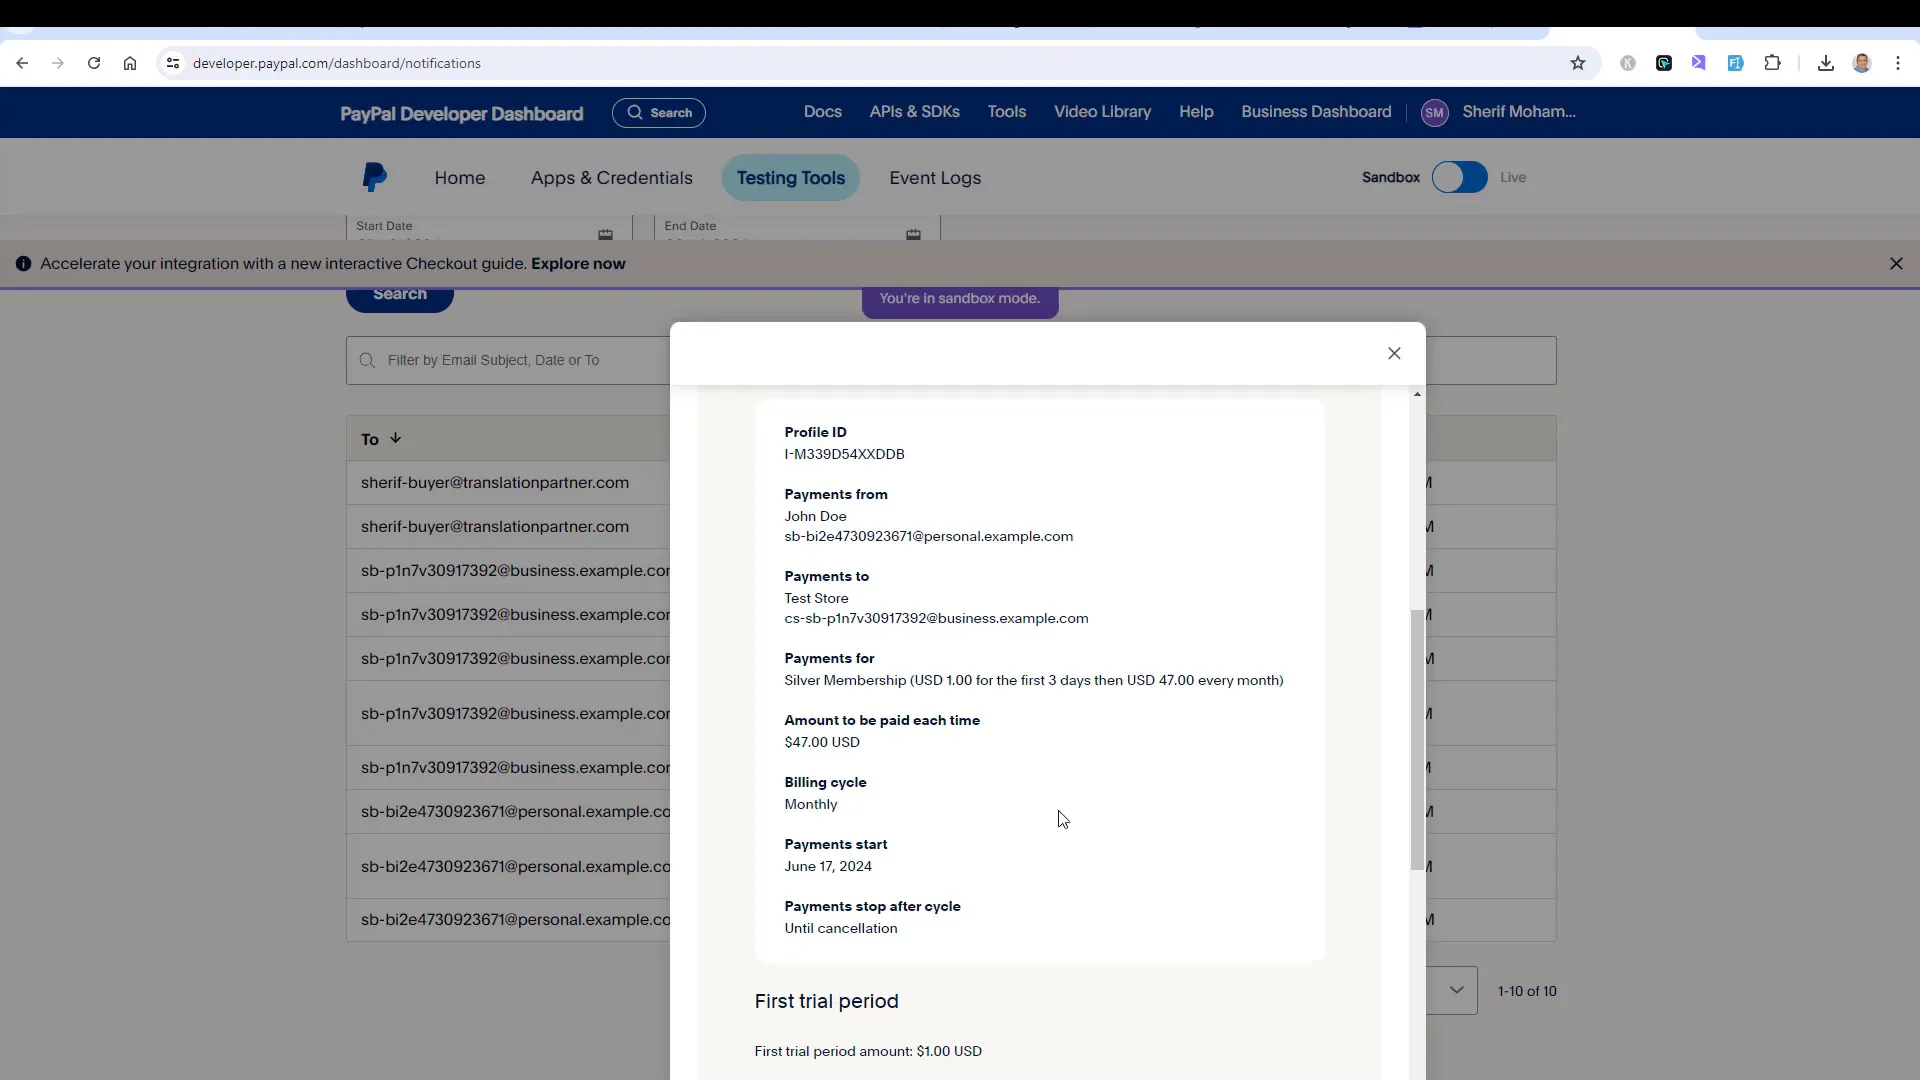
To begin testing, use the PayPal sandbox environment that you configured earlier. This allows you to simulate transactions without real money being exchanged. Here’s how to execute a successful test:
- Navigate to Your Landing Page: Open the landing page you created for your membership.
- Click the Join Button: This should redirect you to the PayPal checkout page.
- Log Into Your Sandbox Account: Use the test credentials you created for the sandbox.
- Complete the Transaction: Follow the prompts to finalize the payment.
After completing the transaction, verify that you receive a confirmation email from PayPal and check your WordPress dashboard to ensure that the new member has been registered.
Verifying the Membership Registration
After testing the payment process, it’s important to verify that the membership registration was successful. This step ensures that your members have access to the content they paid for.
To verify registration:
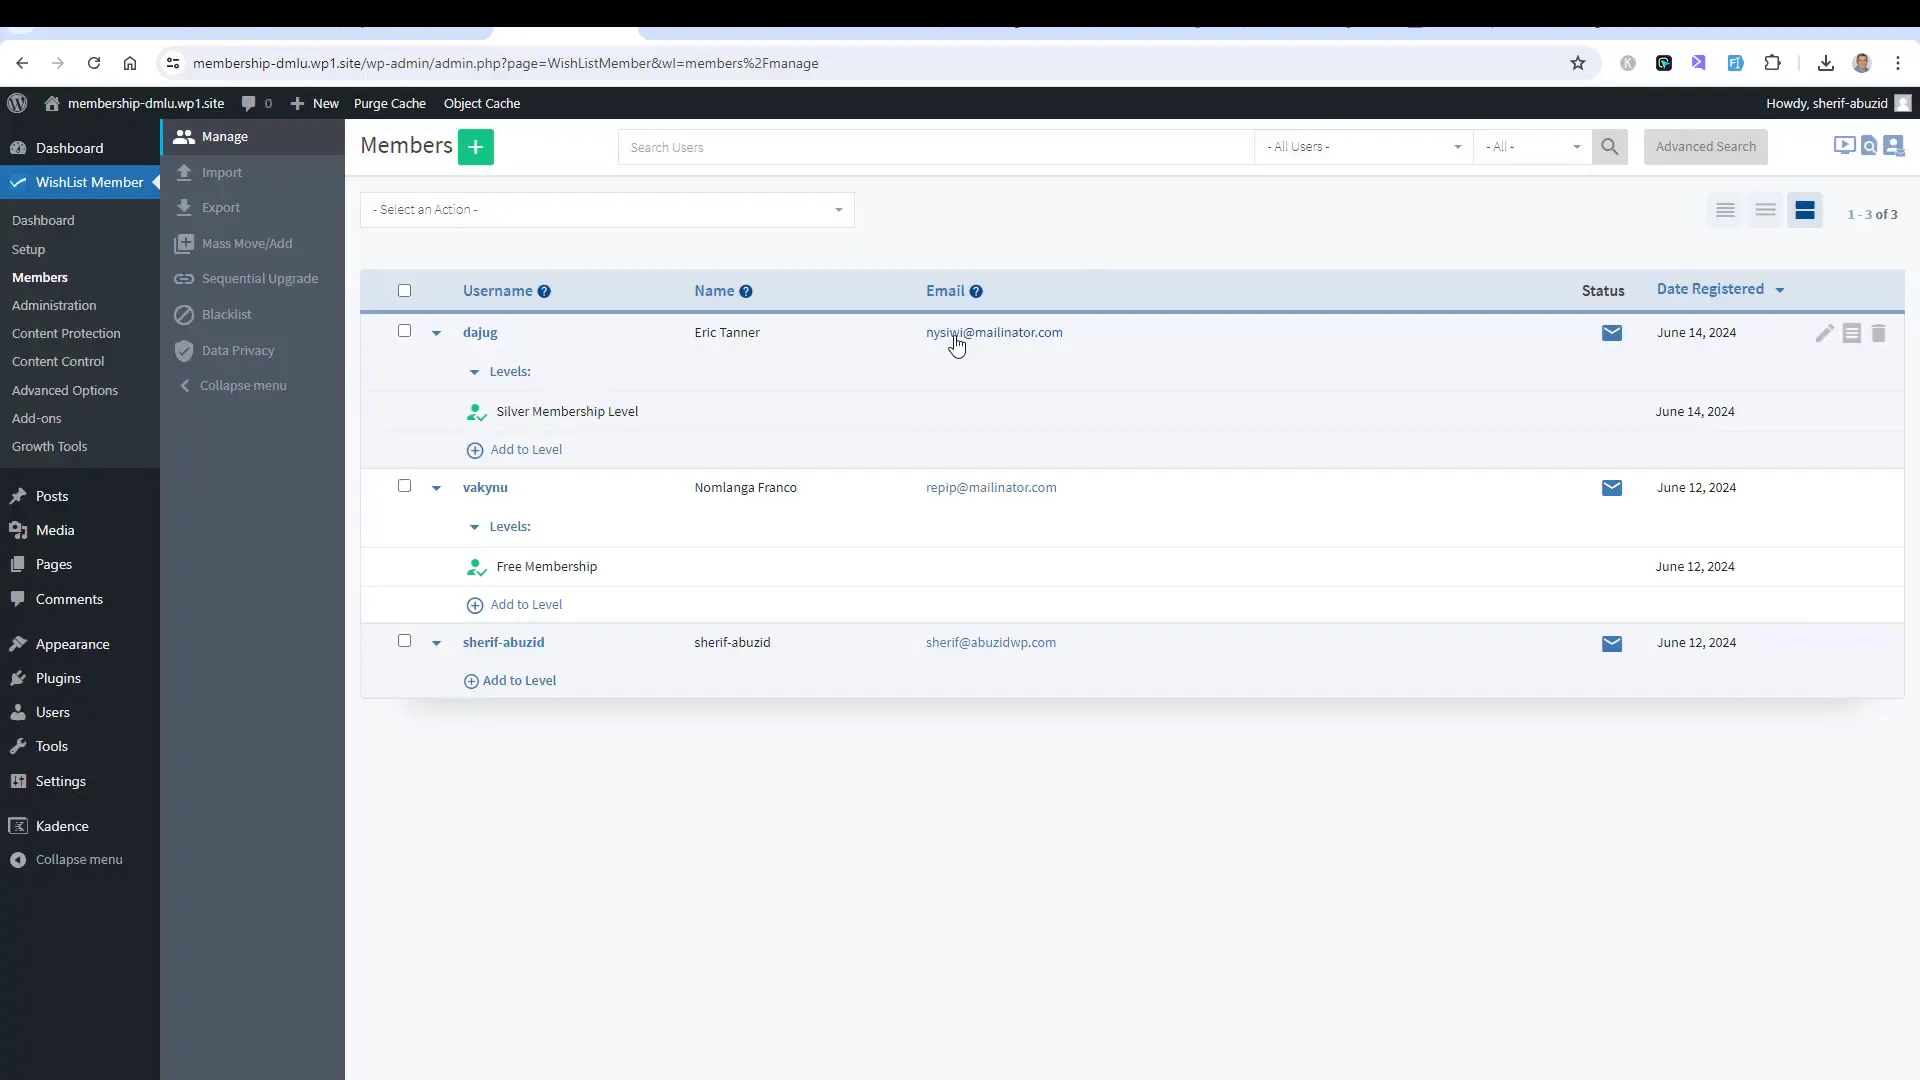
- Access the Members Section: Go to the Wish List Member dashboard and navigate to the members section.
- Check for New Registrations: Look for the email address or username of the new member who just signed up.
- Review Membership Details: Click on the member to see their subscription details, including the membership level and registration date.
This process confirms that your integration is working as intended and that members can access the appropriate content.
Managing Cancellations and Membership Access
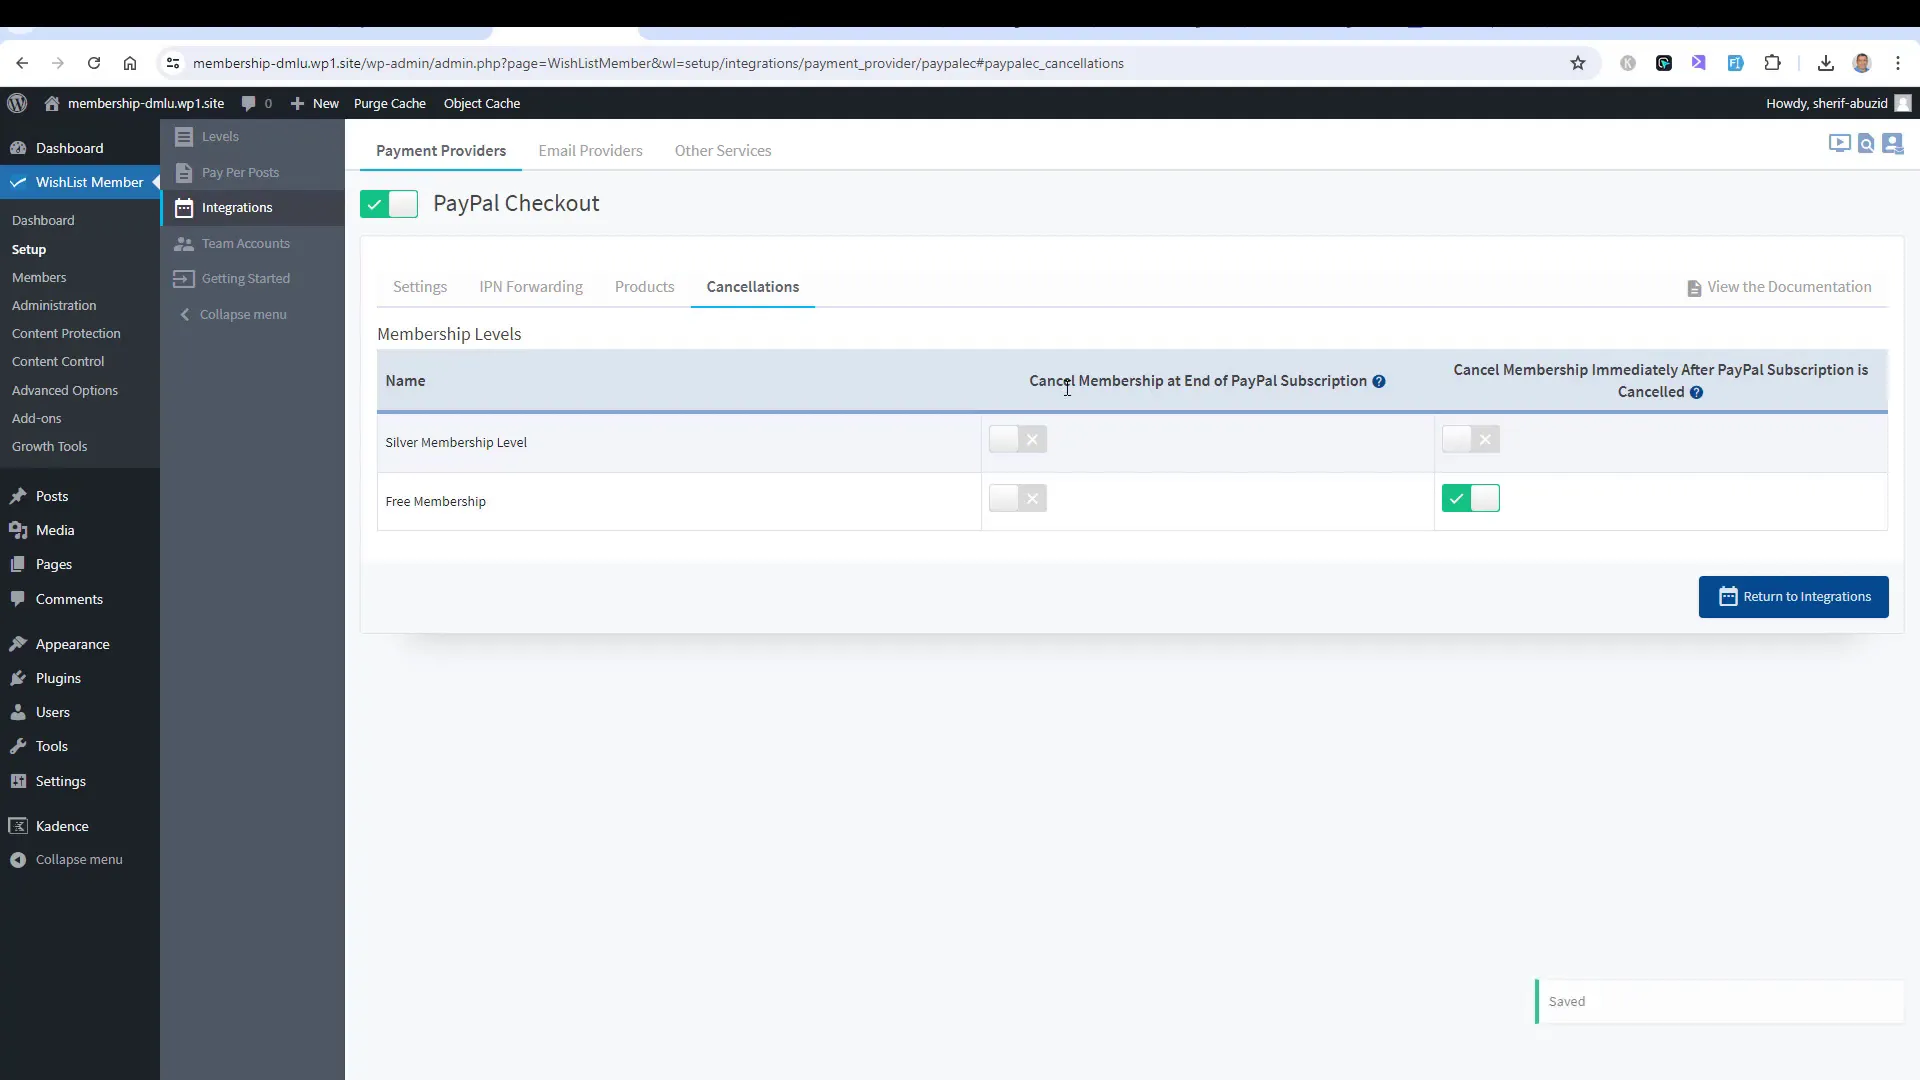
Managing cancellations is a vital part of running a membership site. You need to decide how to handle subscriptions when a member cancels. Here are two main options:
- Cancel Membership Immediately: This option revokes access as soon as a member cancels their subscription.
- Cancel at End of Billing Cycle: This allows members to keep access until the end of the period they have already paid for.
It is often recommended to choose the second option. This approach shows goodwill and encourages a positive relationship with your members. Remember, consistency across all membership levels is essential.
Finalizing Your PayPal Setup
With everything tested and verified, it’s time to finalize your PayPal setup. Here’s a checklist to ensure you don’t miss anything:
- Update API Credentials: If you were using sandbox credentials for testing, switch to live credentials.
- Check Payment Settings: Review your payment settings to ensure they align with your business model.
- Test Again: Conduct one last test transaction using a real PayPal account to confirm everything works smoothly.
Once finalized, you can confidently launch your membership site to the public.
Part 4 – Restricting Access to Online Courses: A Comprehensive Guide to Membership Sites with WordPress
In today’s digital landscape, restricting access to online courses is essential for maintaining the value of your educational content. This blog post will guide you through the process of creating a membership website using WordPress, focusing on how to effectively protect and manage access to your online courses.
Overview of the Training Series
This training series is designed to walk you through the essential steps of creating a successful membership website using WordPress. Each part builds upon the previous, ensuring you have a comprehensive understanding of the tools and strategies required.
What You Will Learn
- Setting up your WordPress site and selecting the right theme.
- Installing and configuring membership plugins like Wishlist Member.
- Creating and managing online courses using LearnDash.
- Defining access modes for your courses to restrict content effectively.
- Integrating LearnDash with Wishlist Member for seamless user experiences.
Setting Up Your Online Course with LearnDash
LearnDash is a powerful learning management system (LMS) that allows you to create, manage, and sell online courses effortlessly. Setting up your course involves several straightforward steps.
Creating Your First Course
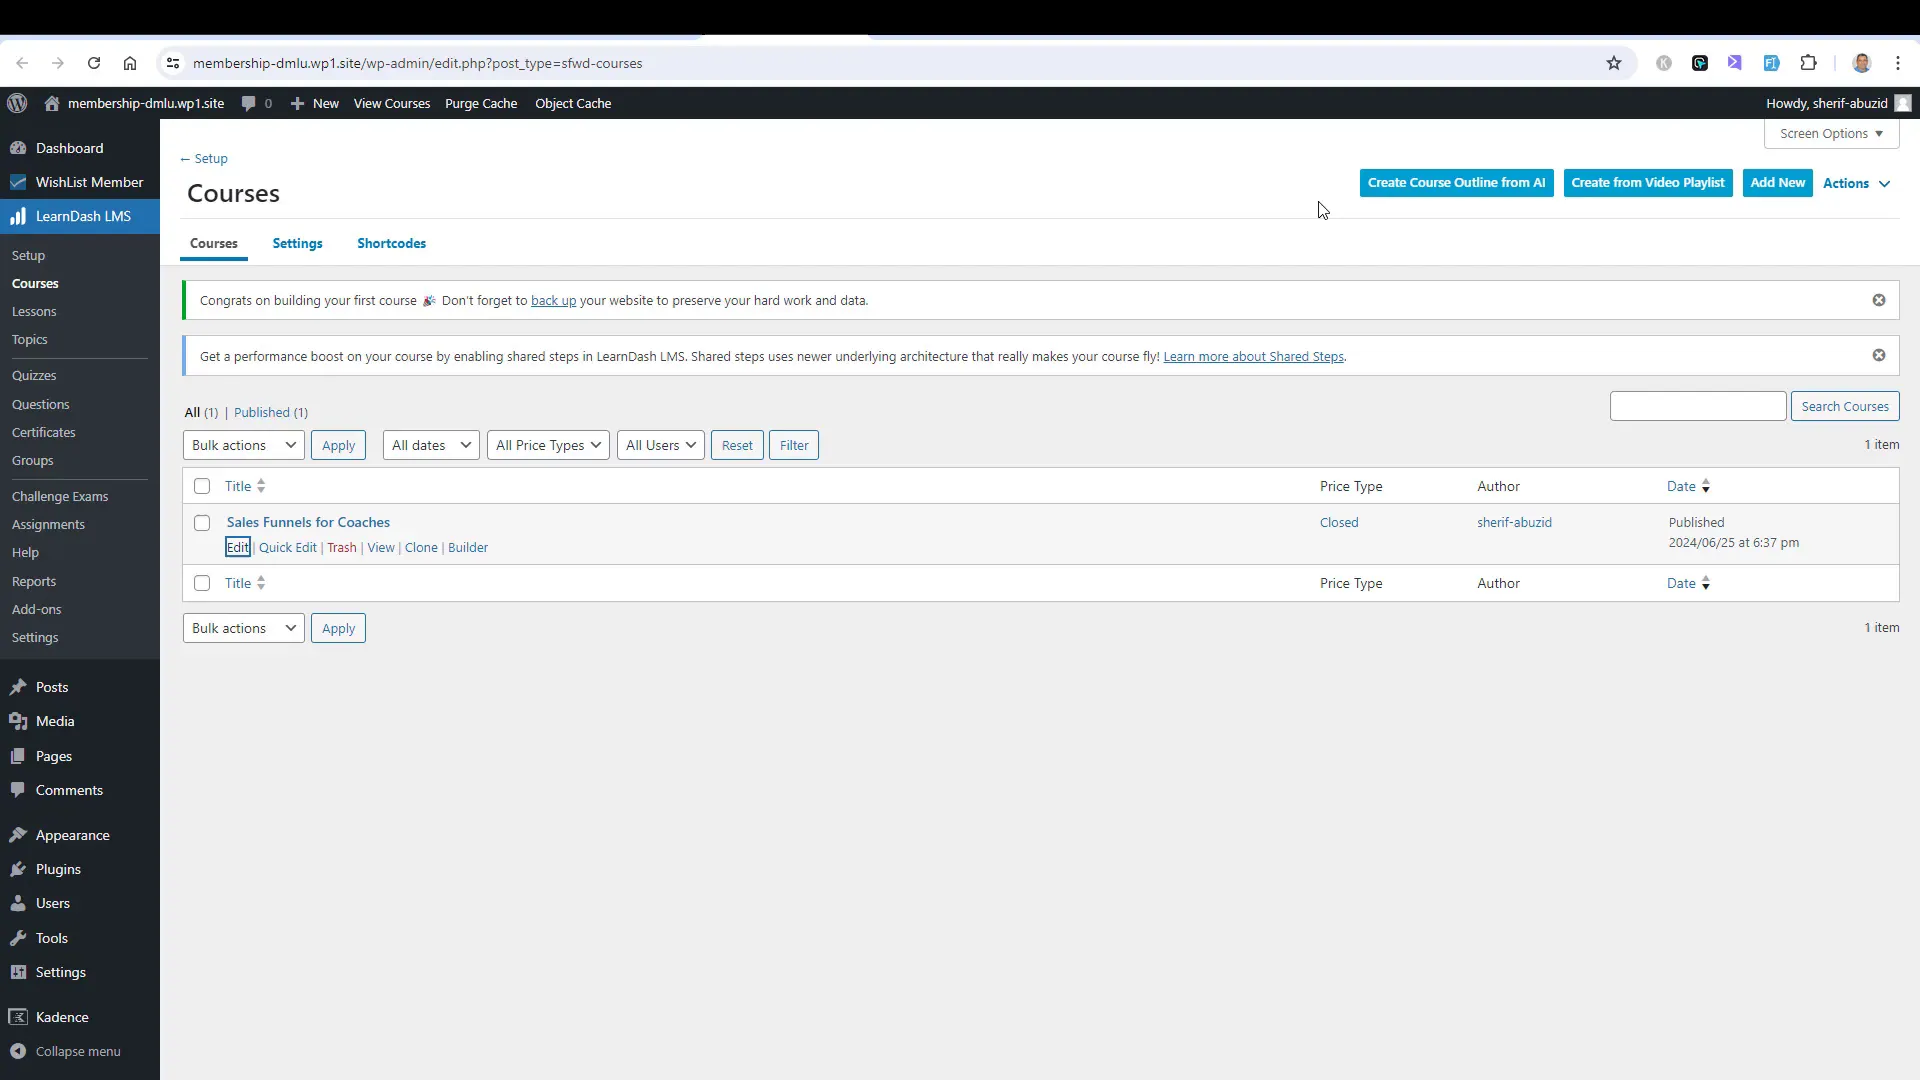
To create a course in LearnDash, navigate to the Courses section and click on “Add New.” Here, you will input the course title and description, and you can add various media types to enhance the learning experience.
Structuring Your Course Content
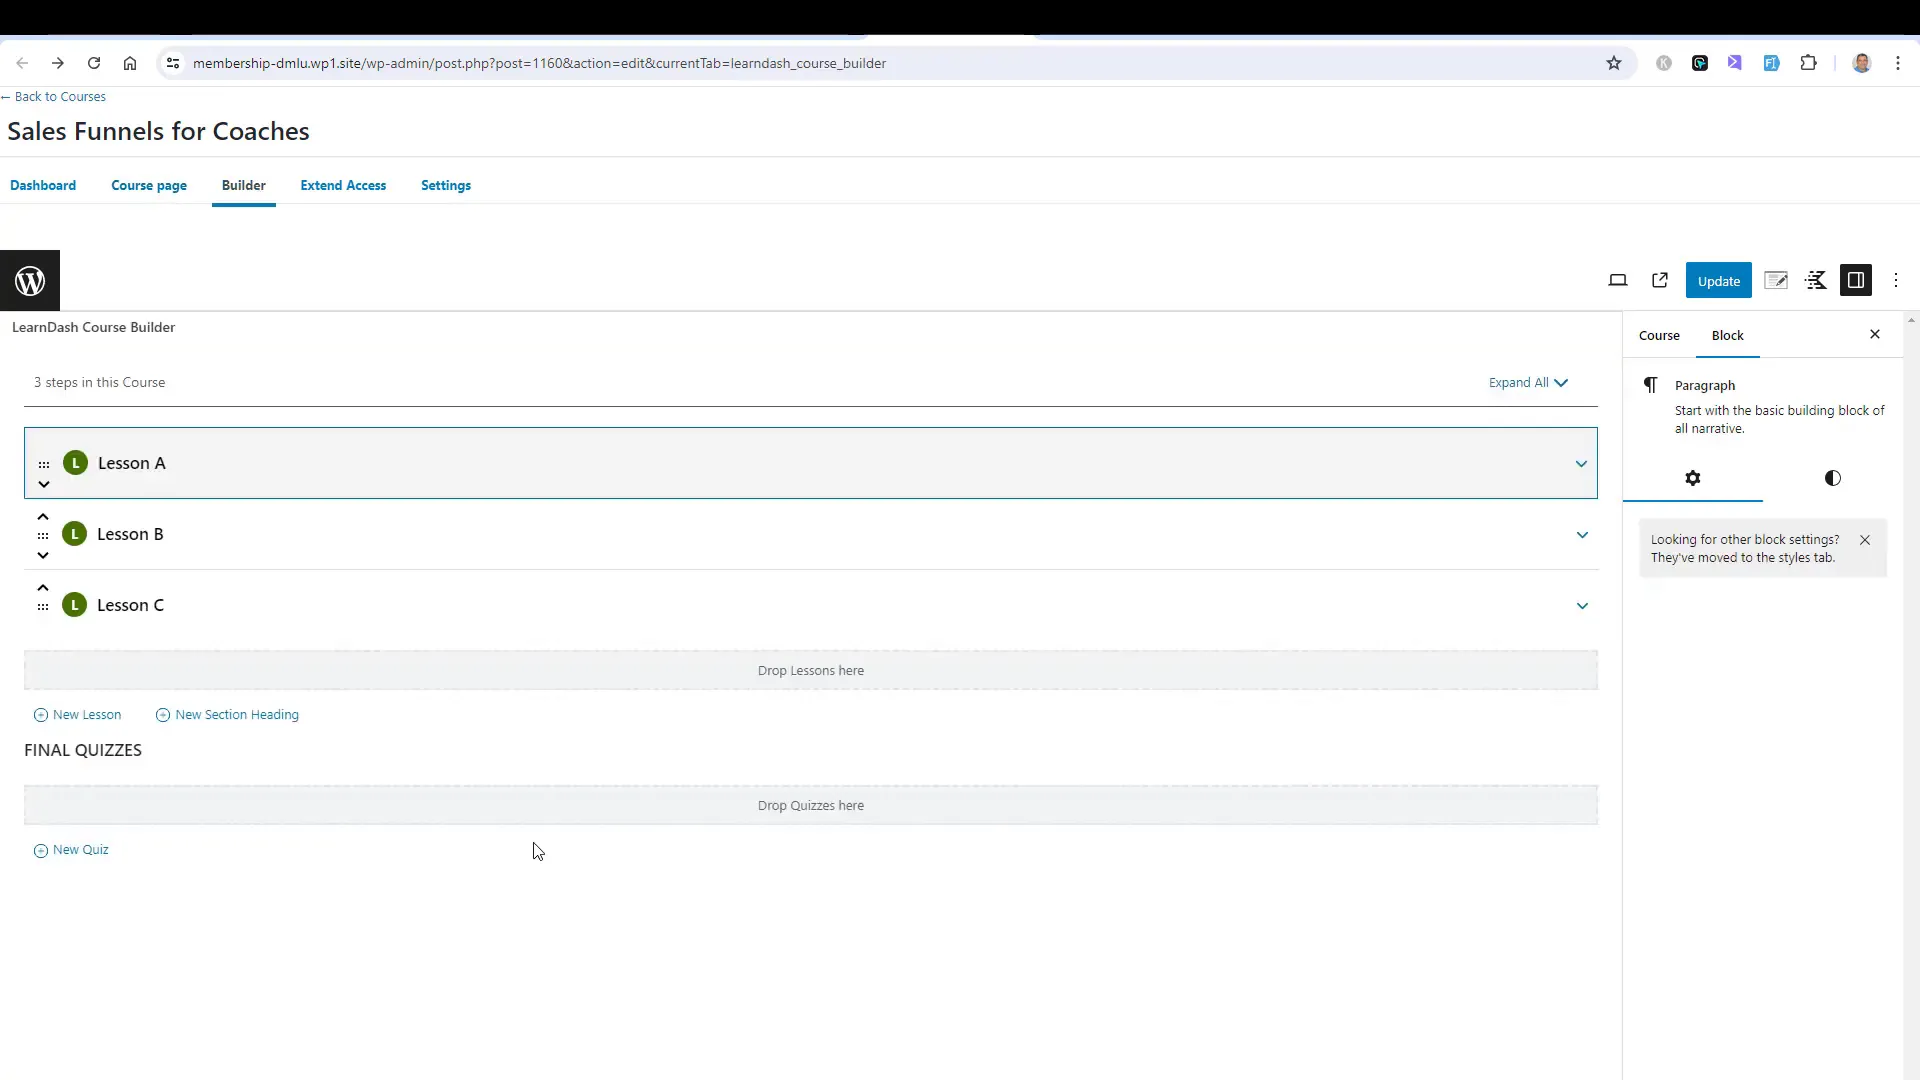
Within the course builder, you can easily add lessons and organize them into sections. This allows you to create a logical flow for your content, making it easier for students to follow along.
Creating and Managing Course Content
Once your course is set up, it’s time to populate it with engaging content. This can include videos, quizzes, and downloadable resources to enhance the learning experience.
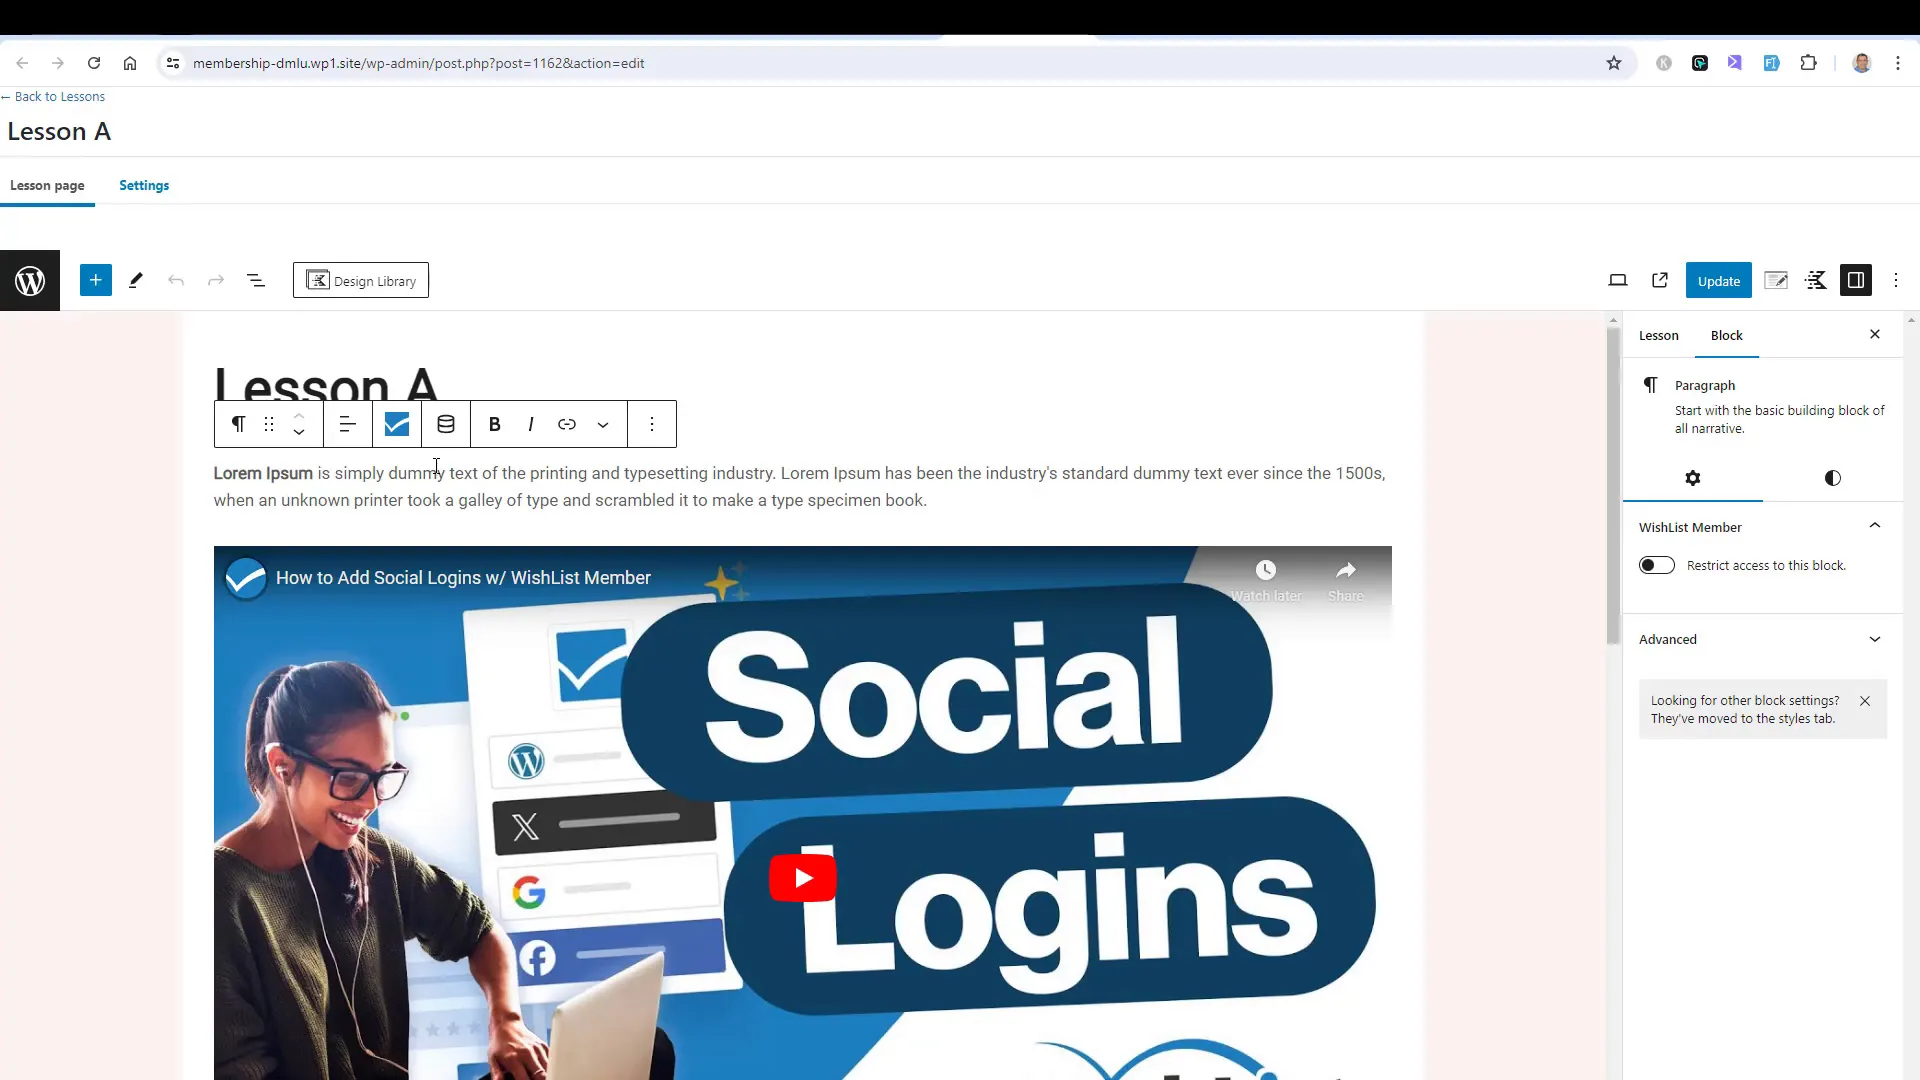
Adding Multimedia Elements
In LearnDash, you can integrate various media formats such as videos, images, and documents. This diverse content helps maintain student interest and improves retention rates.
Utilizing Quizzes and Assignments
Quizzes can be incorporated at the end of lessons to assess understanding. This feature not only reinforces learning but also provides valuable feedback for both instructors and students.
Defining Access Modes for Your Courses
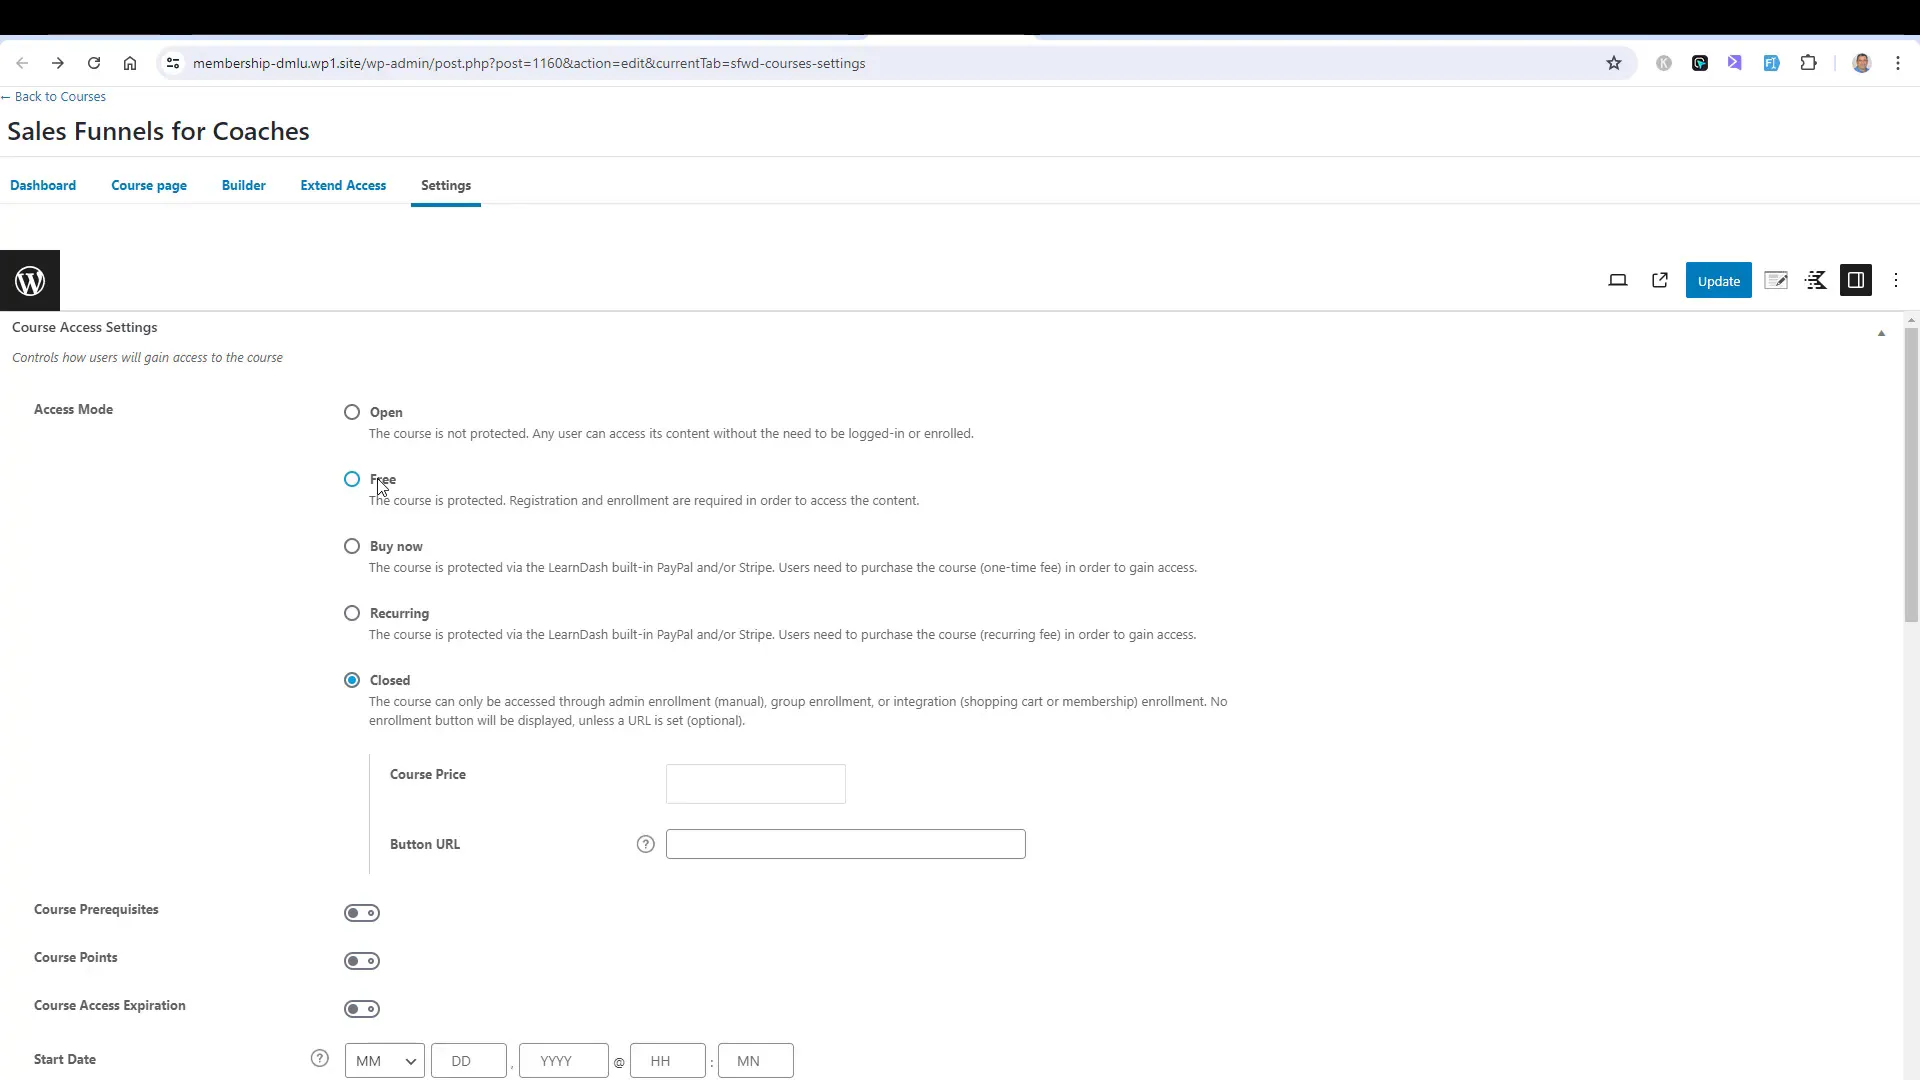
Access modes determine how users interact with your courses. LearnDash offers multiple modes to cater to different business models.
Types of Access Modes
- Open: No registration is required, and anyone can access the course.
- Free: Users must register for an account to access the course.
- Buy Now: Users can purchase the course directly through integrated payment options.
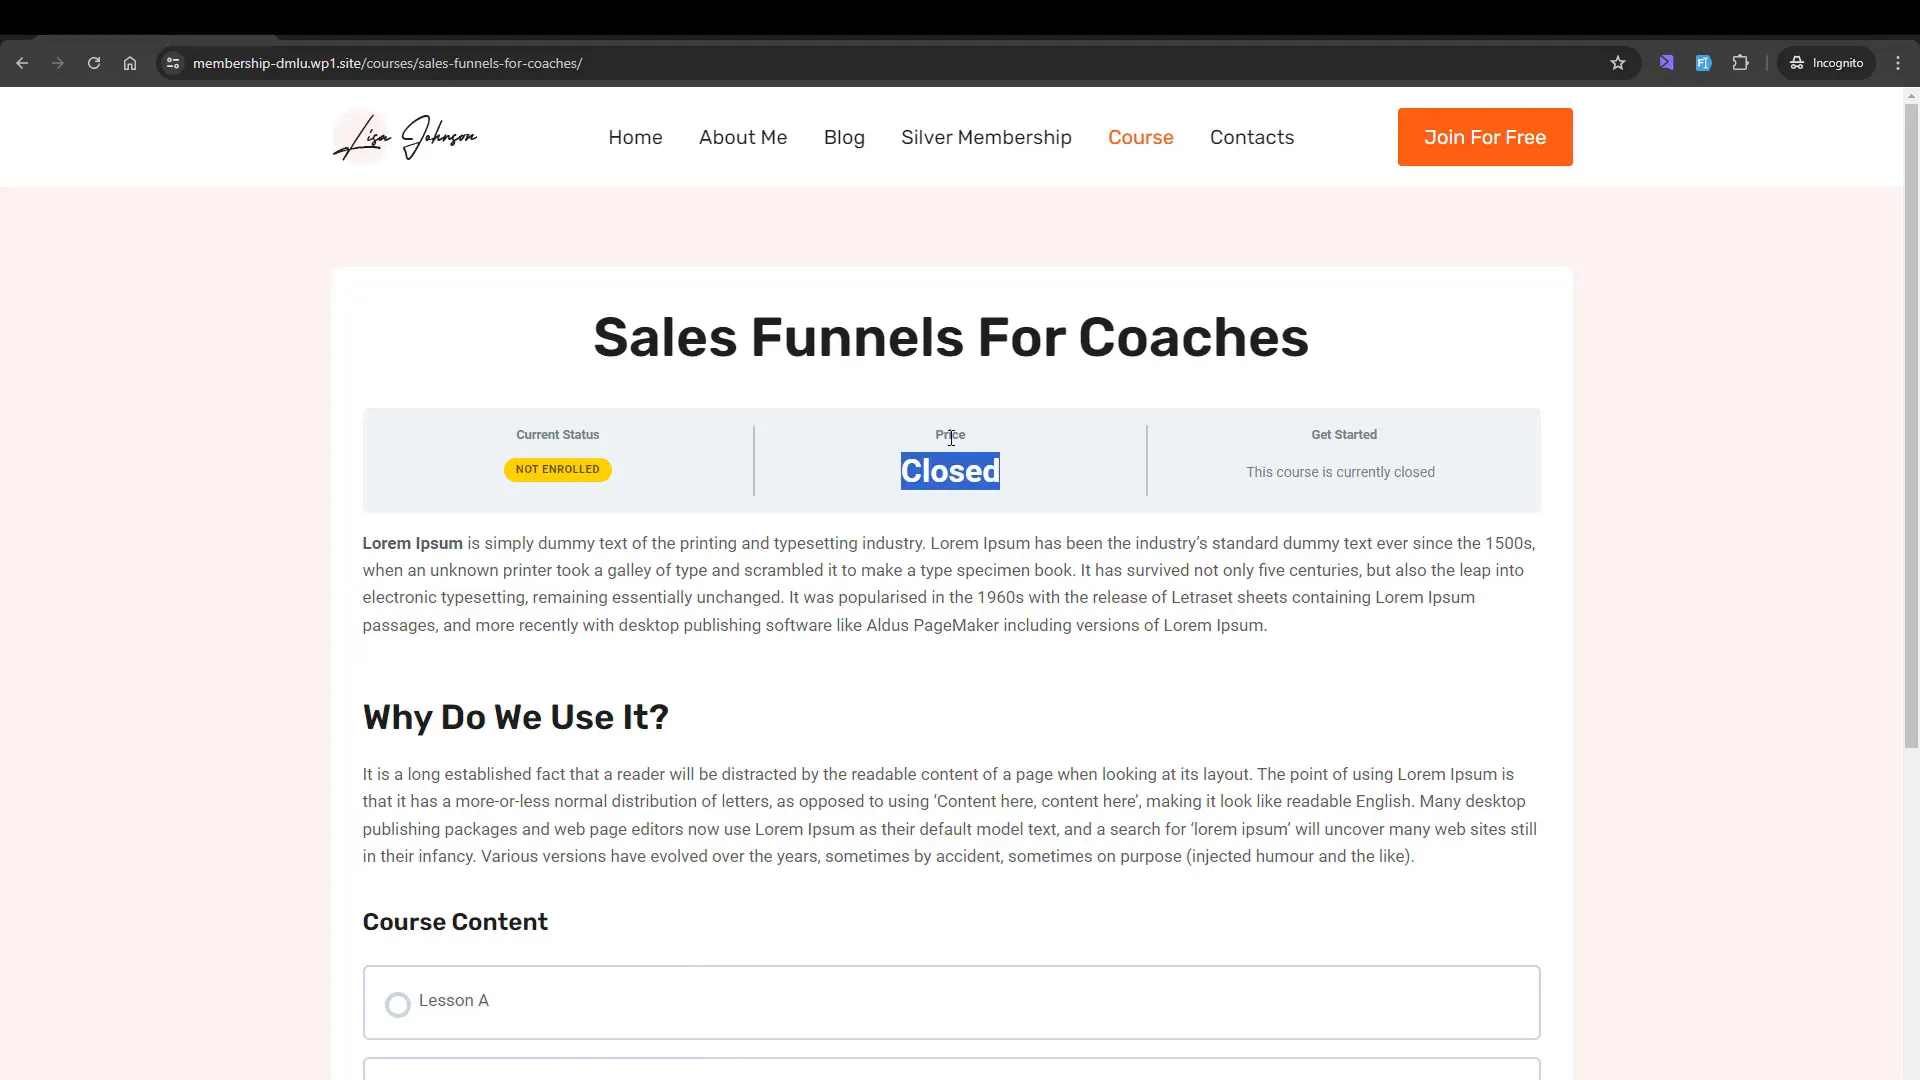
- Closed: The course is only accessible as part of a membership, ensuring exclusivity.
Choosing the Right Access Mode
For membership sites, marking courses as “Closed” is often the best choice. This ensures that only paying members can access the content, thereby increasing perceived value.
Integrating LearnDash with Wishlist Member
Integrating LearnDash with Wishlist Member enhances the functionality of your membership site by allowing for automated enrollment and access control.
Setting Up the Integration
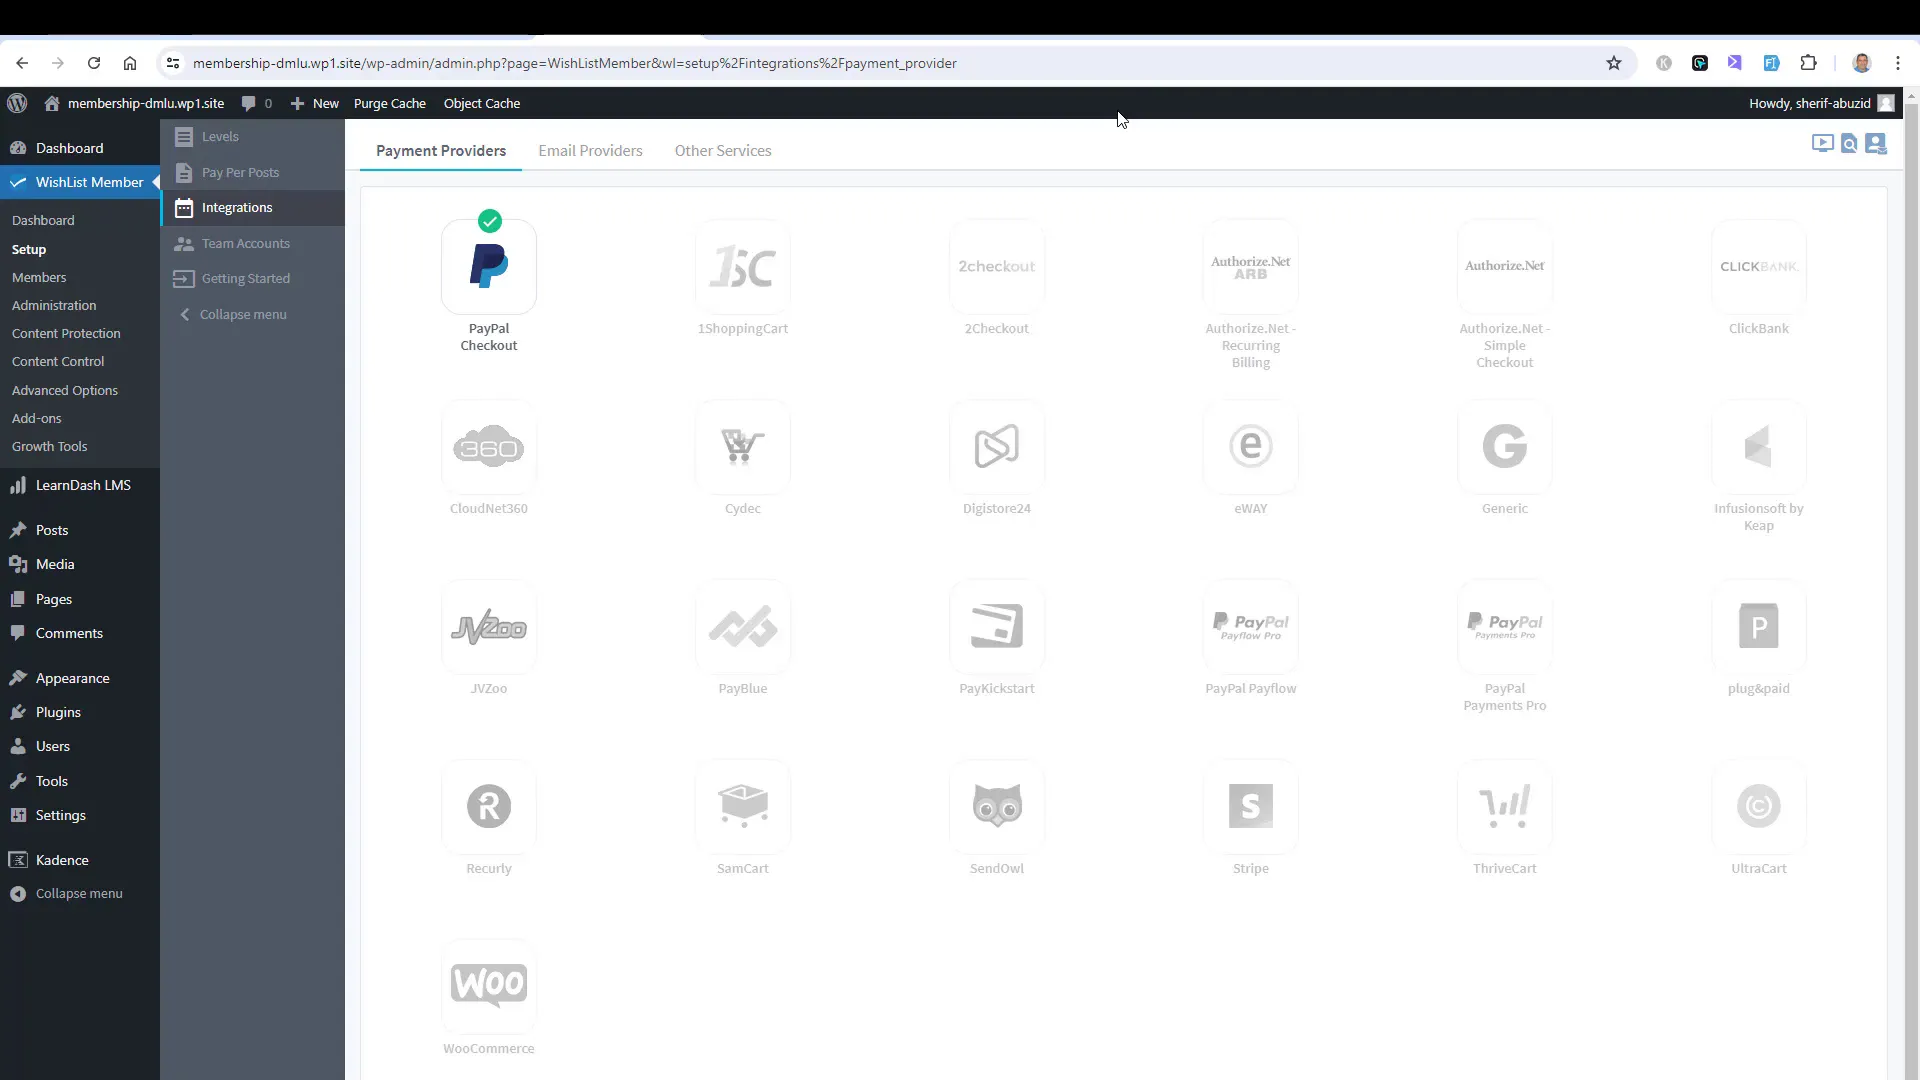
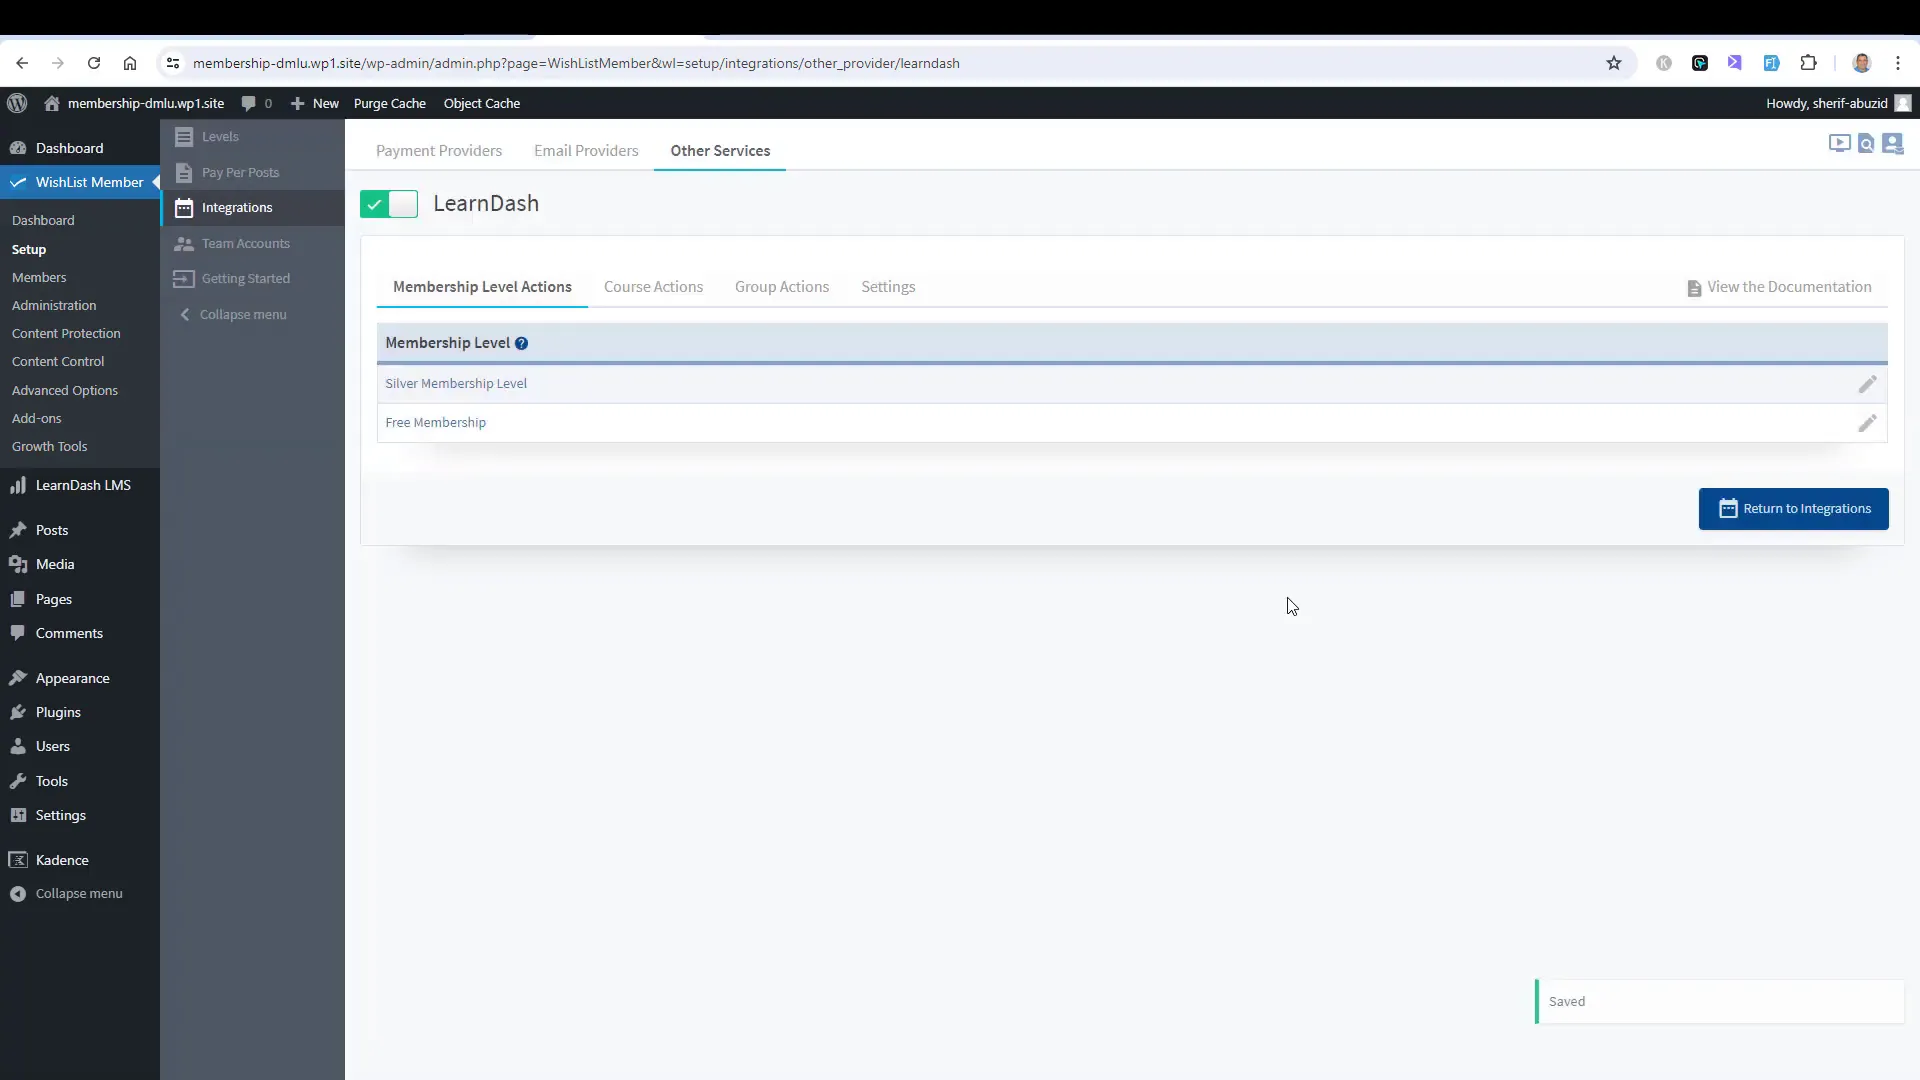
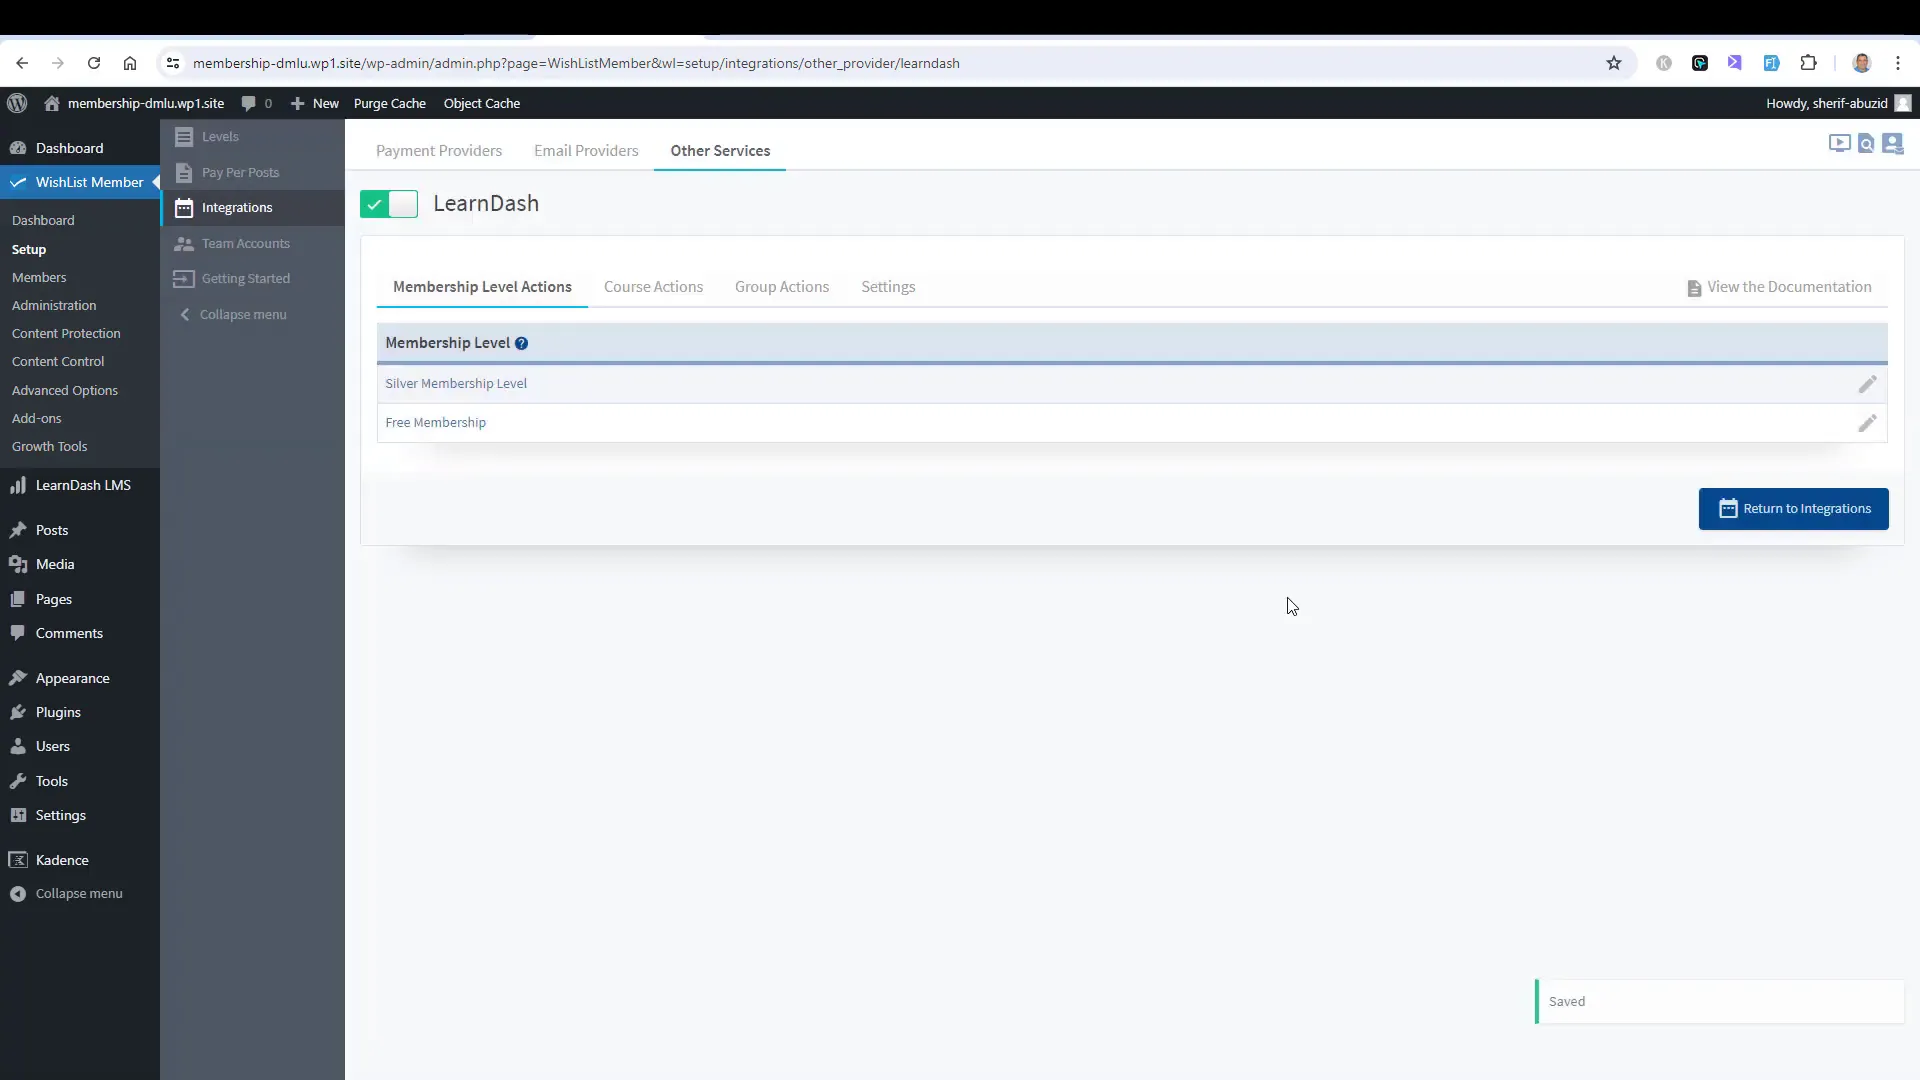
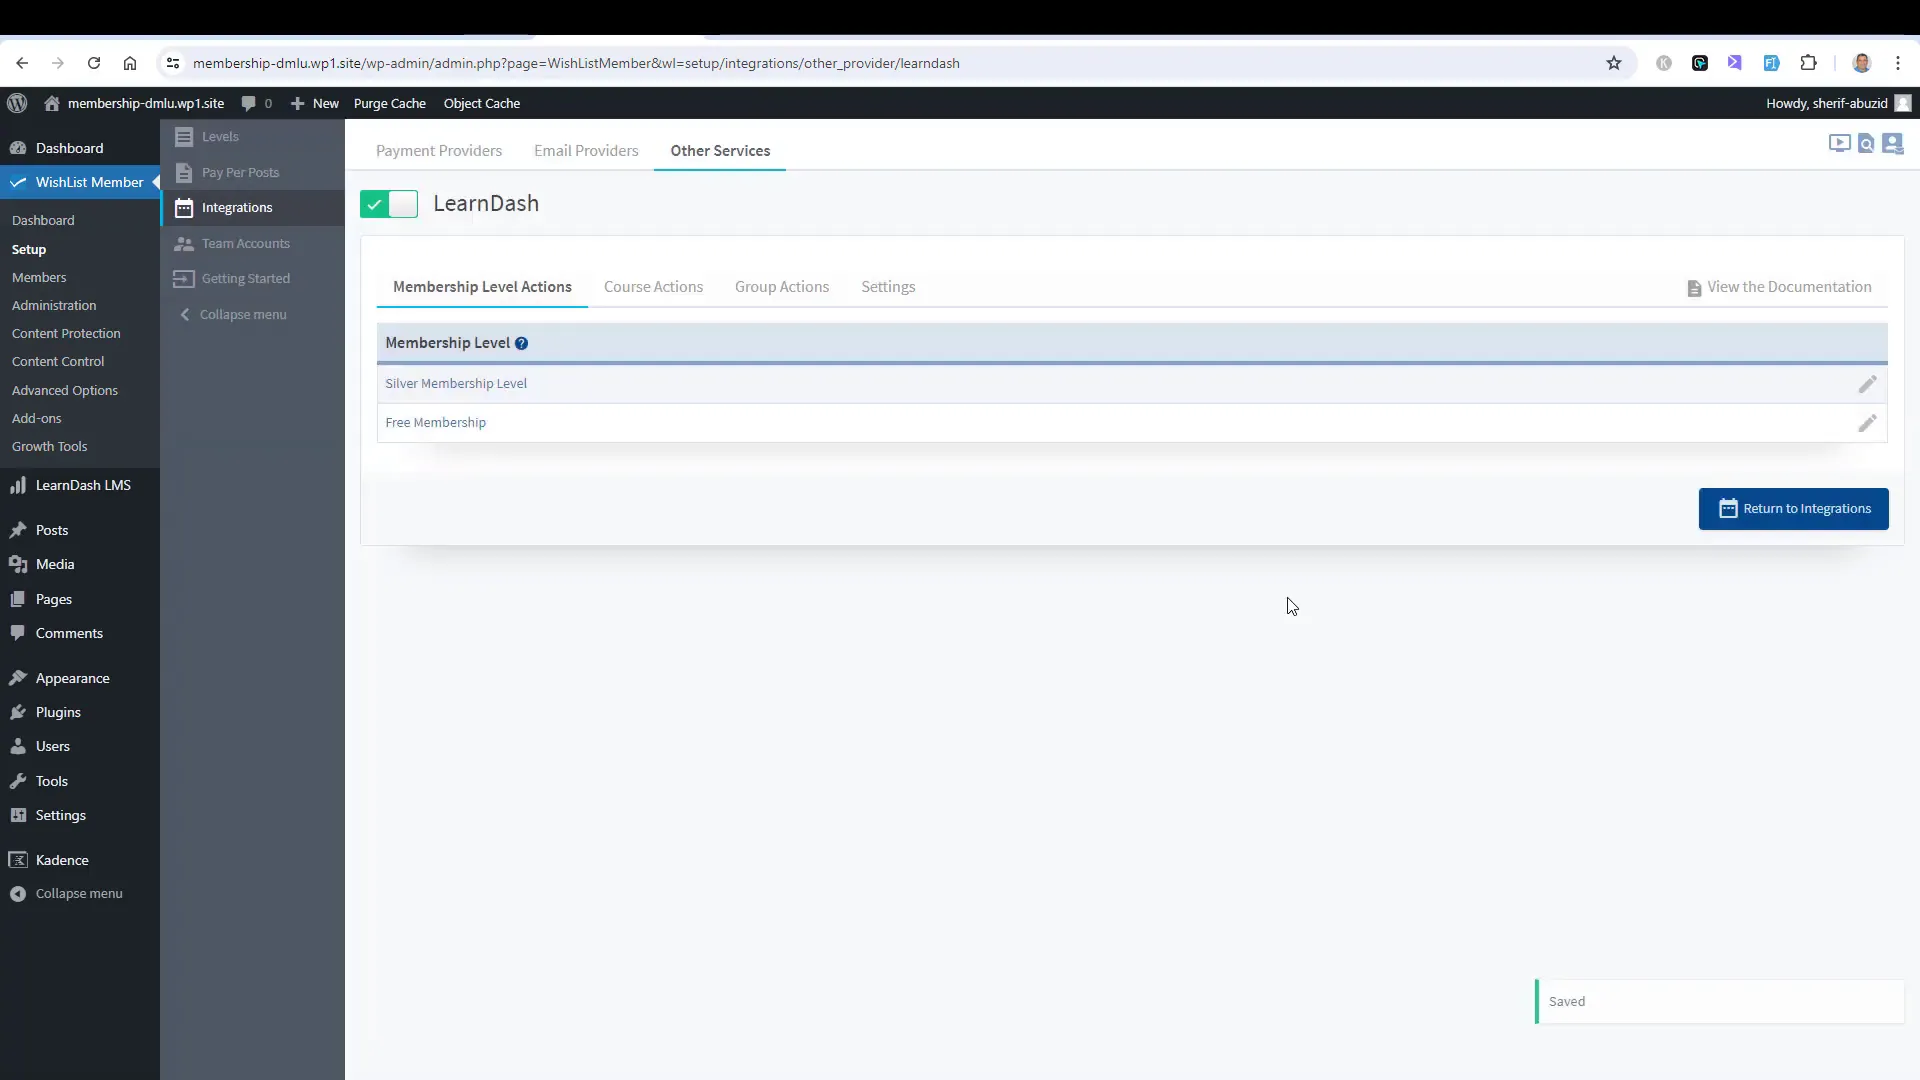
To integrate LearnDash with Wishlist Member, navigate to the Wishlist Member settings and locate the integrations tab. Here, you can enable LearnDash to connect both platforms seamlessly.
Configuring Membership Levels
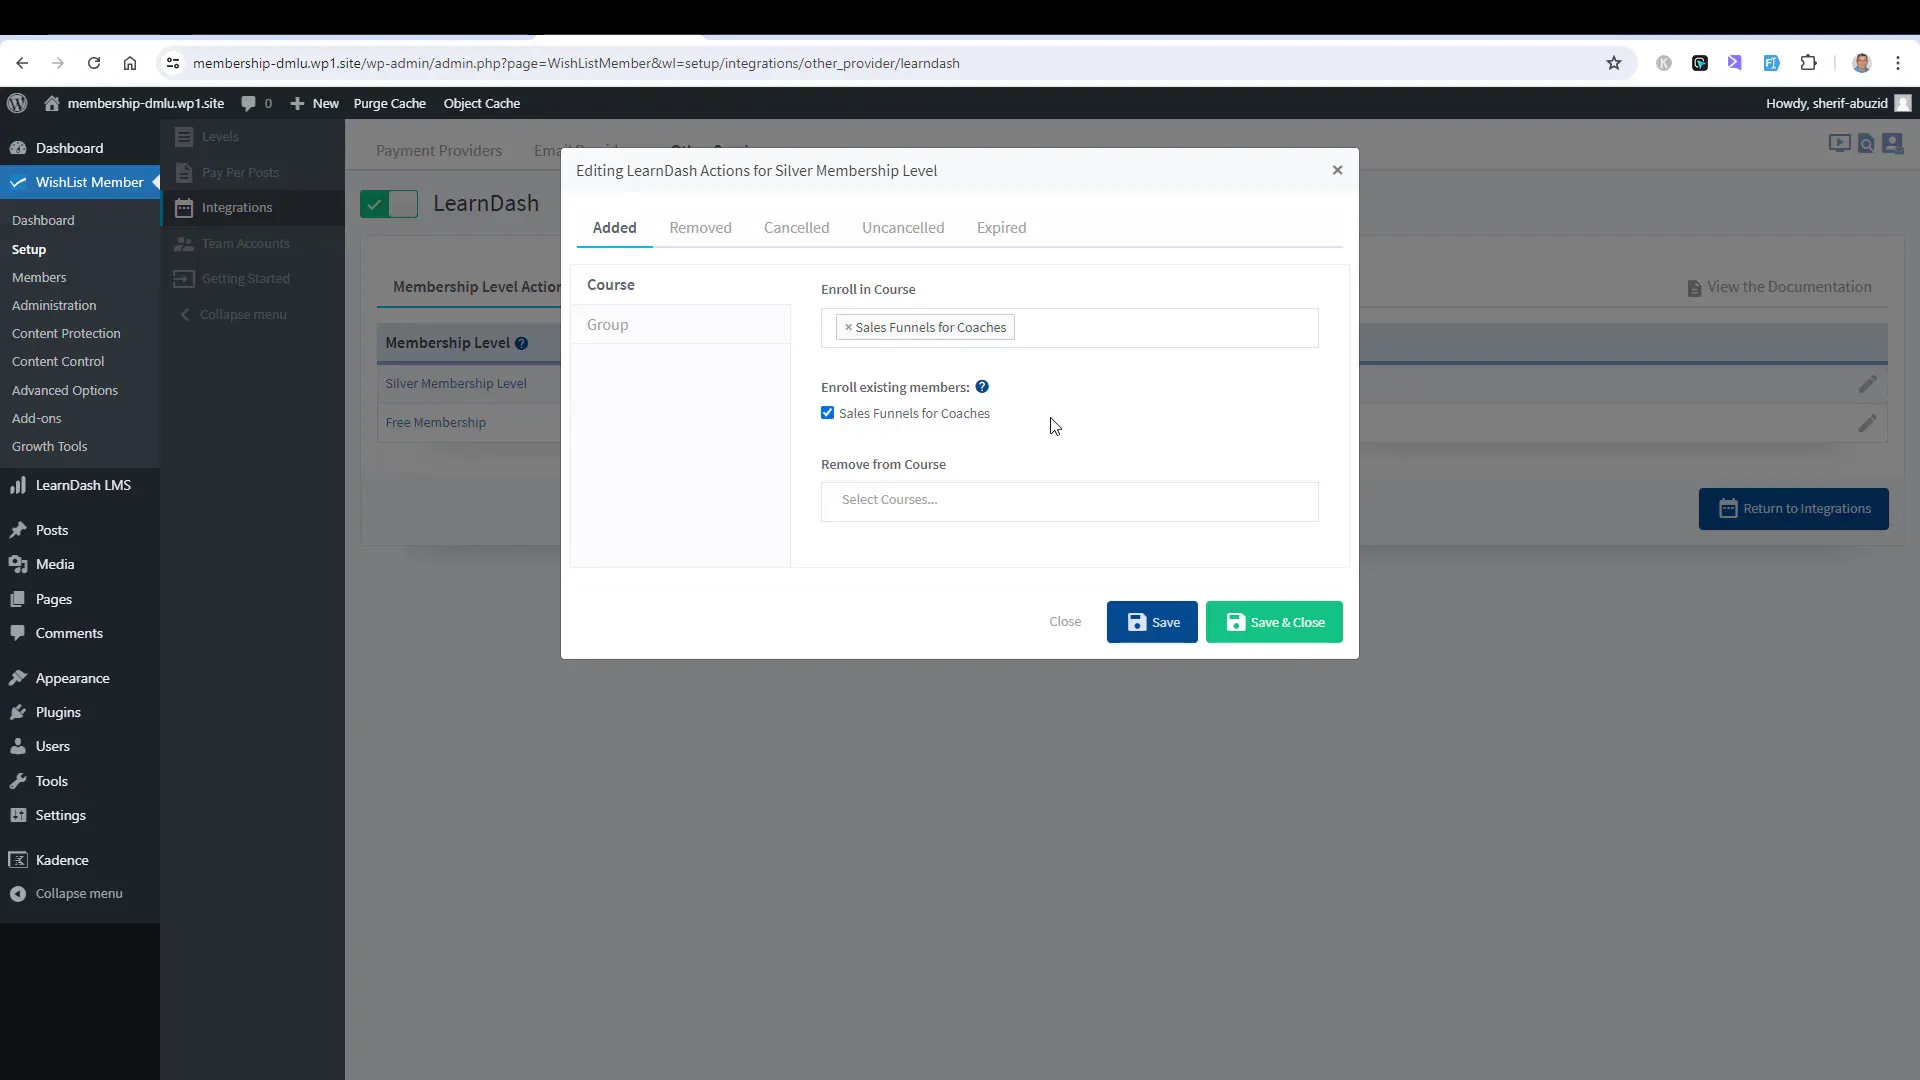
Once integrated, you can specify what happens when users join a membership level. For example, enrolling them in a specific course automatically upon registration.
Managing Member Access
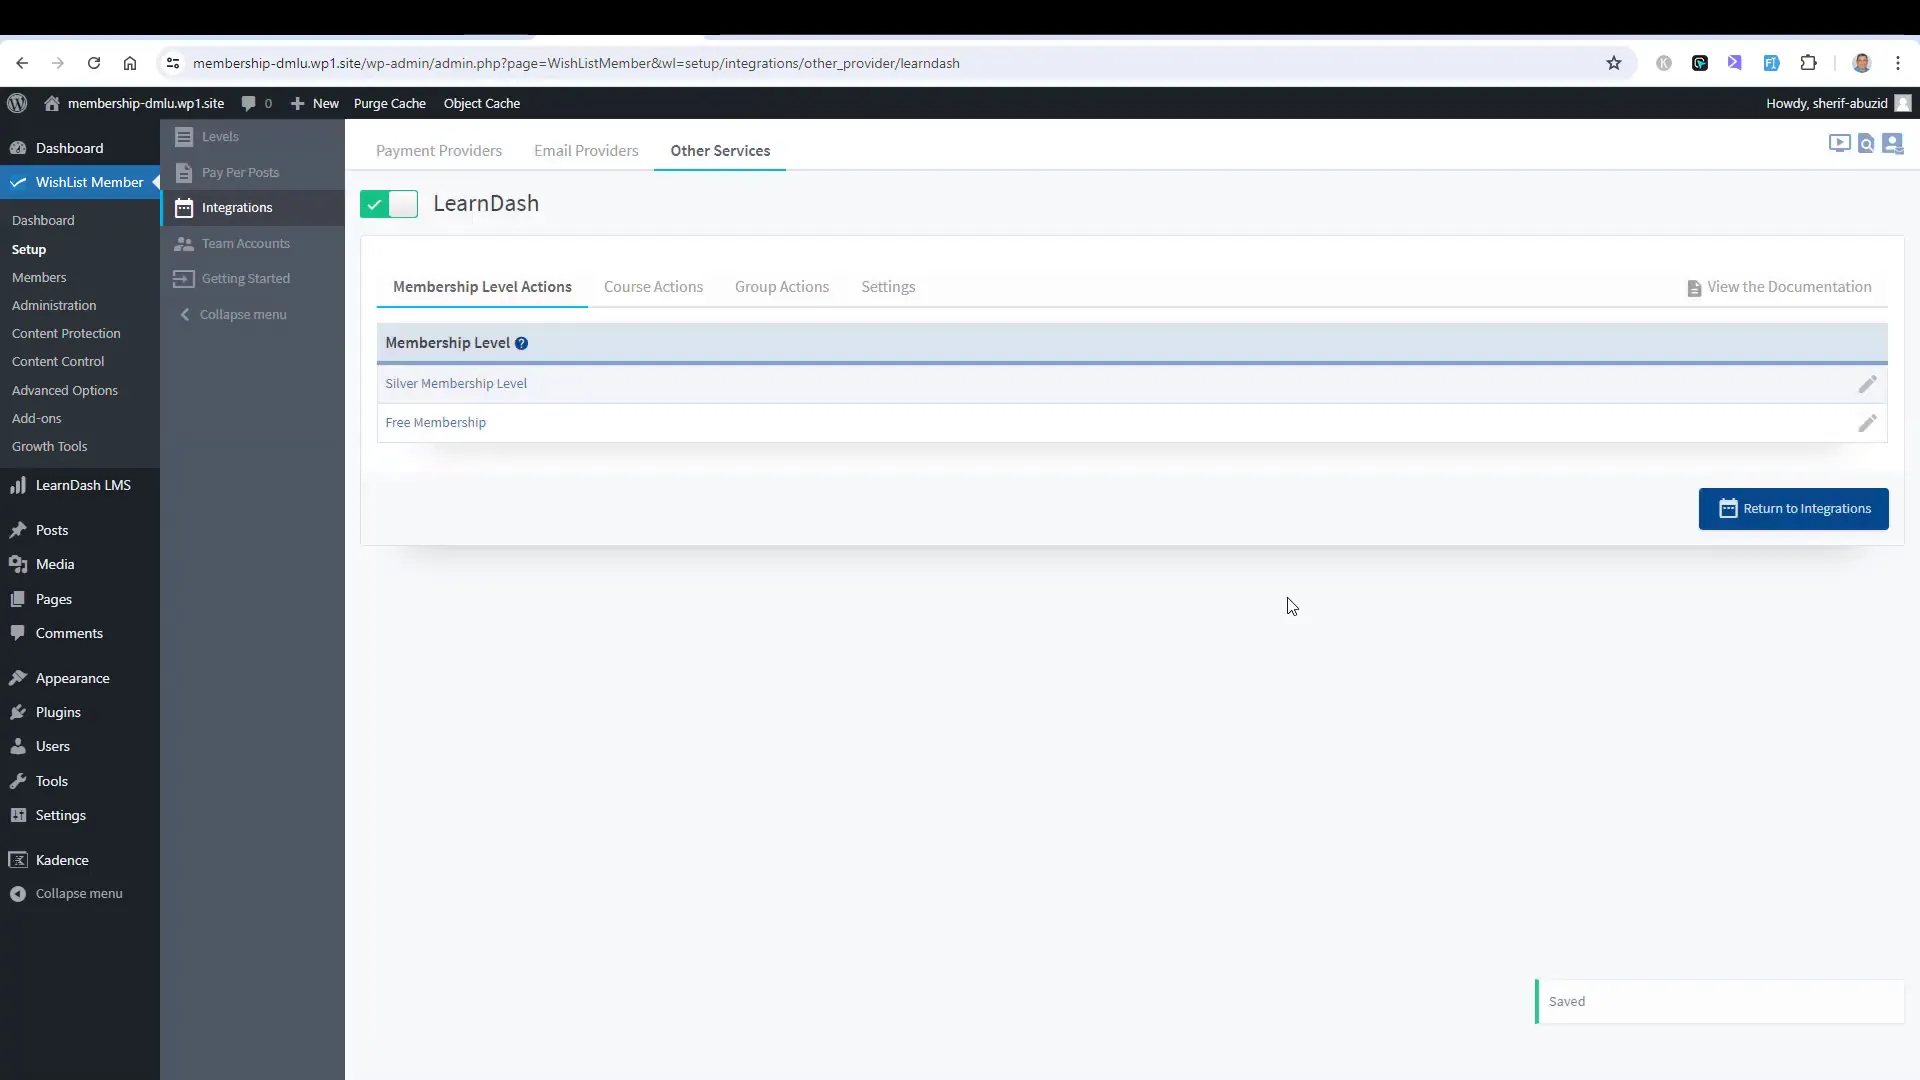
It’s crucial to manage member access effectively. If a member cancels their subscription, they should be removed from any associated courses to protect your content.
Enrolling Members in Courses Automatically
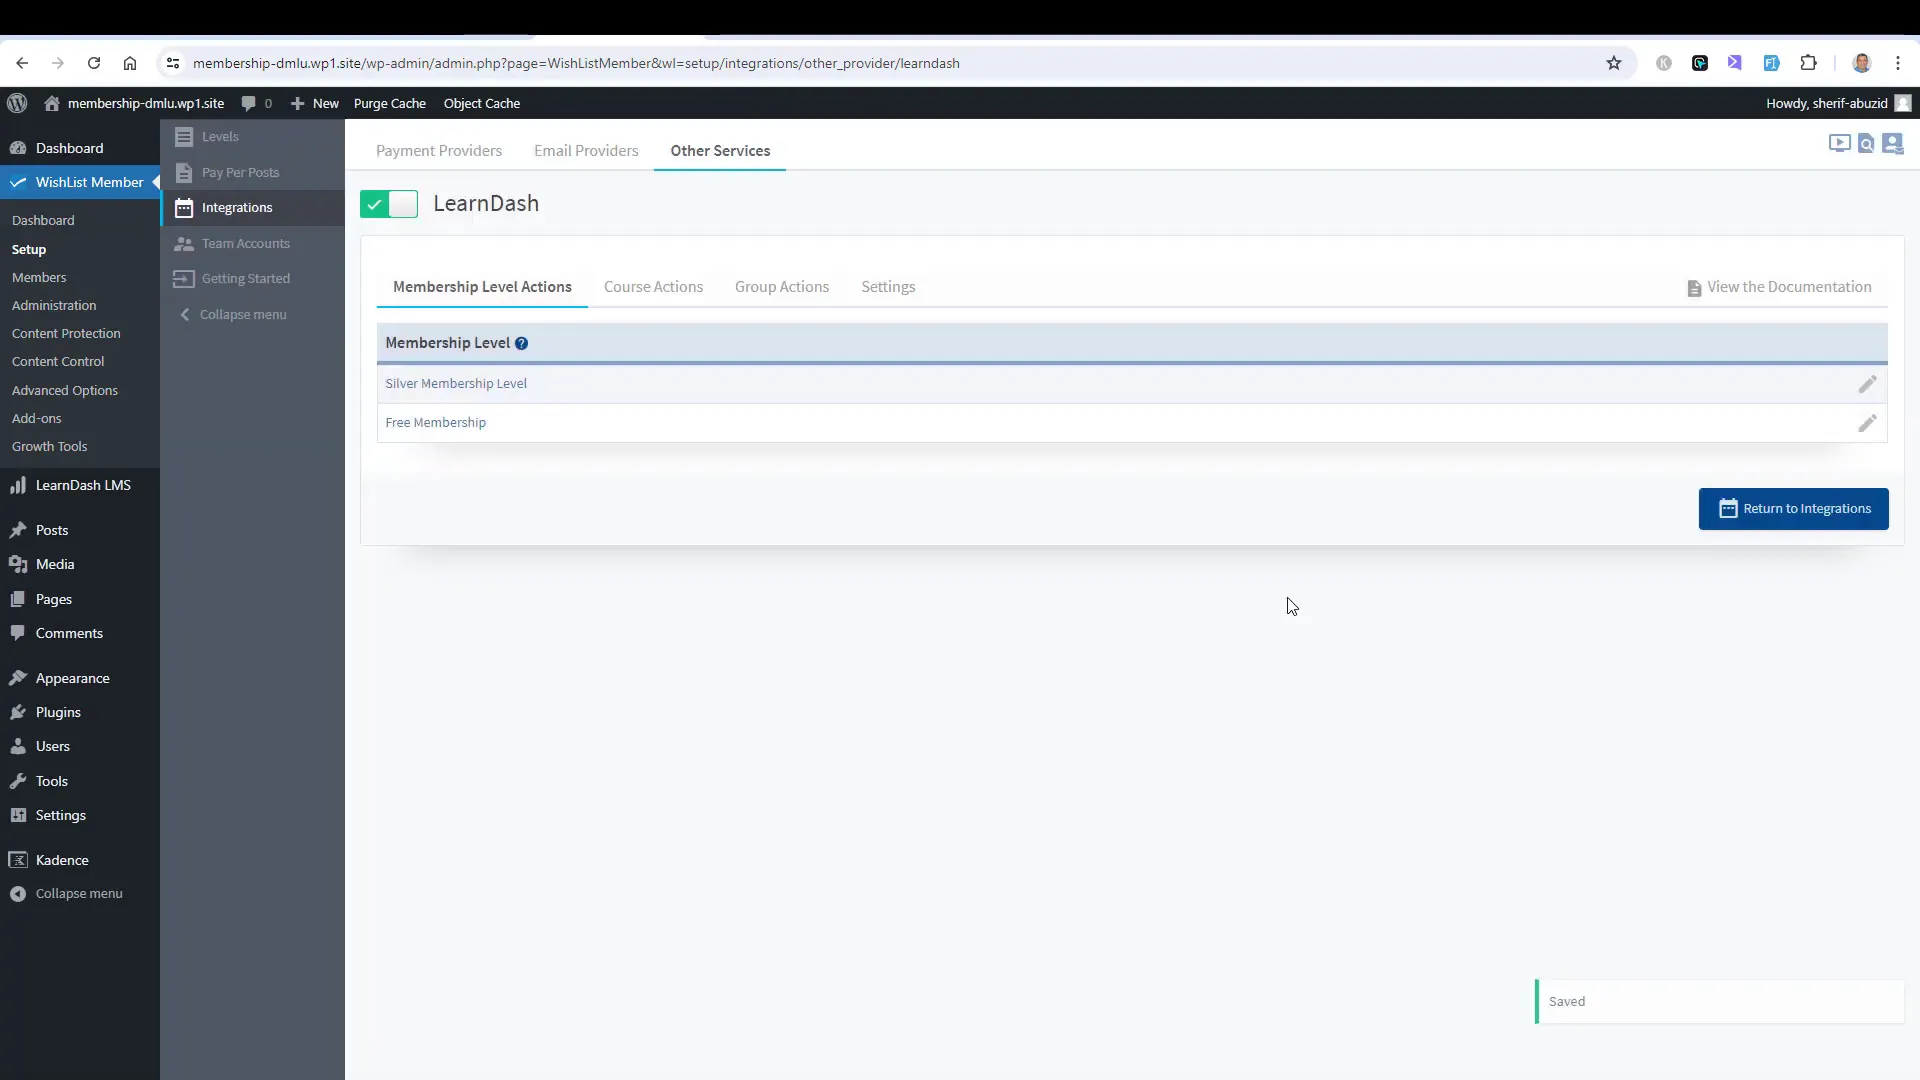
Automating the enrollment process for new members is a vital feature of a successful membership site. By leveraging the integration between LearnDash and Wishlist Member, you can ensure that when someone joins a membership level, they are automatically enrolled in the corresponding course.
This automation not only saves you time but also enhances the user experience. New members will have immediate access to the course materials they signed up for, reinforcing their decision to join.
Steps to Set Up Automatic Enrollment
- Access Your Wishlist Member Settings: Navigate to the Wishlist Member dashboard and select the membership level you want to configure.
- Integrate with LearnDash: In the settings, locate the LearnDash integration options to enable course enrollment.
- Assign Courses to Membership Levels: Specify the courses that correspond with each membership level. This ensures that when a user joins, they are automatically enrolled in the designated course.
- Test the Enrollment Process: Create a test member account to ensure that the enrollment process works as expected.
Handling Membership Cancellations and Expirations
Managing membership cancellations and expirations is crucial to maintaining the integrity of your online courses. When a member decides to cancel their subscription or their membership expires, you need to ensure that their access to the courses is revoked immediately.
This not only protects your intellectual property but also ensures fairness among paying members. If someone is no longer a member, they should not have access to content that is reserved for subscribers.
Process for Revoking Course Access
- Configure Cancellation Settings: In the Wishlist Member settings, determine what happens when a member cancels their subscription. Choose to remove them from any linked courses in LearnDash.
- Set Expiration Rules: Similar to cancellations, set rules for when a membership expires. Automatically revoke access to courses to prevent unauthorized usage.
- Notify Members: Consider sending an automated email to inform members about their cancellation or expiration, guiding them on how to renew their membership if desired.
Testing Course Access for New Members
Before launching your membership site, it’s essential to thoroughly test the course access features for new members. This ensures that everything functions correctly and provides a seamless experience for users.
Testing allows you to identify any potential issues that may arise during the enrollment process or when accessing content. By addressing these issues beforehand, you can enhance user satisfaction and reduce the likelihood of support requests.
Steps to Test Course Access
- Create a Test Member Account: Use a different email address to create a test account for a new member.
- Complete the Registration Process: Go through the entire registration process as a new member, ensuring all steps are functional.
- Access the Course: After registration, attempt to access the assigned course to confirm that everything is in place.
- Review User Experience: Take notes on the user experience from registration to course access for any potential improvements.
Final Thoughts on Restricting Access
Restricting access to online courses is a crucial aspect of running a successful membership site. By implementing effective access controls, you can ensure that only paying members benefit from your valuable content.
Utilizing tools like LearnDash and Wishlist Member allows for a streamlined approach to managing memberships and course access. This not only protects your content but also enhances the overall value of your membership offerings.

Next Steps: Email Marketing Automation
Once you have set up your membership site and integrated your courses, the next step is to implement email marketing automation. This will allow you to engage with your members effectively and keep them informed about new content, updates, and upsell opportunities.
Email marketing automation can help you build a stronger relationship with your members and encourage them to explore additional membership levels or courses.
Benefits of Email Marketing Automation
- Engagement: Regular communication keeps members engaged and informed.
- Upselling Opportunities: Promote higher-tier memberships or additional courses to your existing members.
- Feedback Collection: Use automated emails to gather feedback from members about their experience.
Part 5 – Harnessing Email Marketing Automation to Sell Memberships: A Comprehensive Guide
In this part, we will explore the intricacies of using Email Marketing Automation to Sell Memberships effectively. This guide will provide a step-by-step approach to setting up automated email sequences that nurture leads, promote membership offers, and ultimately enhance conversion rates on your WordPress membership site.
Overview of Membership Websites
Membership websites provide exclusive content and community access to subscribers. They can range from educational platforms to niche hobby sites. These sites create a steady revenue stream through membership fees.
Key features of membership websites include:
- Tiered membership levels offer different benefits.
- Content protection to restrict access to paying members only.
- Community engagement through forums or discussion boards.
- Regular updates and new content to keep members engaged.
Types of Membership Models
Membership websites often employ various models to attract different audiences:
- One-Time Fee: Members pay a single fee for lifetime access.
- Recurring Subscriptions: Monthly or yearly fees provide ongoing access.
- Freemium Model: Basic access is free, with premium features available for a fee.
Recap of Previous Training Parts
In the earlier parts of our training, we covered essential steps to set up a membership website:
- Part 1: Setting up a template for quick launches.
- Part 2: Using Wish List Member to create and manage membership levels.
- Part 3: Integrating payment gateways like PayPal for membership sales.
- Part 4: Protecting content for members only, particularly in online courses.
The Importance of Email Marketing Automation
Email marketing automation is crucial for membership websites. It allows you to engage with your members efficiently and effectively. Automation helps you send targeted messages based on user behavior and preferences.
Benefits of email marketing automation include:
- Increased Engagement: Personalized emails lead to higher open and click-through rates.
- Time Savings: Automating repetitive tasks frees up time for more strategic activities.
- Consistent Communication: Regular updates keep members informed and engaged.
Key Automation Workflows
Some essential workflows for membership sites include:
- Welcome series for new members.
- Onboarding sequences that guide users through your offerings.
- Regular newsletters to keep members up-to-date.
- Upsell campaigns for higher membership tiers.
Setting Up Fluent CRM for Email Automation
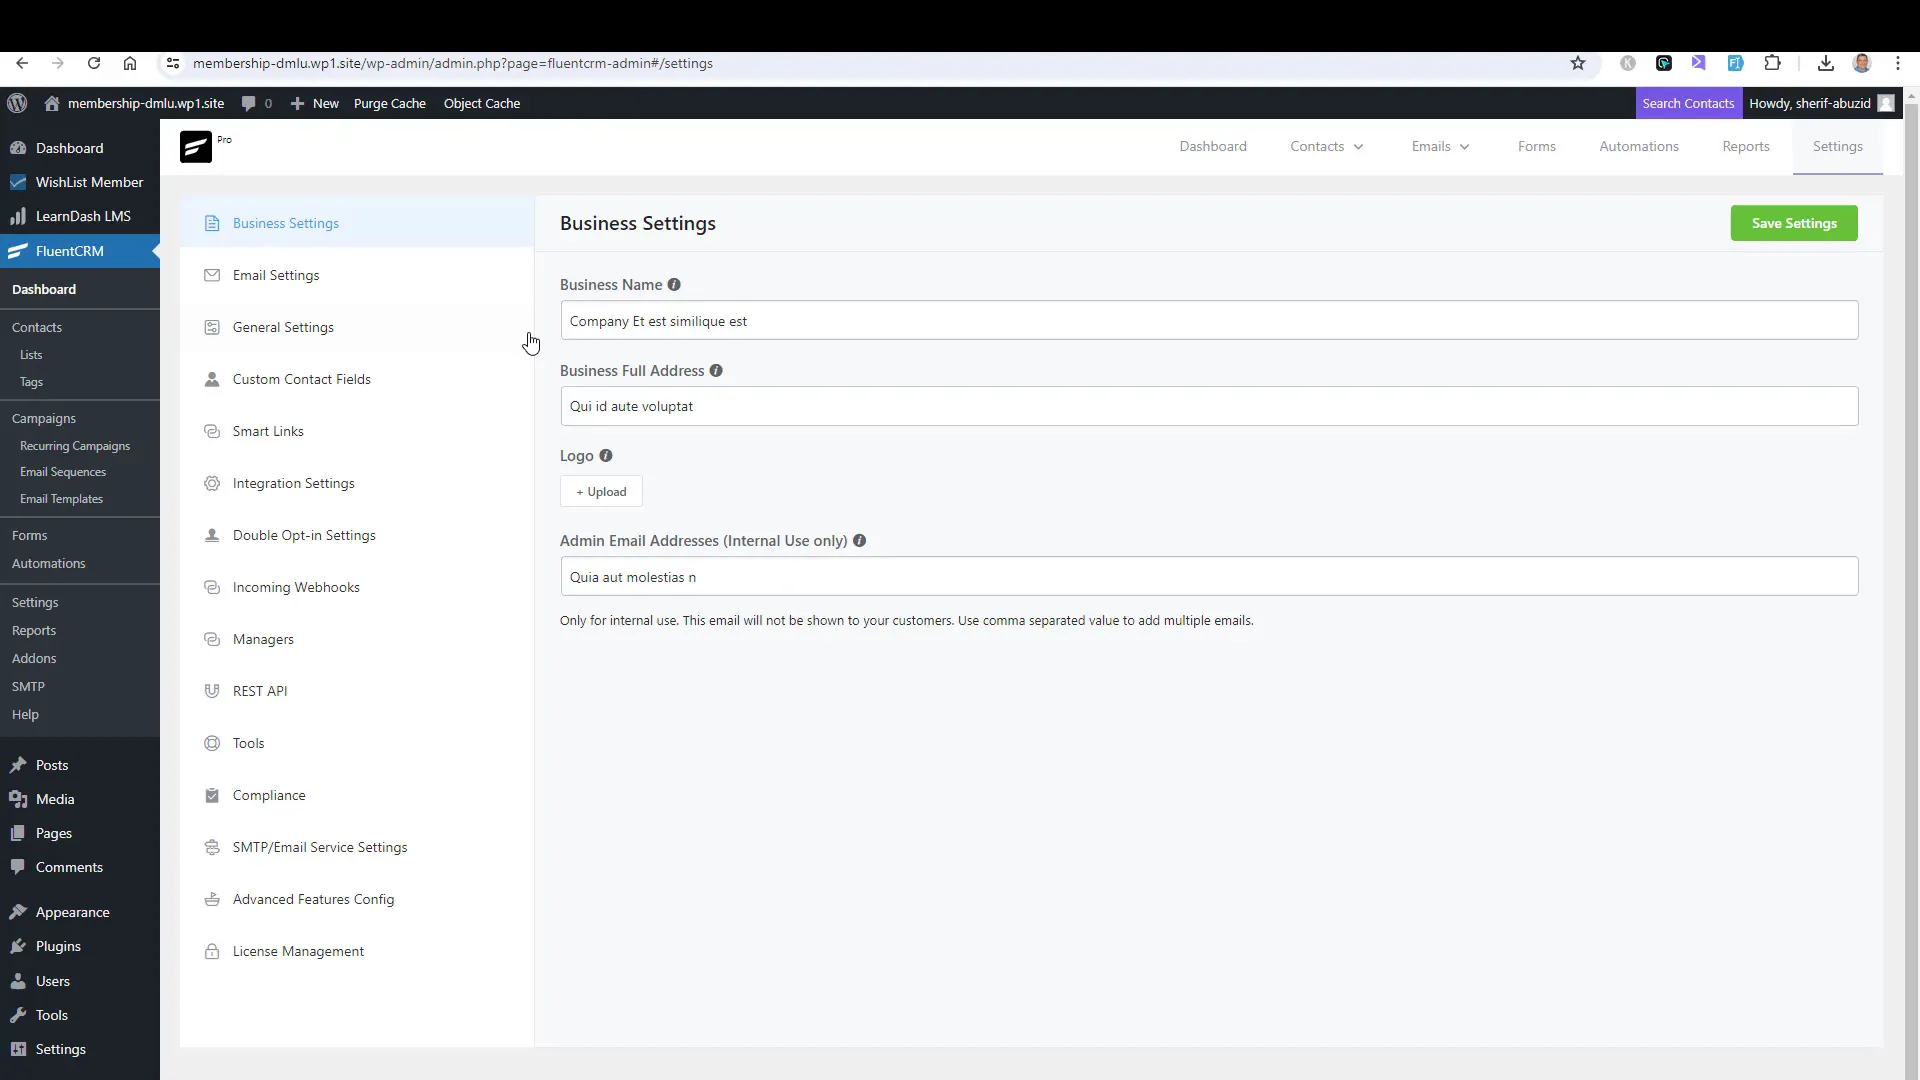
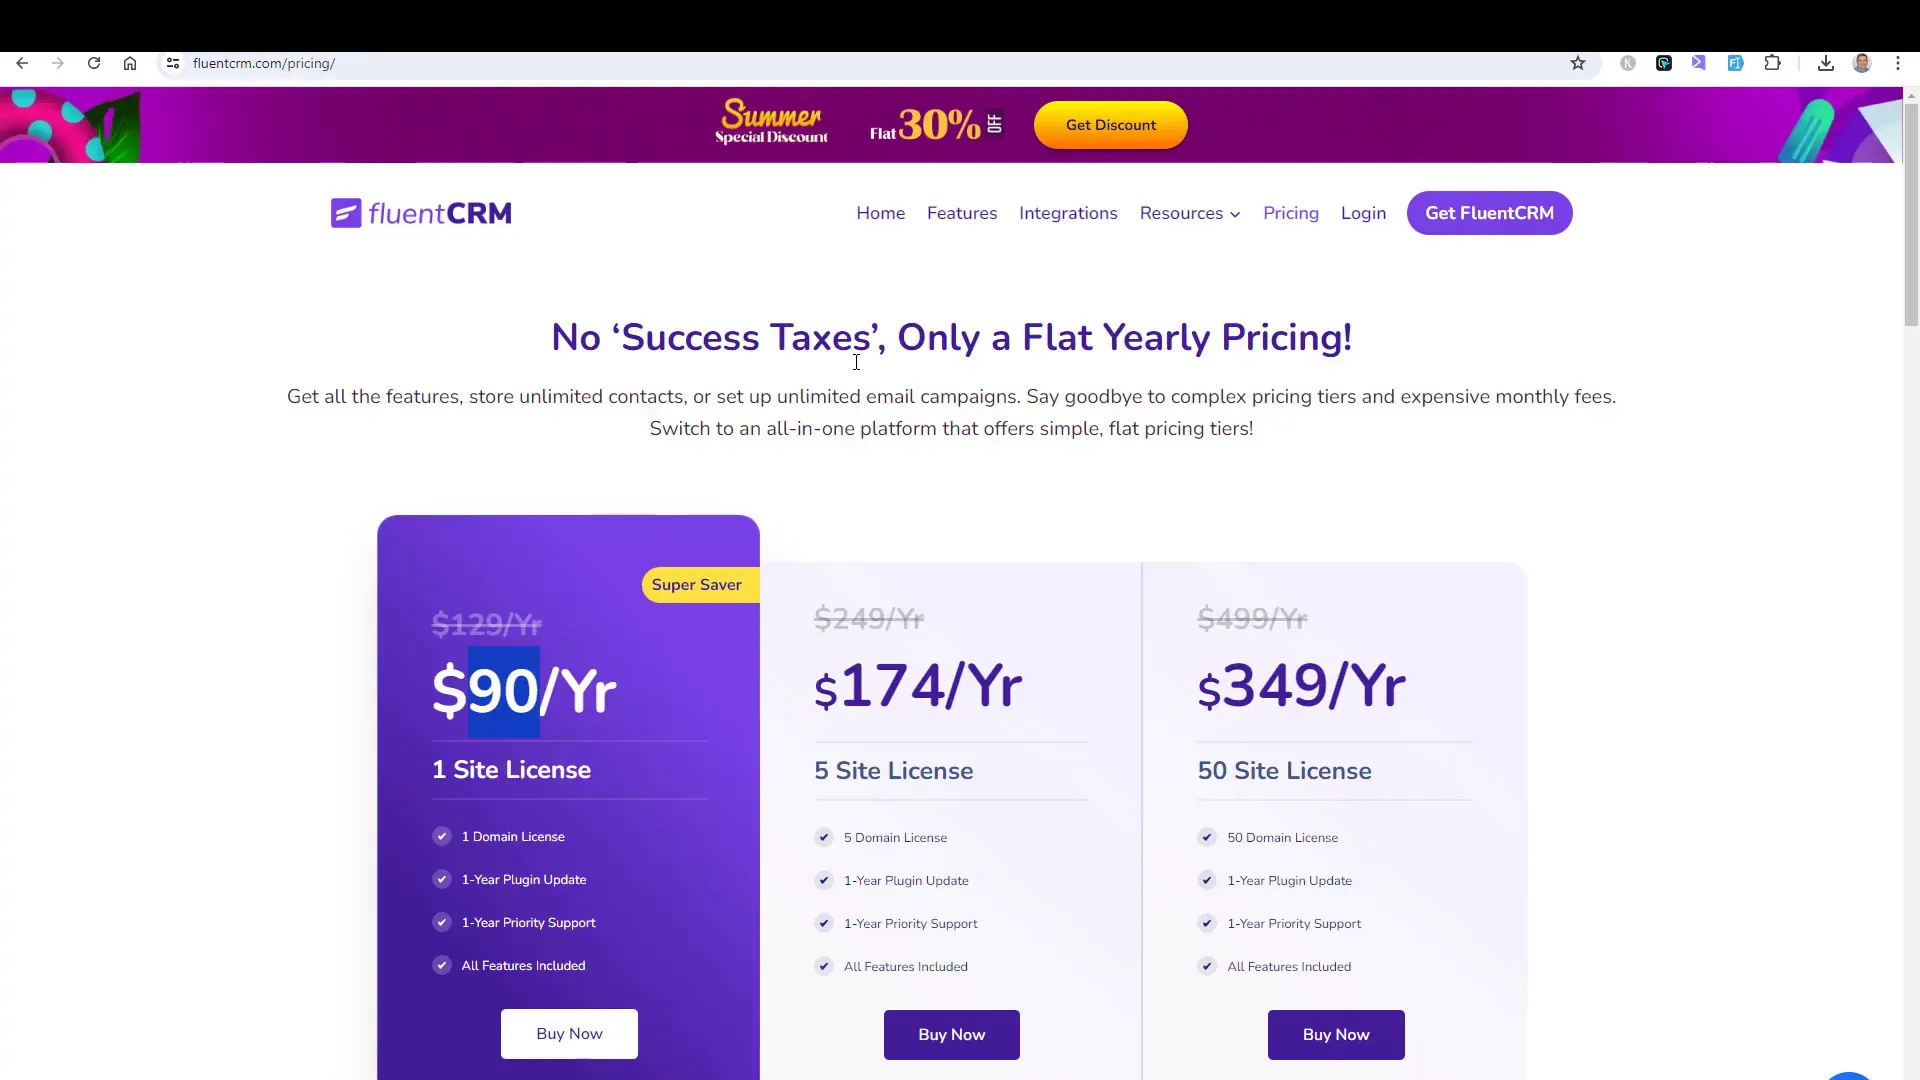
Fluent CRM is an essential plugin for managing email marketing automation within WordPress. To get started, install Fluent CRM and its Pro version for advanced automation features.
After installation, configure your business settings:
- Add your business name, address, and logo.
- Set up your email settings, including the sender name and email address.
Email Sending Services
For effective email delivery, select an email-sending service. Popular options include:
- Amazon SES
- Mailgun
- SendGrid
Choose a service based on your needs and budget. For example, Amazon SES offers a cost-effective solution for sending large volumes of emails.
Creating Email Lists and Tags
Organizing your contacts is vital for effective email marketing. Create distinct email lists to segment your audience:
- Leads: Individuals who have shown interest but haven’t purchased.
- Customers: Members who have made a purchase.
Utilizing Tags for Member Segmentation
Tags help differentiate between various membership levels. For instance:
- Tag for Silver Members
- Tag for Gold Members
This tagging system allows you to send targeted communications based on membership status.
Building Automation for Membership Levels
Automations streamline your communication process. Set up triggers based on user actions, such as purchasing a membership. For example, when someone buys a Silver Membership, you can automatically tag them and start a welcome sequence.
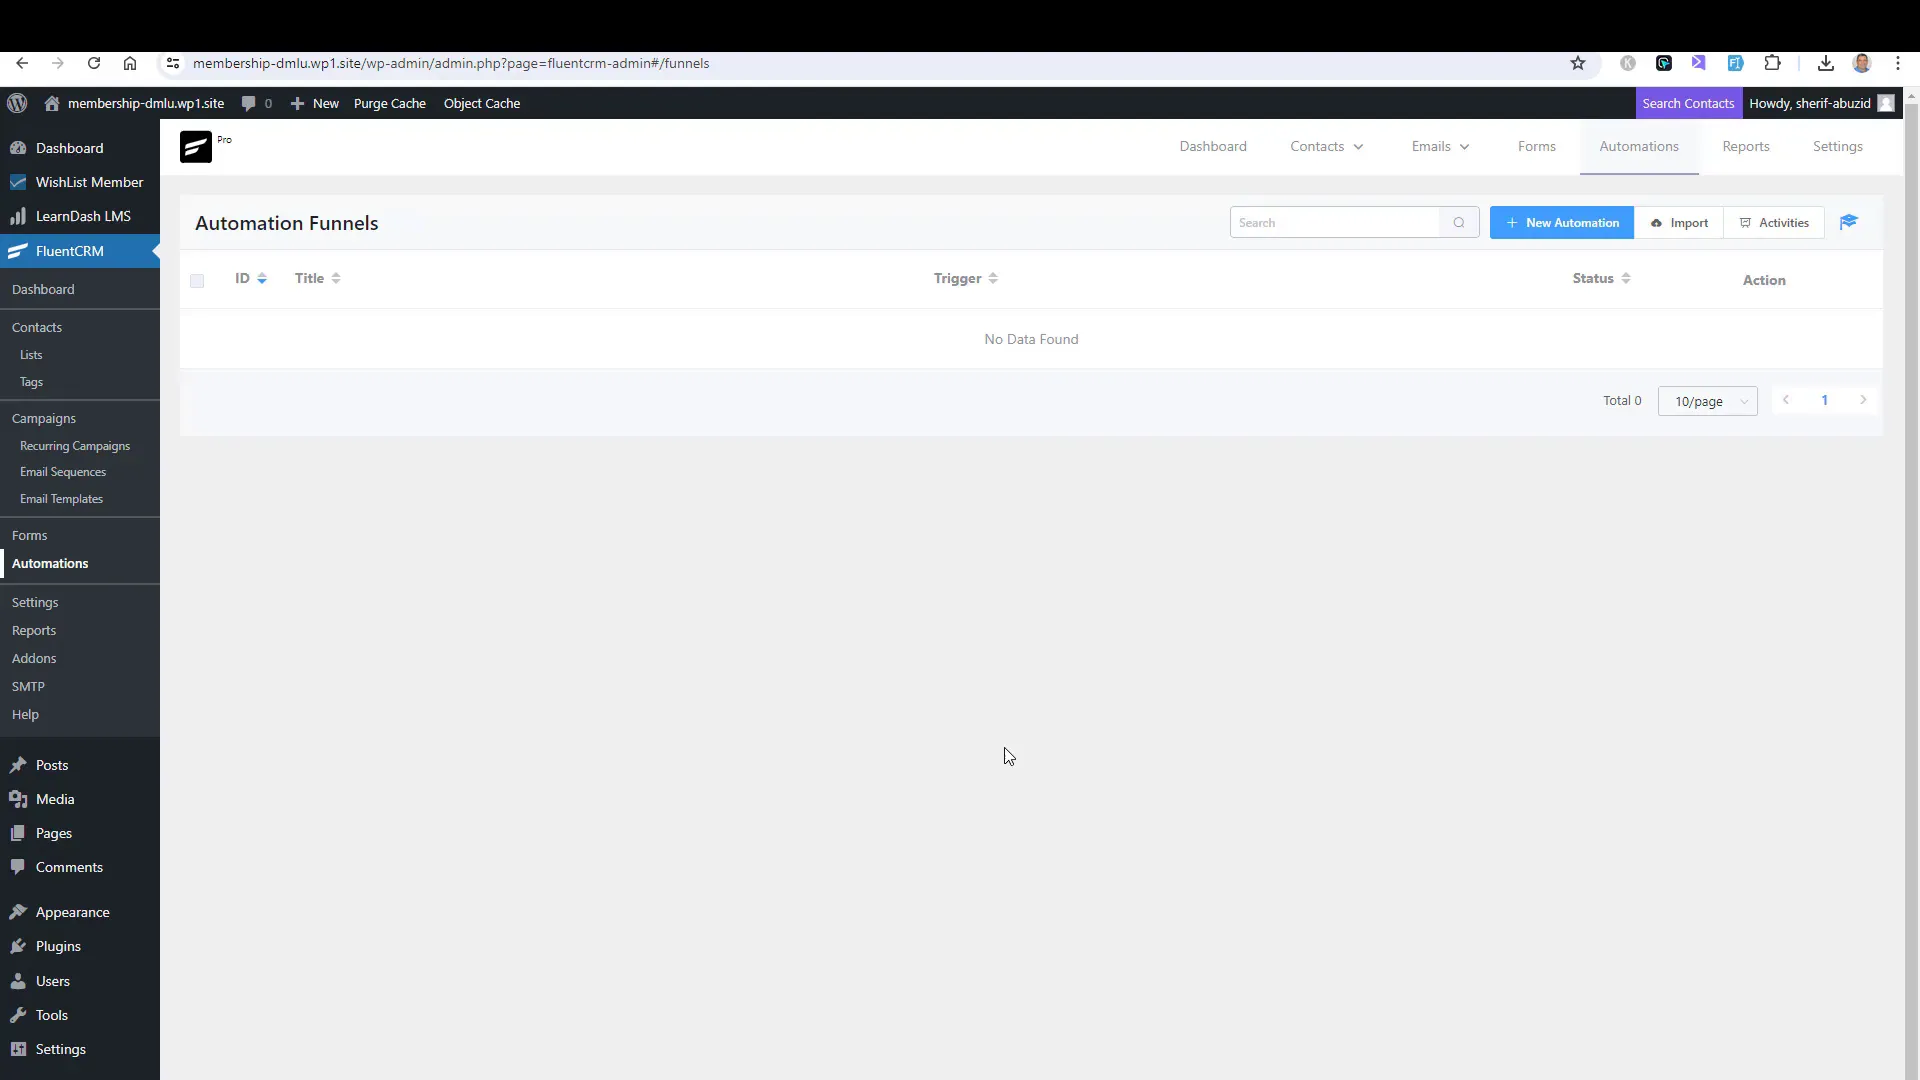
Creating Automation Workflows
To create an automation workflow, follow these steps:
- Choose the trigger event (e.g., membership enrollment).
- Add actions like applying tags or sending emails.
- Set conditions to check if members upgrade to higher tiers.
This structured approach ensures that your members receive timely and relevant communications.
Sending Weekly Emails to Members
Consistent communication with your members is key to maintaining engagement. Sending weekly emails can help keep your audience informed and connected to your community. These emails can include updates, valuable content, and exclusive offers tailored to their membership level.
To set up weekly emails, follow these steps:
- Create a content calendar to plan your weekly topics.
- Segment your email list based on membership levels.
- Draft engaging content that resonates with each segment.
- Use Fluent CRM to schedule and automate the sending process.
By automating your weekly emails, you save time while ensuring that your members receive consistent and relevant information.
Types of Content to Include in Weekly Emails
Your weekly emails should provide value while encouraging members to engage further. Consider including:
- Updates on new content or features available to members.
- Exclusive discounts or promotions for higher-tier memberships.
- Member spotlights or success stories to foster community.
- Tips and resources related to the membership content.
By varying the content, you keep your emails fresh and interesting, which can lead to higher engagement rates.
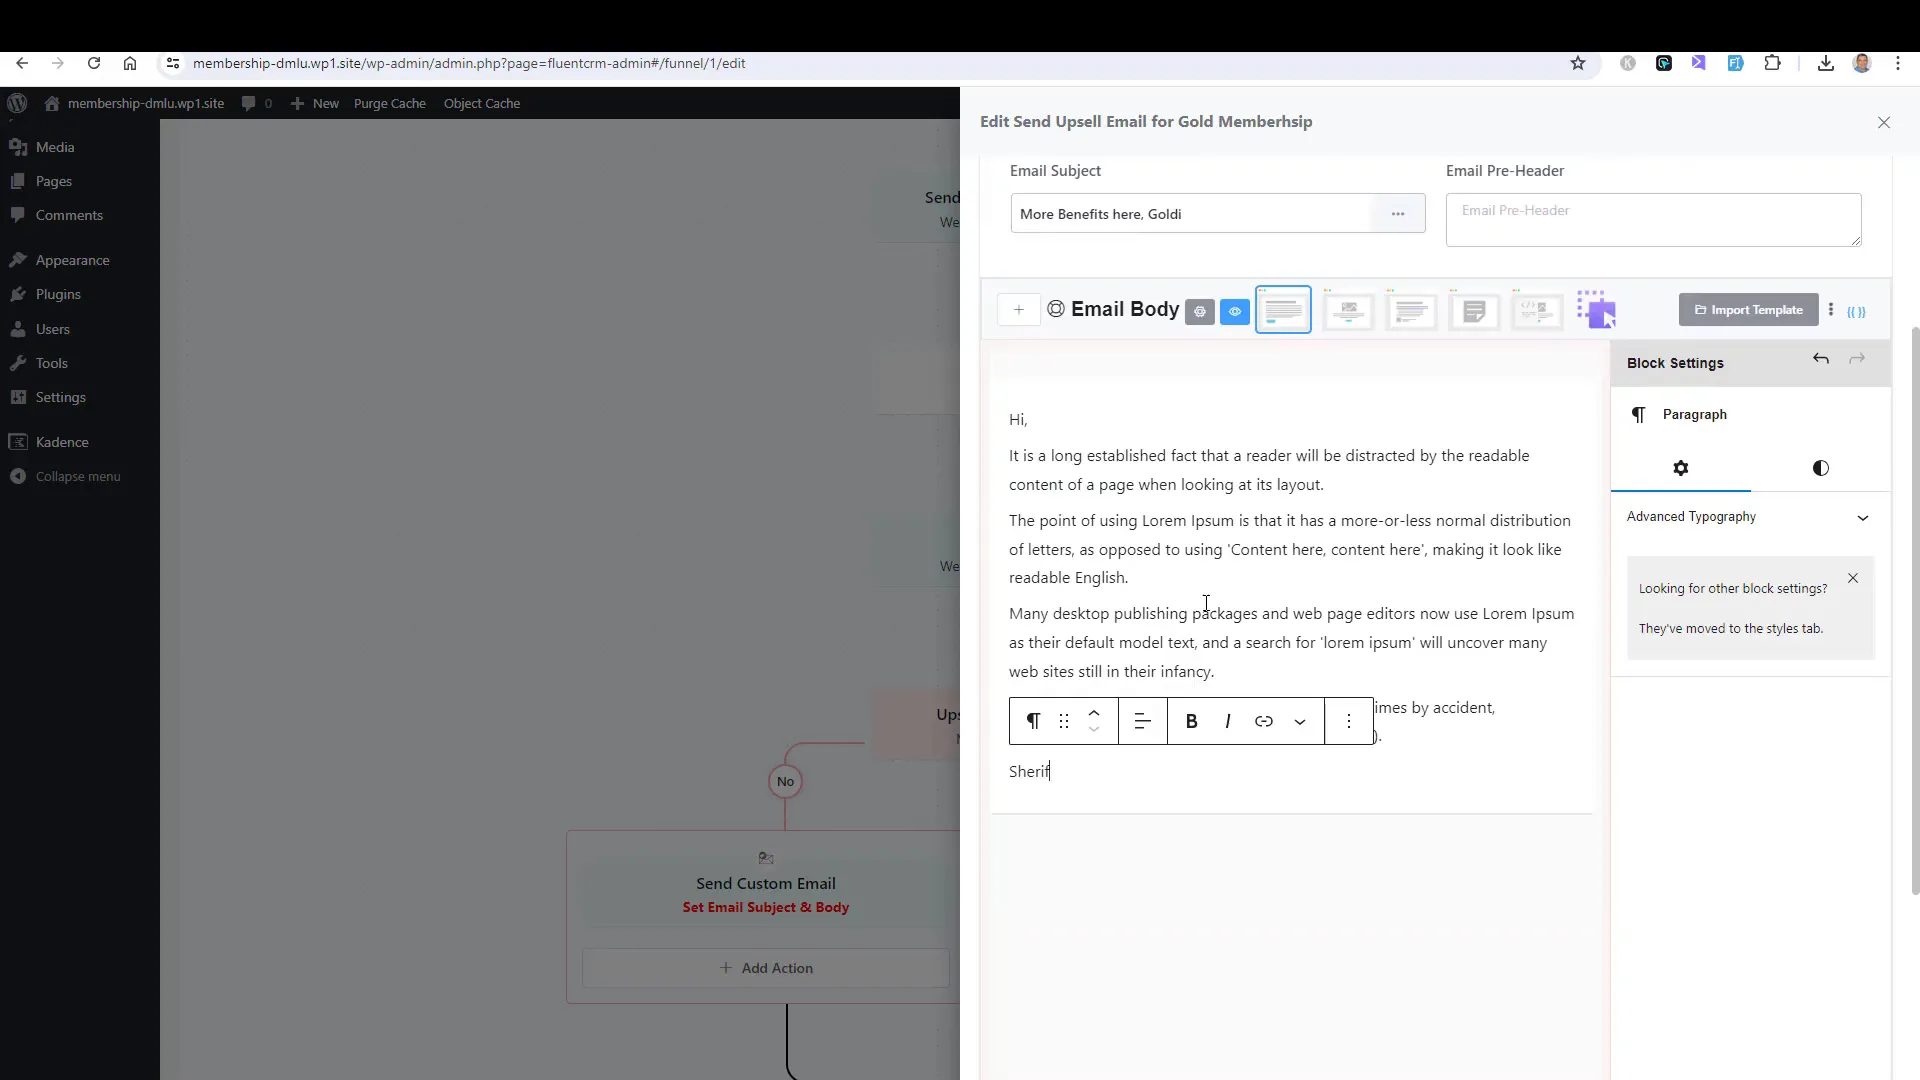
Creating Conditional Funnels for Upselling
Conditional funnels are vital for maximizing revenue from existing members. By setting up triggers based on member behavior, you can effectively upsell higher-tier memberships.
To create a conditional funnel, follow these steps:
- Identify the membership level you want to upsell.
- Create a new automation in Fluent CRM.
- Set a trigger based on an action, such as a member purchasing a lower-tier membership.
- Add conditions to check if they have purchased the upsell.
This approach allows you to send targeted emails that highlight the benefits of upgrading, leading to increased conversions.
Examples of Upsell Emails
Your upsell emails should communicate the value of the higher-tier membership. Here are some ideas:
- Highlight exclusive features available only to higher-tier members.
- Include testimonials from current gold members.
- Offer limited-time discounts to encourage immediate action.
Using persuasive language and a clear call to action will help drive conversions.
Handling Email Triggers and Actions
Understanding how to correctly set up email triggers and actions is essential for effective Email Marketing Automation to Sell Memberships. Triggers initiate the automation process based on specific member actions, while actions define what happens next.
Common triggers include:
- Membership enrollment
- Membership upgrades or downgrades
- Completion of specific tasks or courses
Once a trigger occurs, you can set actions such as:
- Sending a welcome email
- Applying tags to segment members
- Starting a follow-up sequence to encourage engagement
Best Practices for Setting Up Triggers
To ensure smooth automation, consider the following best practices:
- Keep triggers relevant to member actions.
- Test automation before going live to catch any issues.
- Regularly update your triggers based on member feedback and behavior.
By maintaining your triggers, you ensure that your email marketing remains effective and aligned with member needs.
Final Thoughts on Email Marketing Automation
Implementing Email Marketing Automation to Sell Memberships is a game-changer for your membership website. It not only saves you time but also helps you maintain a strong relationship with your members.
By sending targeted emails, creating conditional funnels, and utilizing effective triggers and actions, you can significantly increase engagement and conversions. Remember to continually analyze your email performance to refine your strategies.
Part 6 – Create Custom Members Dashboard and Menu: A Comprehensive Review
In this part, we will explore how to create a custom members dashboard and menu for your WordPress membership website. This guide will cover essential specifications, including menu customization, dashboard creation, and support form setup, ensuring that your members have a personalized and streamlined experience.
Creating a Menu for Logged-In Members
To create a menu tailored for logged-in members, you’ll need to customize the navigation so that it reflects the membership levels. This involves removing general navigation items that logged-in members should not see and adding new items relevant to their specific membership level.
Start by accessing the menu settings in your WordPress dashboard. In the primary menu, remove items that should only be visible to logged-out users. Next, add custom links for specific membership content, ensuring that these links are only visible to members who are logged in. This creates a streamlined experience that guides users to their intended content.
Customizing the Login Page
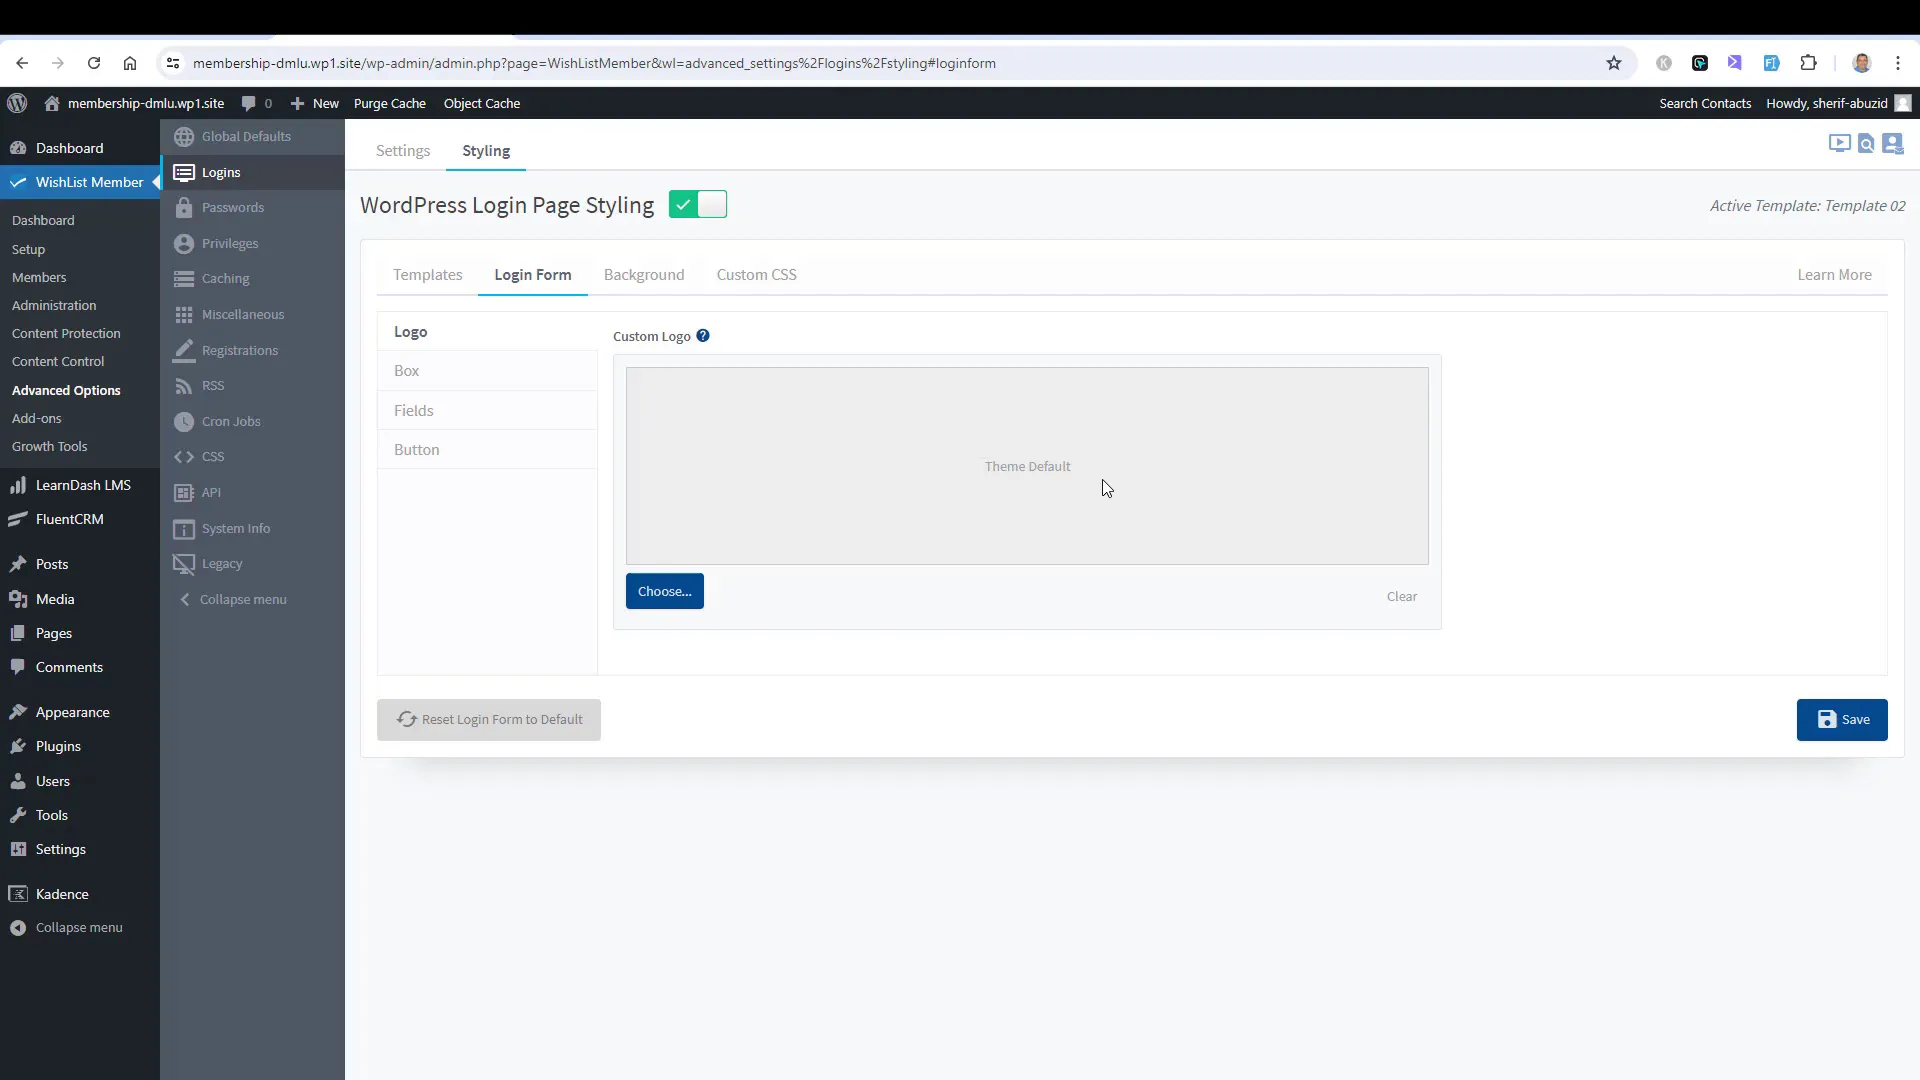
Your login page is often the first interaction users have with your site. Therefore, customizing it is crucial for creating a welcoming experience. You can easily change the layout and elements of the login page using your membership plugin settings.
Choose a template that reflects your brand and provides a user-friendly interface. You can also add your logo, change background images, and modify button styles. By doing this, you ensure that the login page is not only functional but also visually appealing, reinforcing your brand identity.
Building a Custom Members Dashboard
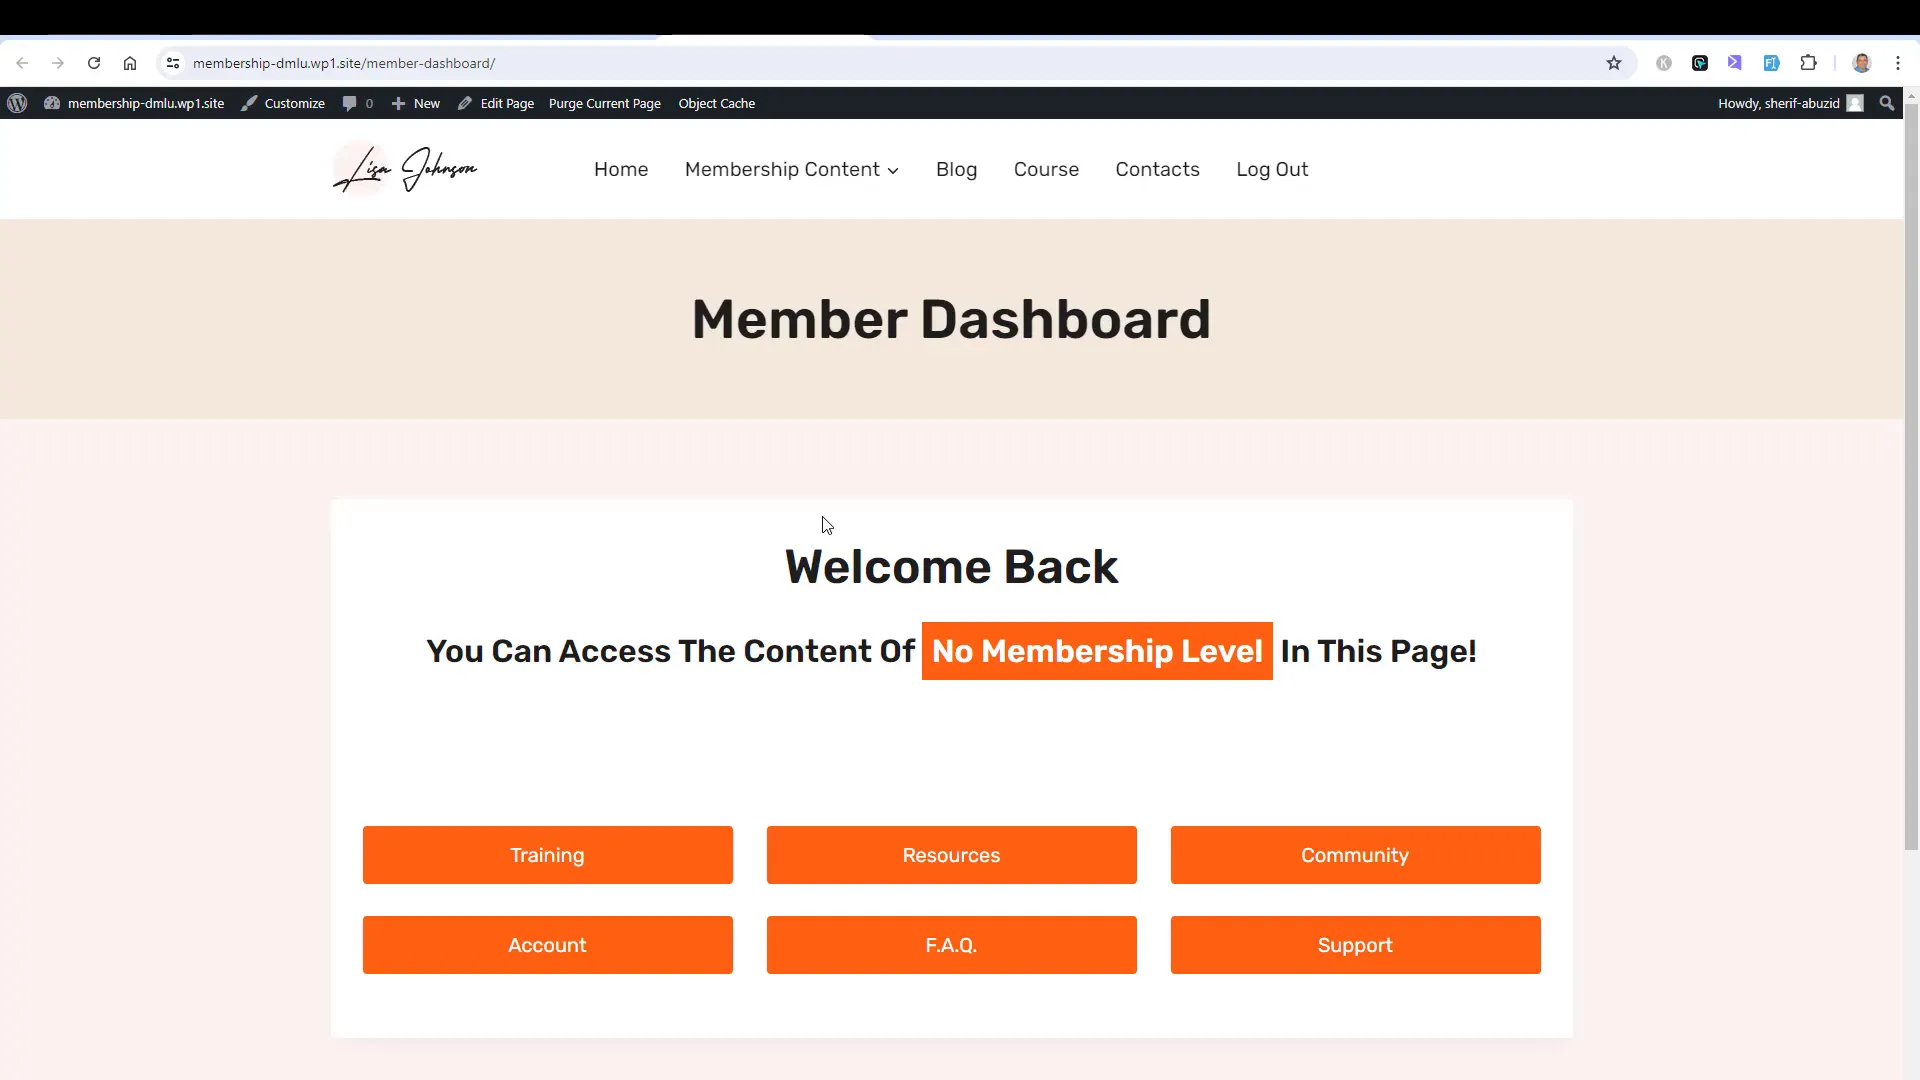
The members dashboard is where users will access their content and manage their profiles. It should be intuitive and organized so members can quickly find what they need. Begin by creating sections within the dashboard that are specific to each membership level.
For example, gold members may have access to exclusive content, while silver members see different resources. Use conditional logic to display content based on the user’s membership level. This ensures that each member only sees information relevant to them, improving their overall experience.
Implementing Dynamic Shortcodes
Dynamic shortcodes are a powerful tool for personalizing content for your members. These shortcodes can automatically display user-specific information, such as first names or membership levels, enhancing the personalization of your site.
To implement dynamic shortcodes, navigate to the shortcode generator in your membership plugin. From there, you can choose various codes to display member-specific information throughout your site. This not only makes your site feel more personalized but also encourages members to engage with the content.

Creating a Support Form for Members
Providing a dedicated support form for your members enhances their experience and addresses their needs promptly. A support form allows members to submit inquiries or issues directly, ensuring they feel heard and valued. Here’s how to create an effective support form tailored for your members.
Steps to Create a Support Form
- Go to your WordPress dashboard and click on “Pages” then “Add New”.
- Title the page “Support” and add a single-row layout.
- Insert an advanced form block into the row.
- Create a new form, naming it “Member Support Form”.
- Customize the form fields to gather necessary information, such as name, email, and the nature of the inquiry.
Once you have created the form, ensure to set up the form’s submission actions. Choose the email option and add the email address where support requests should be sent. This could be your email or that of a dedicated support team member.
After the setup, it’s crucial to integrate this support page into your members’ menu. Ensure that only logged-in members can access this page to maintain exclusivity and enhance their experience.
Testing the Support Form
Before launching the support form, test it thoroughly. Log in as a member and submit a test inquiry to ensure that it reaches the designated email address. This step is vital to confirm that your members can easily reach out for assistance when needed.
Tips for Upselling Membership Levels
Upselling is a strategic way to enhance your revenue while providing additional value to your members. Here are some effective strategies to consider when upselling membership levels.
1. Highlight Benefits
Clearly outline the benefits of upgrading to a higher membership level. Use persuasive language to showcase exclusive content, features, or perks that come with the new membership. Consider creating a dedicated section on your dashboard or within each content area that emphasizes these benefits.

2. Use Dynamic Messaging
Implement dynamic messaging that appears for specific membership levels. For example, if a silver member accesses a gold-level resource, display a message that highlights the benefits of upgrading to gold membership. This personalized approach can motivate members to consider the upgrade.
3. Create Exclusive Offers
Offer limited-time promotions for upgrading memberships. This could include discounts for early upgrades or exclusive content only available for upgraded members. Create urgency to encourage immediate action.
4. Leverage Testimonials
Share success stories and testimonials from current members who have upgraded. Hearing about the positive experiences of others can significantly influence potential upgrades.
5. Monitor Engagement
Keep an eye on member engagement and tailor your upselling strategies accordingly. If certain content is particularly popular among silver members, consider creating a targeted upsell campaign for the gold membership.
Conclusion and Additional Resources
Creating a custom members dashboard and menu significantly enhances the user experience and engagement on your membership site. By implementing a support form and utilizing upselling strategies, you can further improve member satisfaction and boost revenue.
For additional resources, consider checking out the following:
- Best Membership Plugins for WordPress
- Free Checklist for Launching a Membership Website
- Effective Upselling Strategies for Membership Sites


