In today’s digital landscape, capturing email addresses from your WordPress website visitors is crucial for building a successful email list. This guide will walk you through the essential steps to effectively capture email addresses and send weekly emails, utilizing powerful tools like Fluent Forms and Fluent CRM.
Introduction to Email Capture
Capturing email addresses is a vital strategy for any website owner aiming to enhance engagement and build a loyal audience. By effectively capturing emails, you can foster relationships with your visitors and keep them updated with valuable content, promotions, or newsletters. This process not only strengthens your brand but also directly contributes to business growth.
To maximize your email capture efforts, it’s essential to utilize user-friendly tools that streamline the process. One such tool is Fluent Forms, which allows you to create customizable forms tailored to your audience’s needs. This guide will walk you through the steps necessary to capture email addresses from your WordPress website visitors.
Installing Fluent Forms
Before you can start capturing email addresses, you need to install the Fluent Forms plugin on your WordPress site. This straightforward process will enable you to create forms quickly and efficiently.
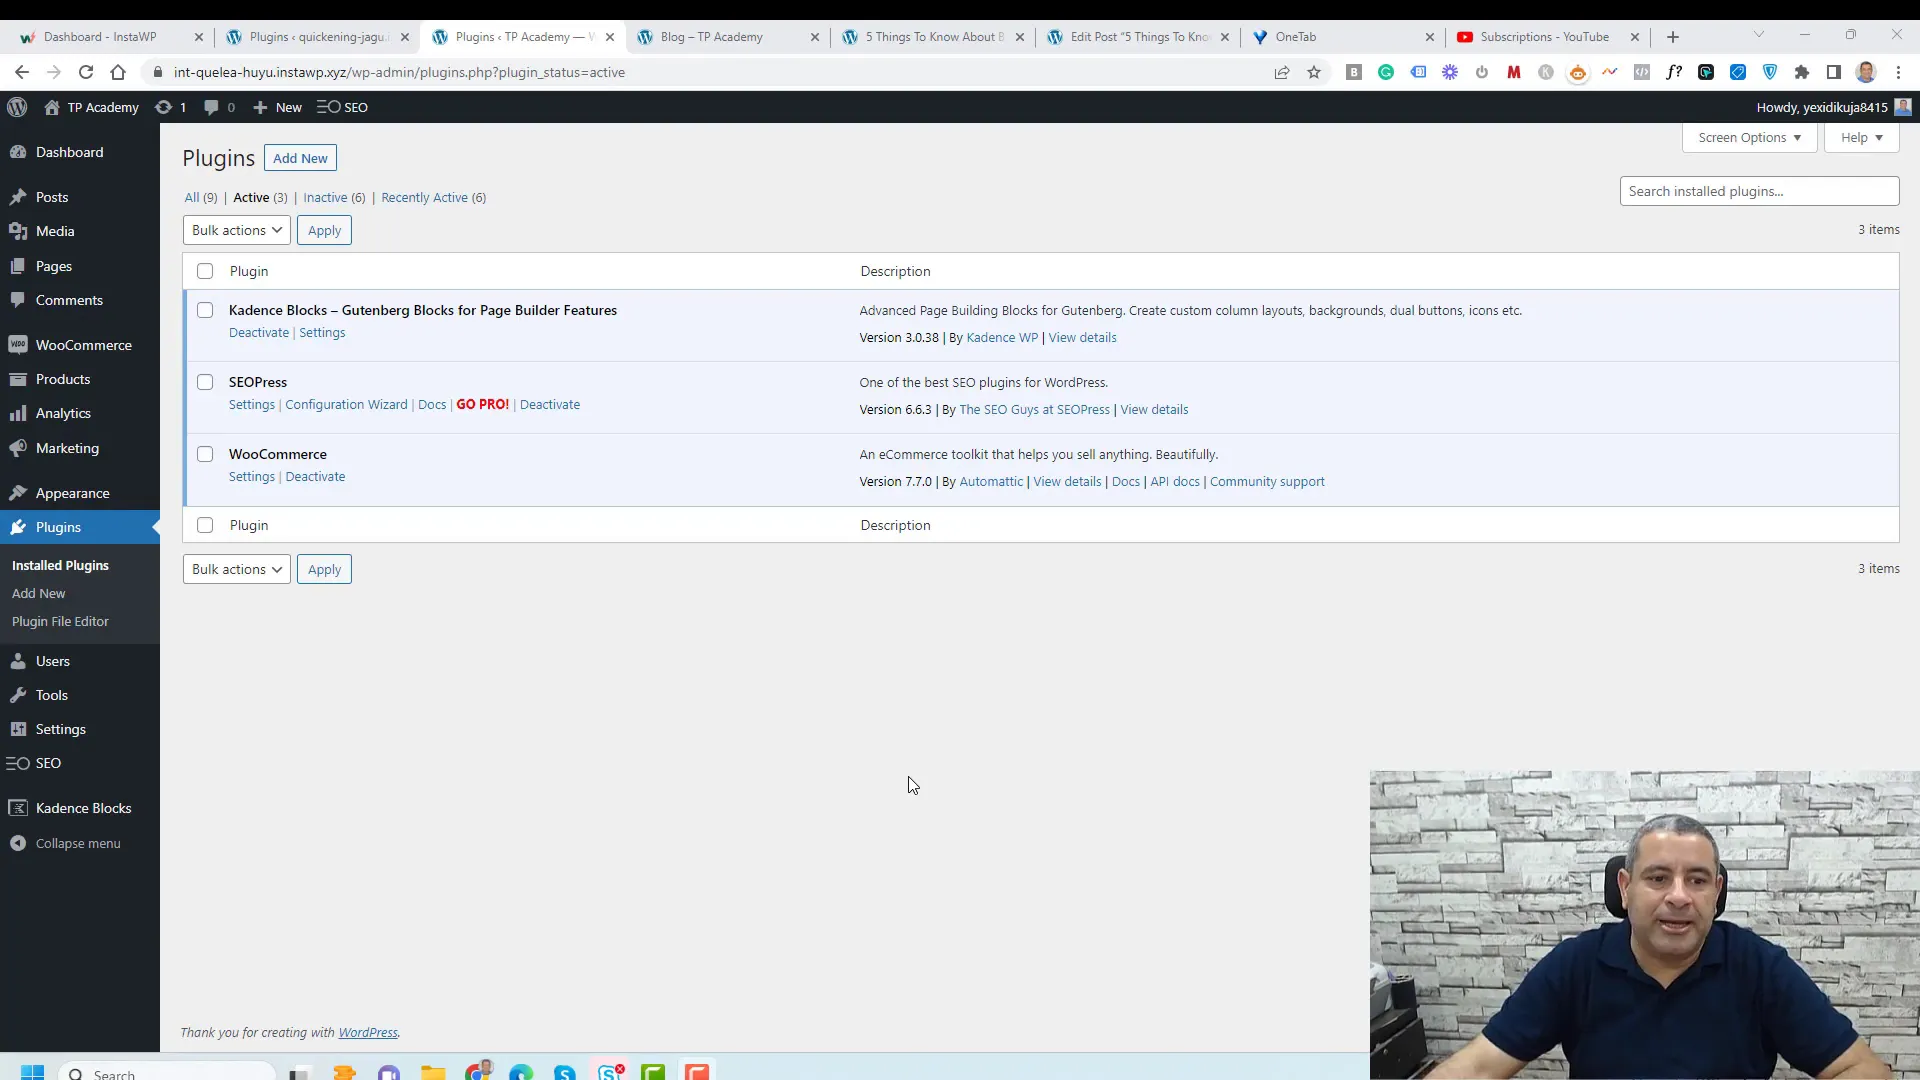
To install Fluent Forms, navigate to the Plugins section of your WordPress dashboard. Click on ‘Add New’ and search for “Fluent Forms.” Once you find the plugin, click on ‘Install Now’ and then activate it. After activation, you’ll notice a new menu item labeled ‘Fluent Forms‘ in your sidebar, indicating successful installation.
Creating Your First Form
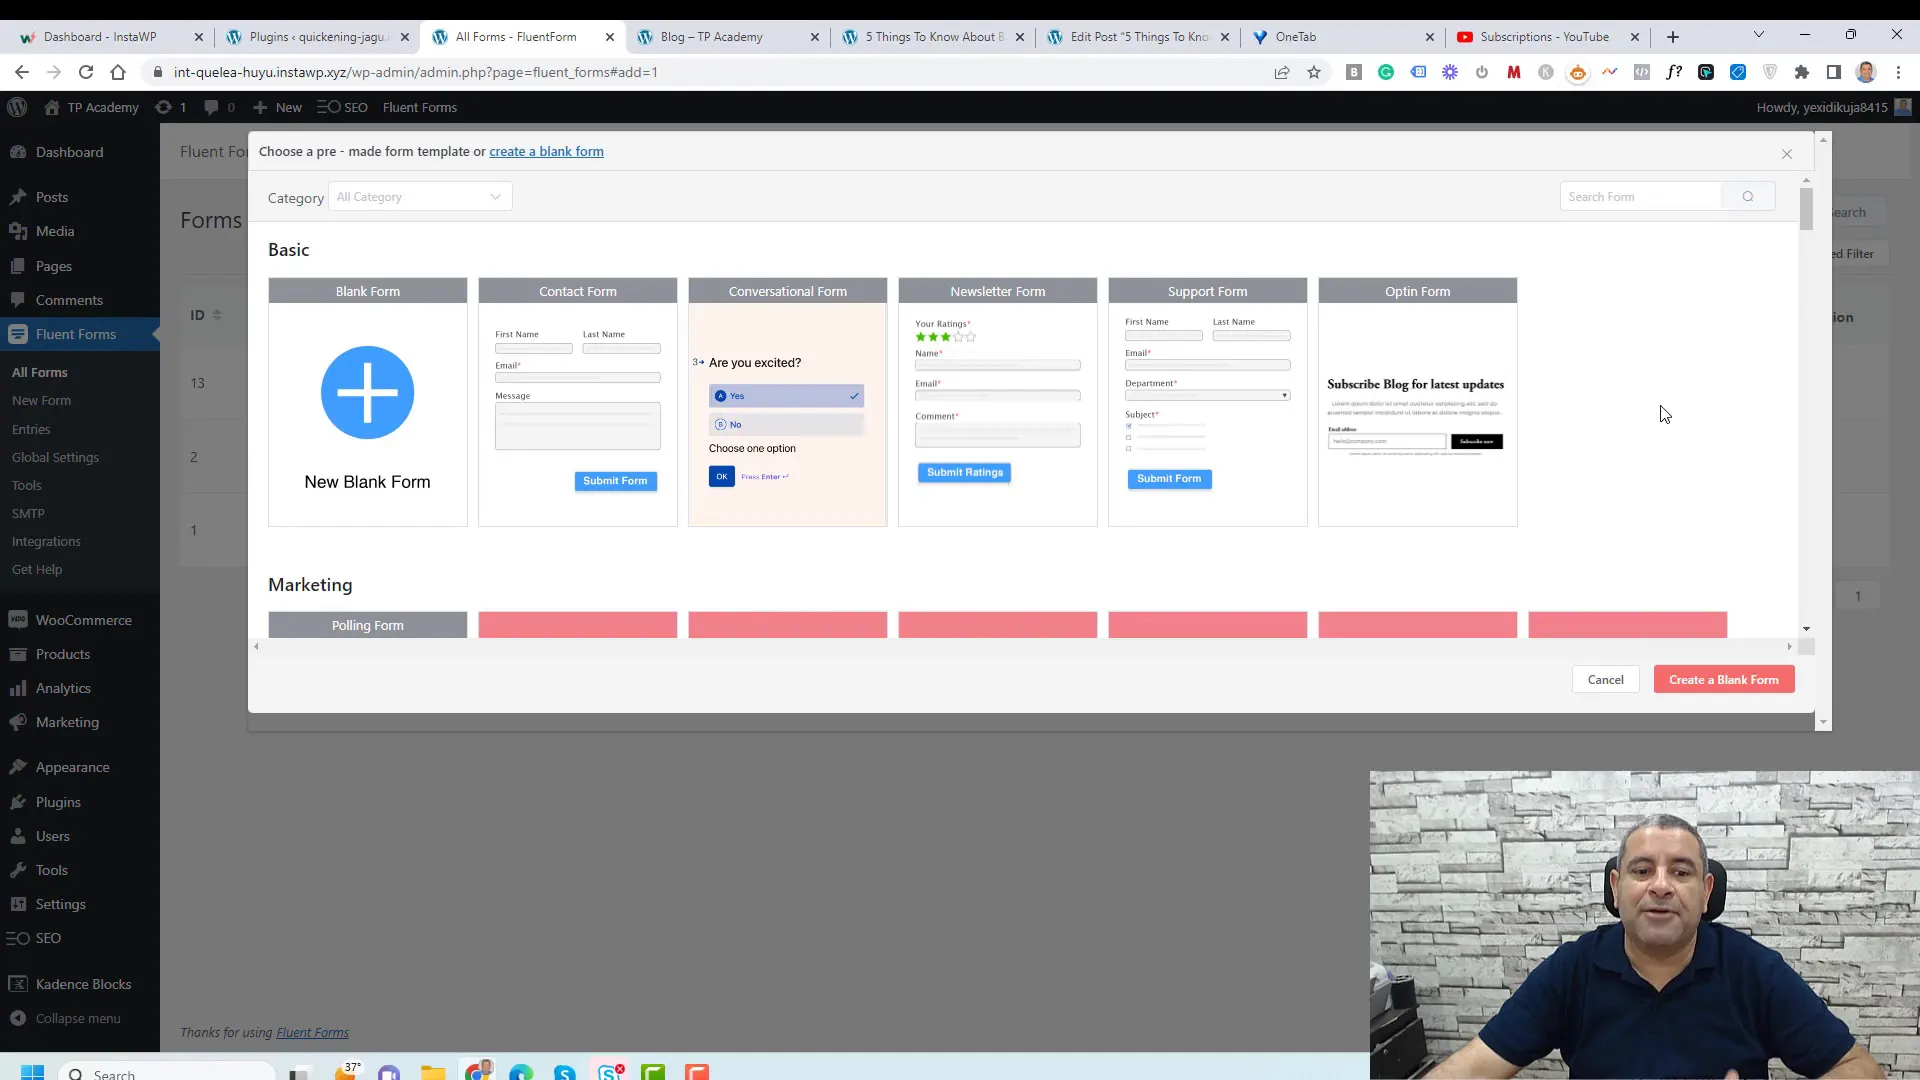
With Fluent Forms installed, it’s time to create your first form. Start by clicking on ‘New Form’ within the Fluent Forms dashboard. You will see various templates available, but for simplicity, choose to create a blank form.
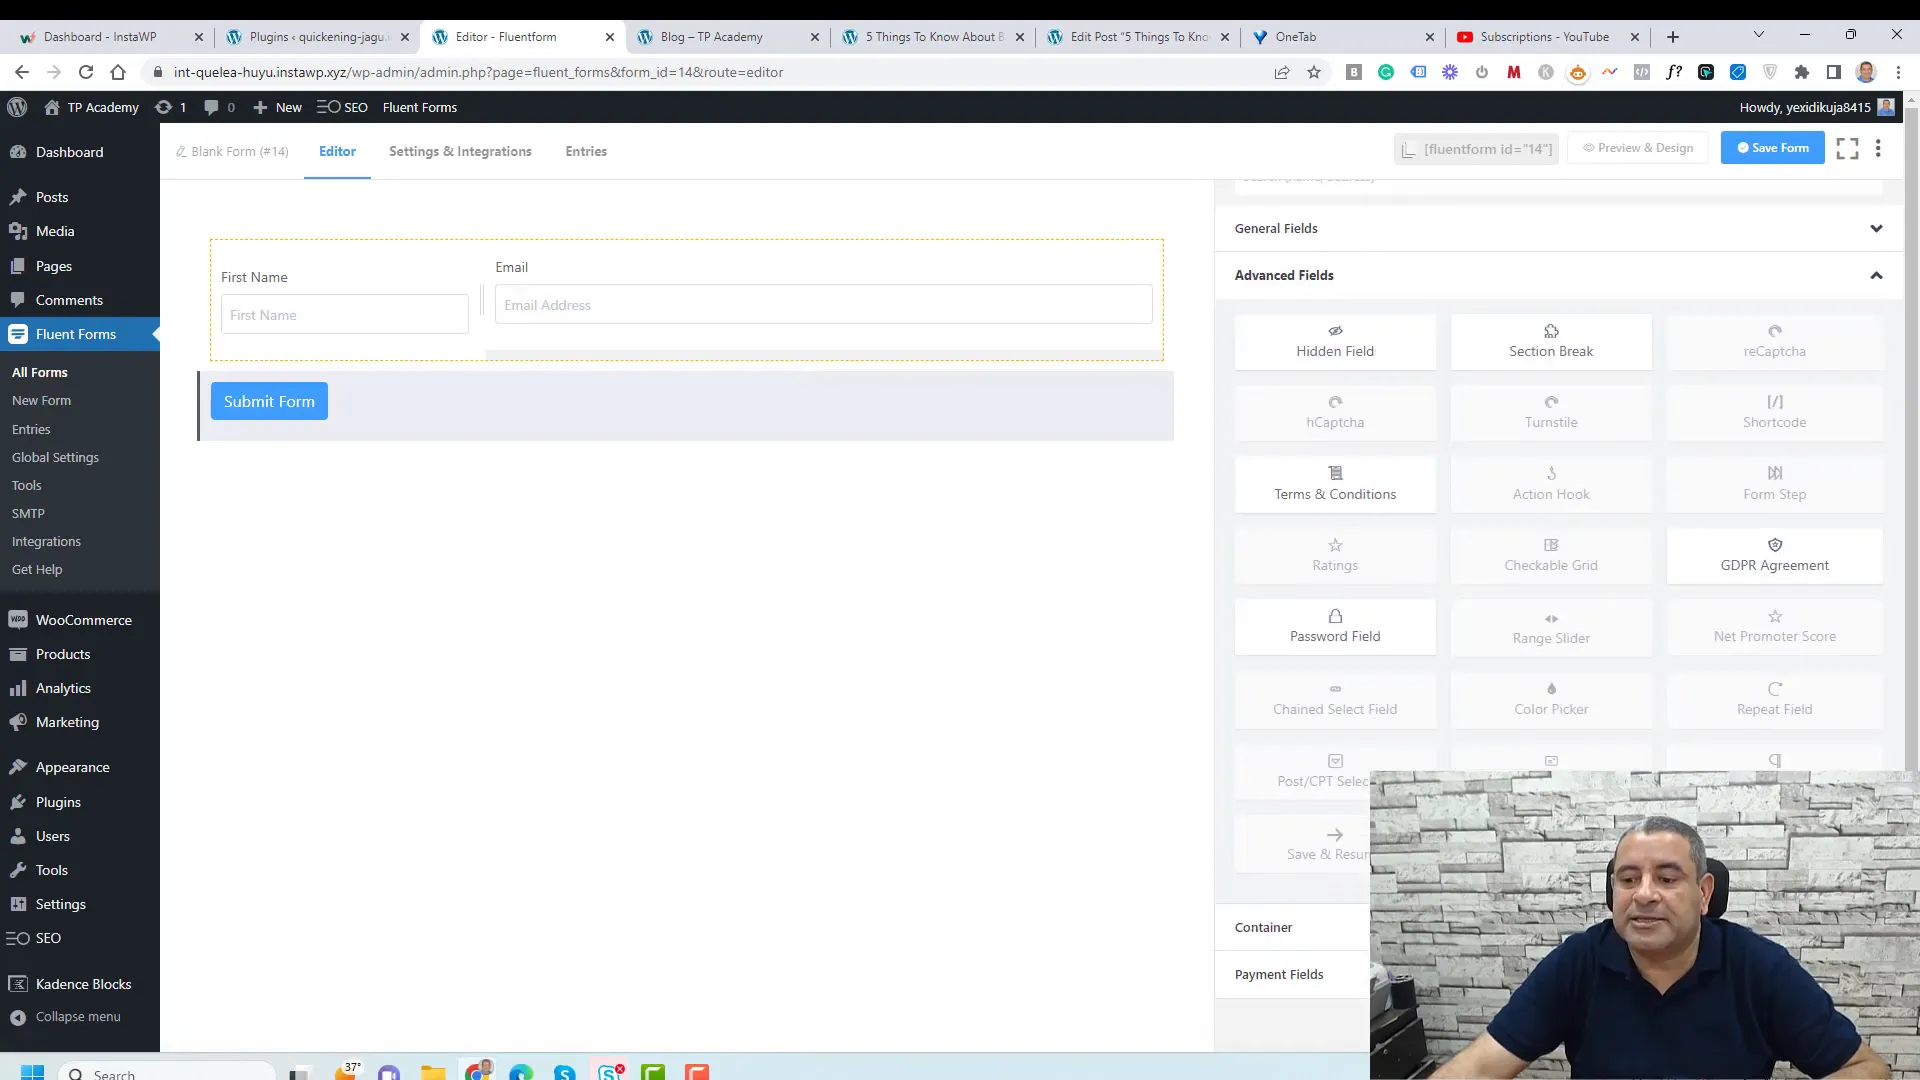
Once in the form builder, you can drag and drop fields from the right sidebar onto your form canvas. For capturing email addresses, you’ll need to include fields for the visitor’s name and email address. To make the form visually appealing and user-friendly, consider placing the name and email fields side by side using a two-column container.
Next, customize these fields by removing unnecessary fields and renaming them as needed. Streamline your form by only requesting essential information, such as the first name and email address. Once your fields are set up, add a custom submit button to enhance the form’s look and feel.
Styling Your Form for Better Engagement
Styling your form is crucial for attracting attention and encouraging visitors to complete it. Begin by adding a catchy title and subtitle to your form. Use the custom HTML field to insert these elements above your input fields.
To further enhance the appearance of your form, consider adding a background color or image. You can achieve this by placing your form within a container or column block. Adjust the padding and margins to create a visually appealing layout that draws users in.
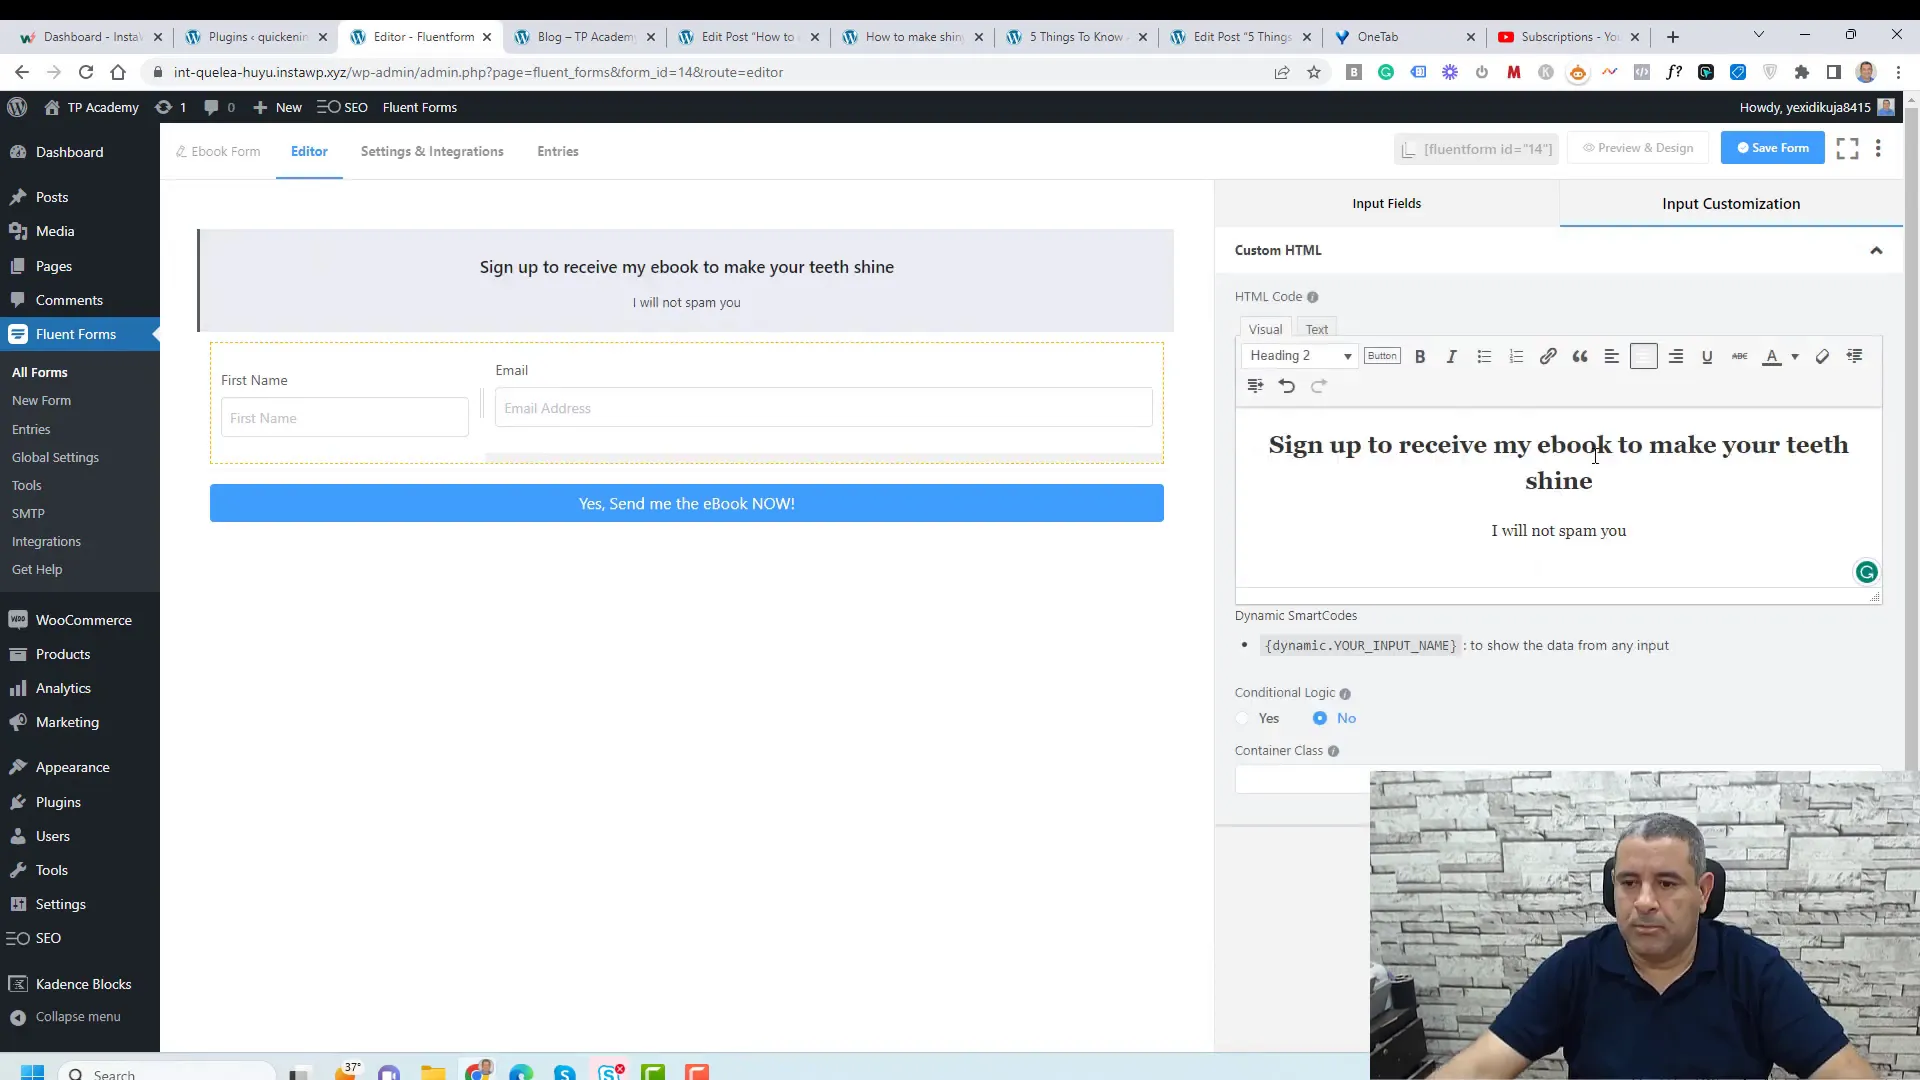
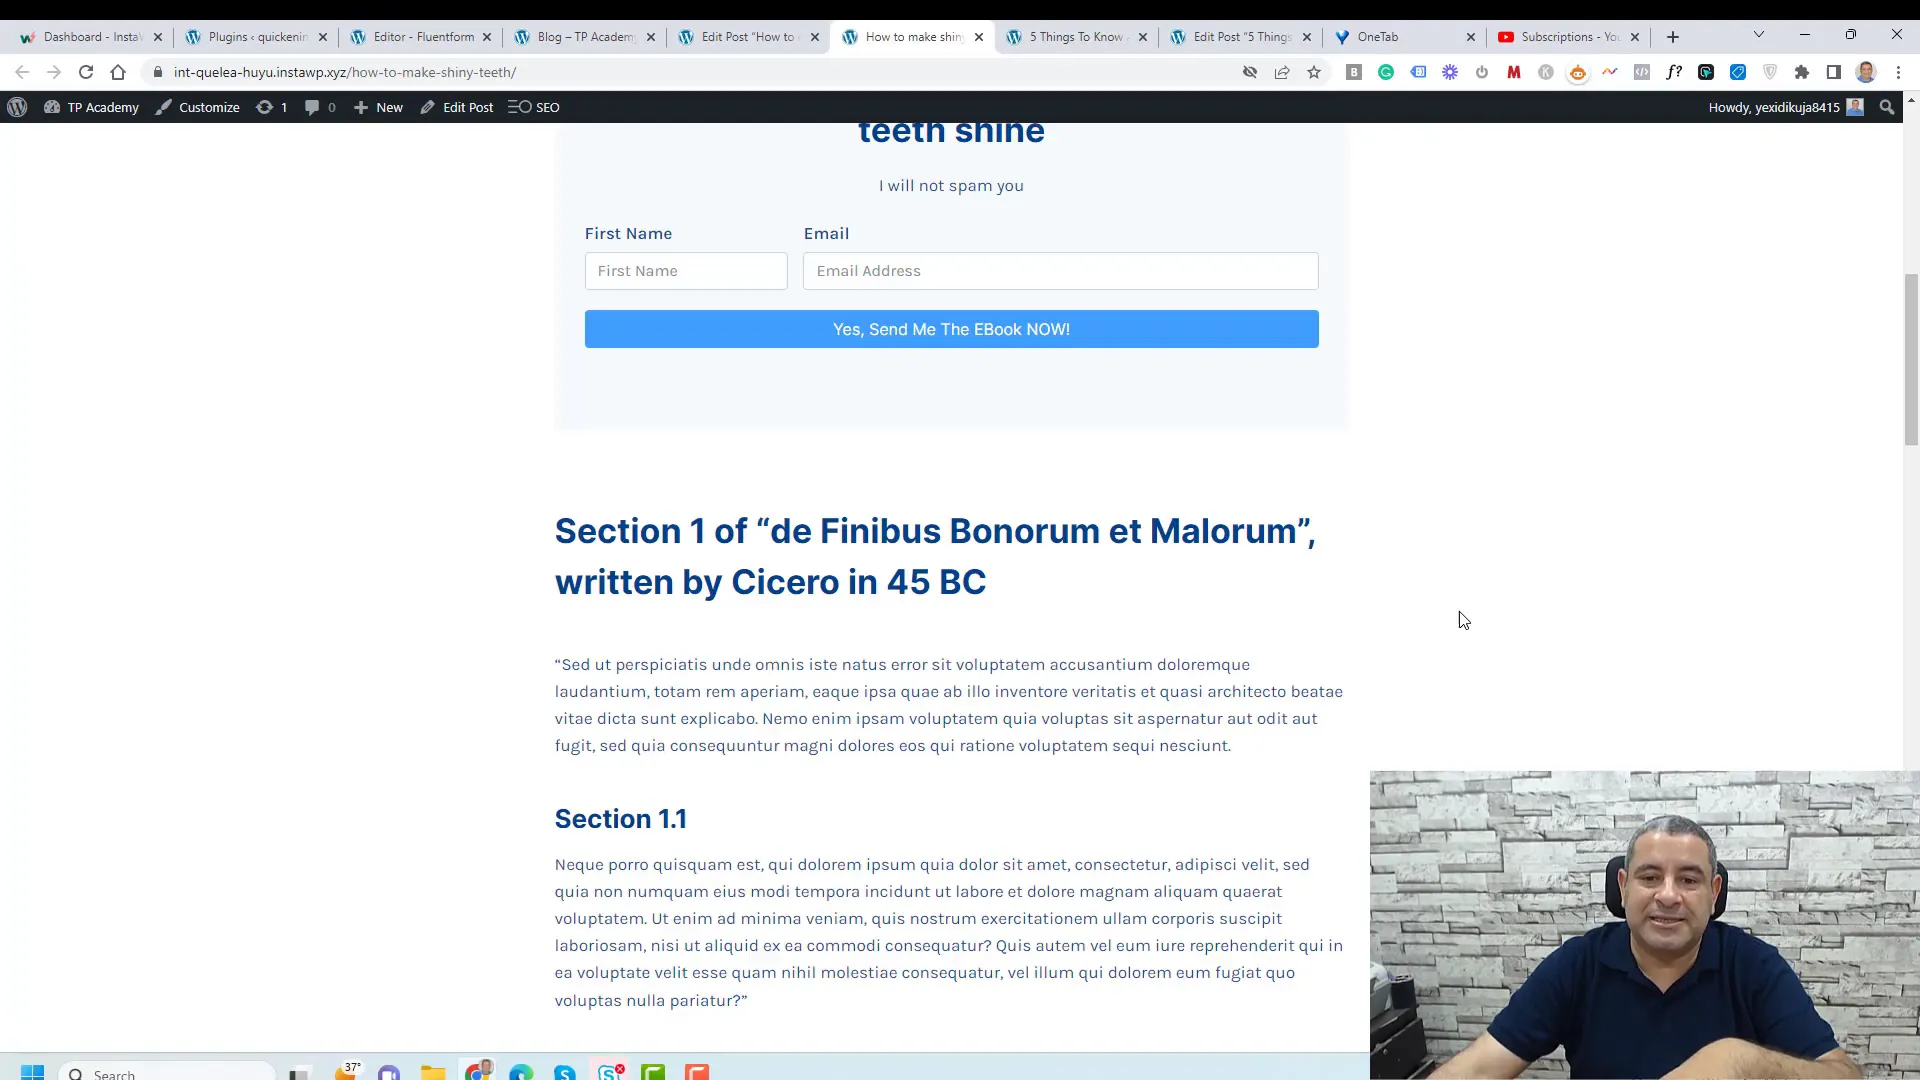
Don’t forget to preview your form to ensure it looks great on both desktop and mobile devices. A well-styled form can significantly increase conversion rates by making it inviting and easy to fill out.
Integrating with Email Marketing Platforms
Once your form is ready, it’s time to connect it with an email marketing platform. This integration allows you to automatically send collected email addresses to your preferred email service provider. Fluent Forms offers seamless integration with various platforms, including MailChimp and Fluent CRM.
To set up the integration, navigate to the settings of your form and find the ‘Integrations’ tab. Here, you can select your email marketing service and follow the prompts to connect your account. This will enable you to send automated emails to your subscribers, keeping them engaged with your content.
Connecting Fluent Forms with Fluent CRM
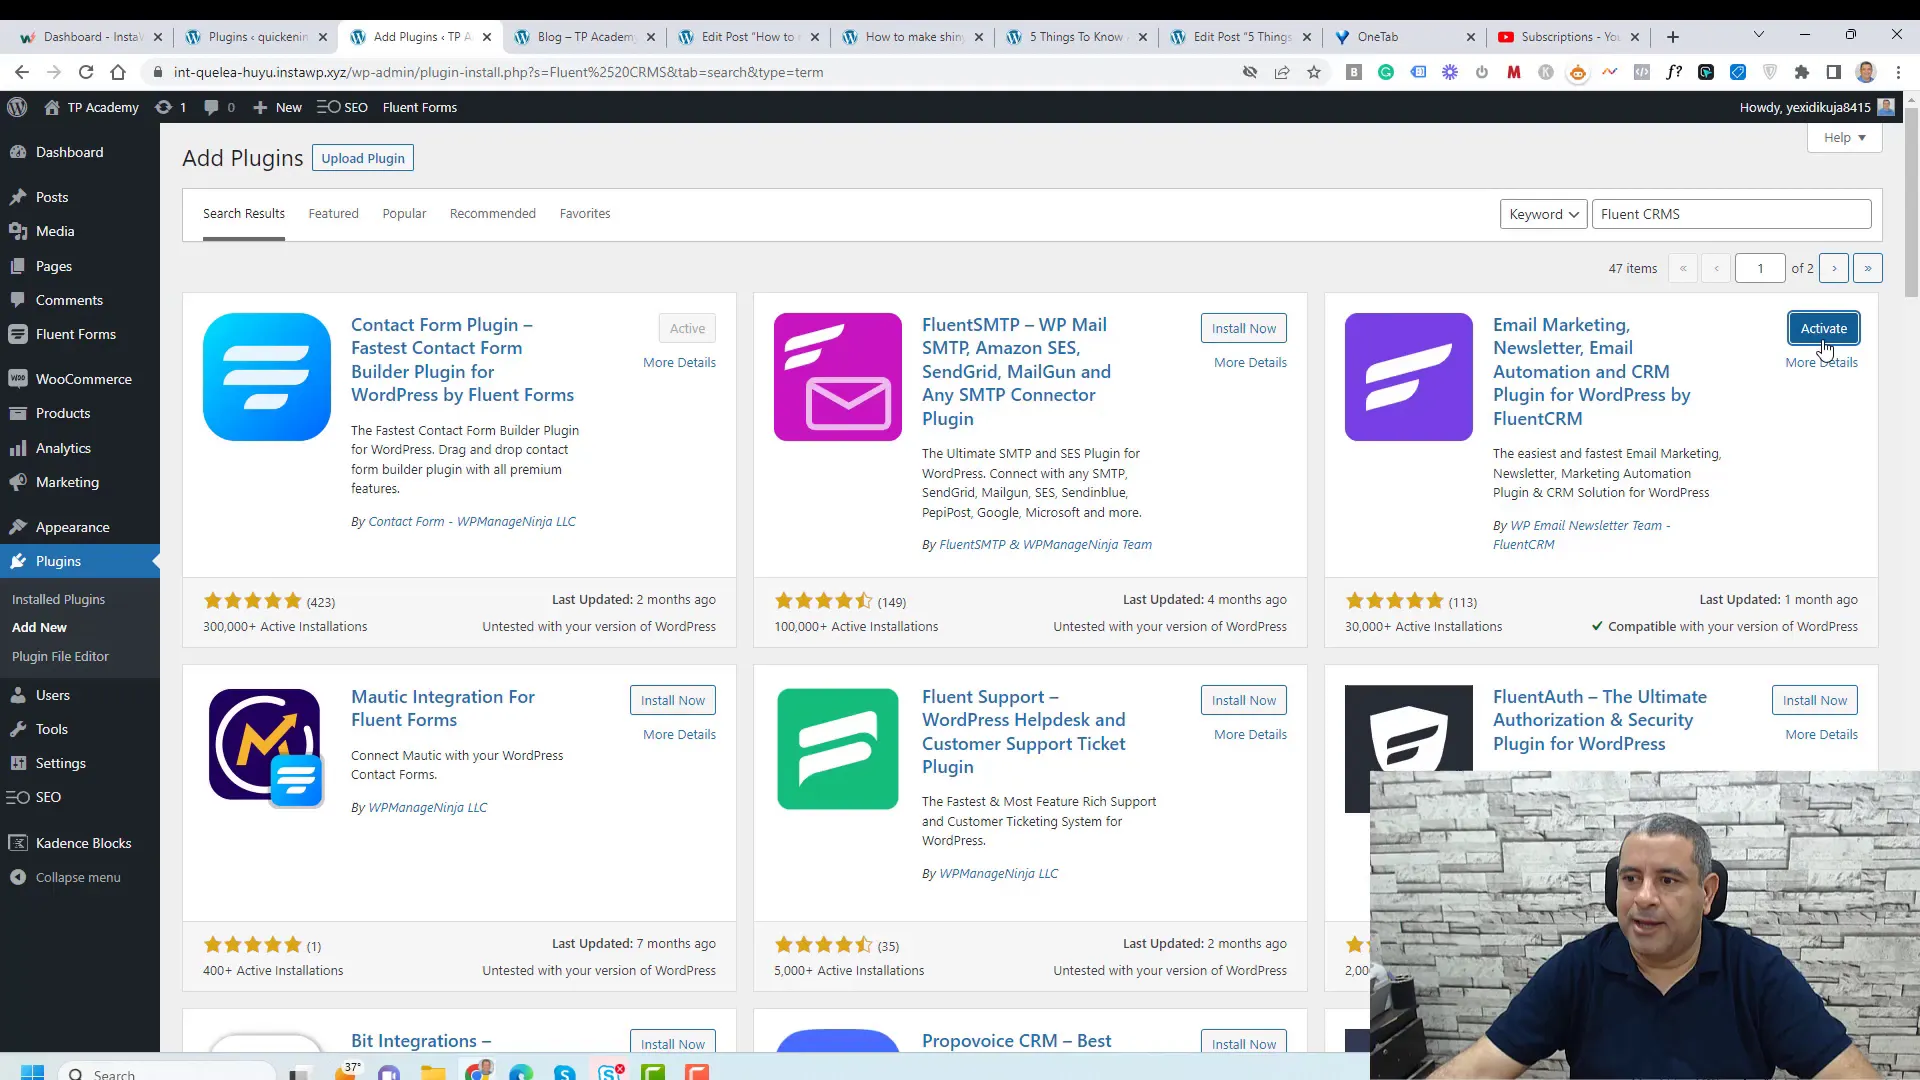
For those looking to manage their email campaigns directly from their WordPress site, connecting Fluent Forms with Fluent CRM is an excellent choice. Start by installing the Fluent CRM plugin from the WordPress plugin repository.
Once installed and activated, navigate to Fluent CRM’s dashboard to create a new contact list. This list will house all the email addresses captured from your forms. After creating your list, return to Fluent Forms, open your form settings, and add a new integration for Fluent CRM.
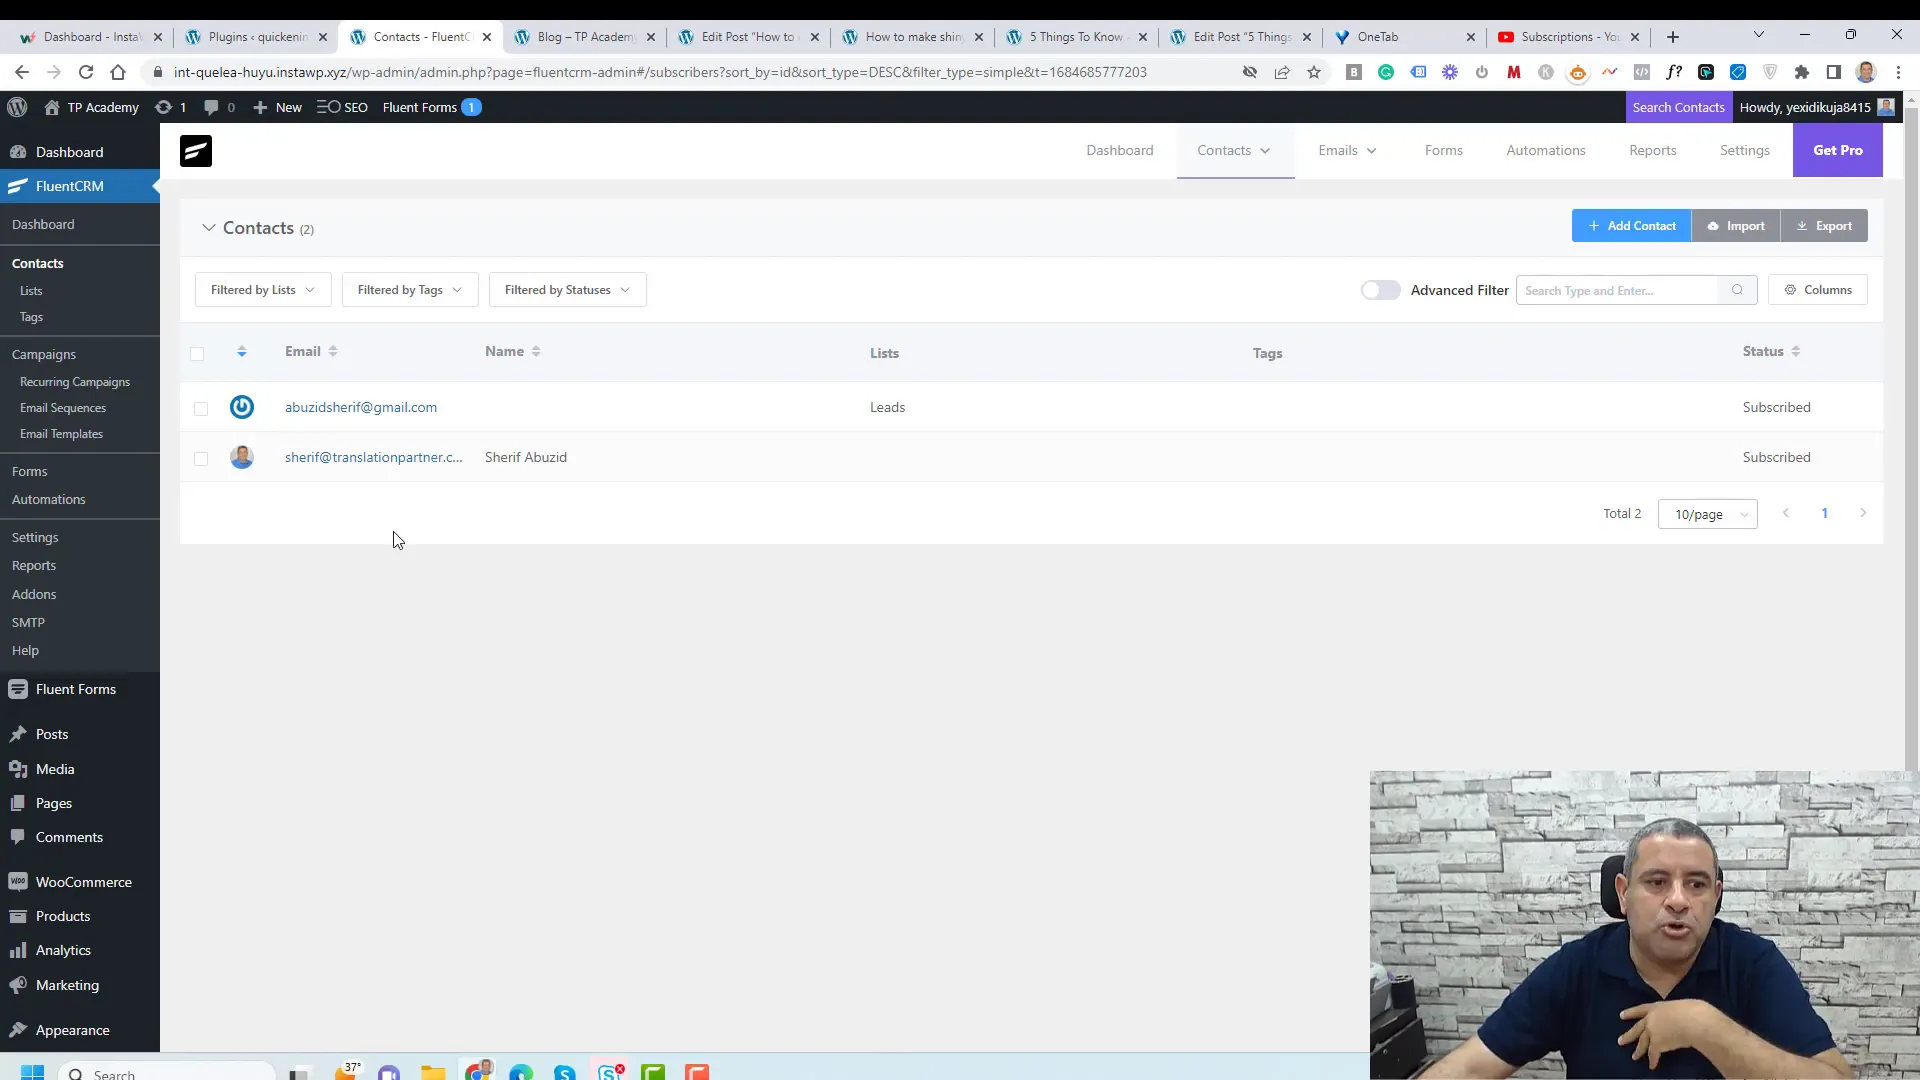
Assign the email field from your form to the corresponding field in Fluent CRM. This ensures that every time someone fills out your form, their information is automatically added to your contact list. With this integration, you can easily manage your email marketing efforts and send targeted campaigns to your subscribers.
Sending Weekly Emails to Subscribers
Once you have successfully captured email addresses from your WordPress website visitors, the next step is to keep them engaged. Sending weekly emails is a powerful way to maintain communication and provide value to your subscribers. With Fluent CRM, you can easily automate this process without incurring additional costs.
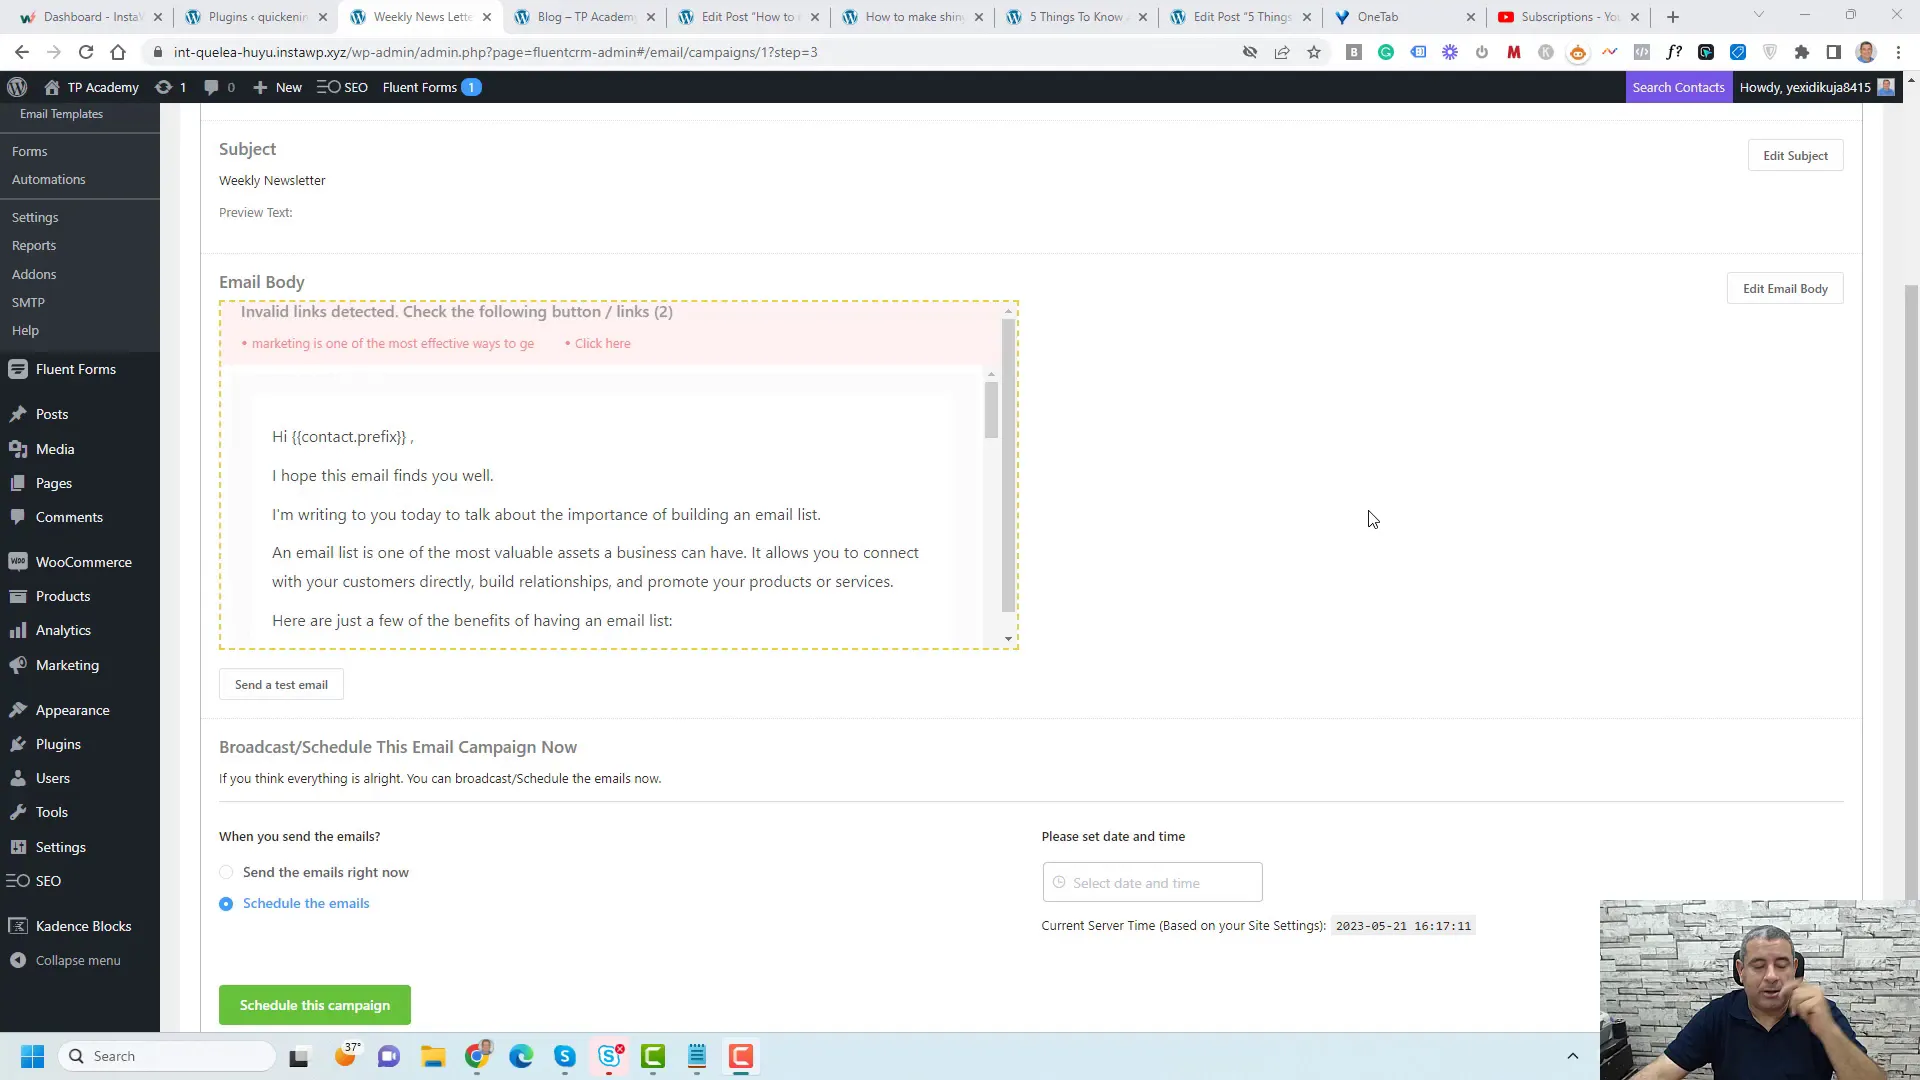
To begin, navigate to the Fluent CRM dashboard and select the ‘Campaigns’ section. Here, you can create a new campaign by clicking on ‘Create New Campaign.’ Choose a name that reflects the content of your email, making it easier for you to manage your campaigns later.
Next, compose your email. You can personalize it by including the subscriber’s name, using tags that automatically pull in their information. This personal touch significantly increases engagement rates. Once your email content is ready, you can either send it immediately or schedule it for a later date and time.
For optimal engagement, consider segmenting your audience based on their interests or behaviors. This allows you to tailor your content to specific groups, making your emails even more relevant and appealing.
Using Kadence Theme for Enhanced Functionality
The Kadence theme is a versatile and powerful tool for WordPress users, especially when it comes to maximizing the functionality of your opt-in forms. With Kadence, you can easily customize your website’s appearance and improve user experience, leading to higher conversion rates.
One of the standout features of the Kadence Pro version is the ability to create reusable elements. This means you can design an opt-in form once and use it across multiple pages and posts without having to recreate it each time.
To get started with Kadence, install the theme from the WordPress repository. Once activated, explore the various customization options available in the theme settings. You can adjust colors, fonts, layouts, and more to match your branding.
Pricing and Value of Kadence Pro
Investing in the Kadence Pro version provides access to premium features that can significantly enhance your website’s performance and appearance. Priced at $59, it’s an affordable option for those looking to improve their WordPress sites.
- Premium Templates: Gain access to a library of professionally designed templates that can save you time and effort.
- Advanced Integrations: Connect seamlessly with various plugins, including Fluent Forms and Fluent CRM, to optimize your email capture process.
- Custom Elements: Create and manage reusable elements across your website, ensuring consistency and saving time on future posts.
The value you receive from Kadence Pro far outweighs the initial cost, especially for those serious about growing their email list and enhancing user engagement.
Final Thoughts on Capturing Emails
In today’s digital world, capturing email addresses from your WordPress website visitors is essential for building a successful online presence. By implementing tools like Fluent Forms and Fluent CRM, coupled with the Kadencetheme, you can streamline your email capture process and maintain consistent communication with your audience.
Remember to keep your forms simple and visually appealing to encourage sign-ups. Regularly engaging with your subscribers through well-crafted emails will help nurture relationships and drive conversions. The combination of these strategies can significantly impact your website’s growth and success.
FAQ


